Robot Arm Control PCB Guide: Motor Drive, Sensors and MCU Layout
The Nervous System of a Robotic Arm
Every robotic arm, from a six-axis factory robot to a collaborative cobot, depends on a robot arm control pcb that reads sensors, runs control algorithms, and drives motors thousands of times per second. This single board coordinates everything: encoder feedback arrives, the microcontroller computes the next joint command, and power electronics deliver the exact current each motor needs, all while the arm moves smoothly and stops safely the instant something goes wrong. Because precision, speed, and safety all live on this board, its design quality decides how well the robot performs and how long it lasts. This guide explains the architecture, components, layout rules, and costs behind a robot arm control pcb.
What the Control Board Must Do
A robot arm control pcb is the central nervous system of the manipulator. Its microcontroller executes the real-time motion control loop that converts trajectory targets into joint positions, generates PWM signals for the motor drives, and parses feedback from encoders, force sensors, and limit switches. It also manages communication with the outside world through CAN, RS-485, EtherCAT, or Ethernet, and it runs the safety logic that stops the arm when a fault appears. Every one of these jobs places demands on the PCB: deterministic timing needs a solid processor with clean power, motor control needs high-current drive stages, and safety needs redundant, well-isolated monitoring paths.
Key Components on the Board
Modern control boards center on a capable MCU such as an STM32, ARM Cortex-M, or higher-performance SoC, which runs the kinematics, dynamics, and servo loops. Around it sit the motor driver stages: H-bridges for DC motors, field-oriented control for BLDC motors, and dedicated servo drive modules where precision matters most. Sensor interfaces are equally important, with encoder channels for joint angle and position, torque and force feedback inputs, limit-switch monitoring, and IMU inputs for dynamic sensing. A robust power management section converts the main supply into clean rails with DC-DC converters and low-noise LDOs, protected by overcurrent, overvoltage, and reverse-polarity circuits that keep a motor fault from destroying the logic.
Layout Discipline for Reliable Motion
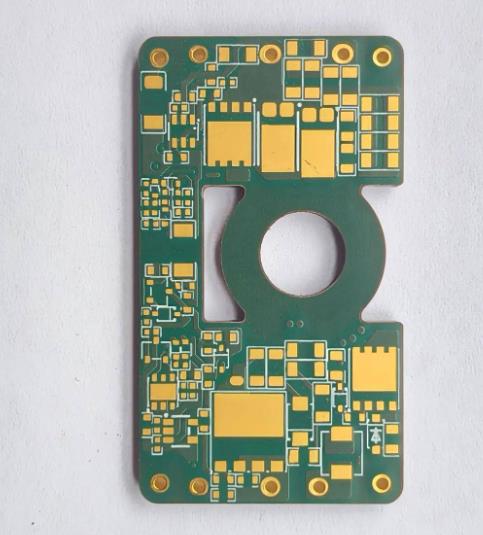
Motor currents are large and switching is fast, which makes layout the difference between a board that works and one that twitches. A robot arm control pcb is usually built on 4 to 8 layers so that power, ground, and signal planes can be separated cleanly. The board is partitioned into power, analog, and logic zones: motor drive stages sit away from sensitive encoder and sensor traces, high-current loops are kept short and wide, and the MCU area gets a dedicated, well-decoupled supply. Encoder and analog feedback lines are routed differentially where possible, shielded from PWM edges, and filtered at the connector. Thermal management matters too, because motor drivers and power stages generate heat that must spread through thermal vias and copper pours to the board edges or heatsinks.
Signal Processing and Feedback Accuracy
Robot accuracy begins with clean feedback. Encoder signals at high counts per revolution arrive as fast quadrature edges that must be decoded without noise, so the PCB provides matched-length routing, termination, and transient protection on every encoder channel. Force and torque sensors produce small analog signals that need precision amplification and filtering before conversion, with careful grounding that keeps motor currents out of the measurement path. Many modern arms close their loops at several kilohertz, which means the MCU must see consistent, low-jitter feedback while PWM output continues uninterrupted. That combination of analog precision and digital determinism is the hardest part of robot control board design, and it rewards experience with motion-control electronics.
Safety, Protection and Redundancy
Collaborative and industrial robots must fail safe. The control pcb implements watchdogs that monitor the processor and drive stages, current sensing that triggers limits before damage, and brake or emergency-stop paths that remove drive power within milliseconds. Isolation separates the logic side from high-voltage motor power, and galvanic isolation on communication interfaces prevents ground loops between the arm and its controller. In higher-safety-class designs, redundant monitoring channels compare measurements independently so a single component failure cannot cause an unsafe motion. These features add cost but are what let a robot work next to people, which is why safety-critical arms use boards built and tested to stricter standards.
Manufacturing and Testing Considerations
Control boards mix fine-pitch MCU packages, large MOSFET and driver footprints, and heavy copper pours, so the assembly process must handle both extremes. Solder paste thickness and reflow profiles need to satisfy fine-pitch logic and power devices on the same board, and X-ray inspection verifies hidden joints under BGAs and thermal pads. Testing goes beyond continuity: functional test exercises each motor channel with real PWM, verifies encoder decoding, checks analog channels against references, and confirms that safety paths disable the drive as designed. Thermal and vibration testing catches the weak joints that shake loose in a moving arm. A partner with experience in PCB assembly for motion and power products will know how to keep these boards consistent.
Cost Drivers and Realistic Pricing
A robot arm control pcb typically costs USD 25-150 per board depending on layer count, material, and complexity. Simple single-axis hobby boards fall at the low end, while multi-axis industrial control boards with high-layer stacks, isolation, and safety-rated design approach the top. Assembly adds the BOM, where MCUs, driver ICs, and power components dominate; a complete control PCBA for a medium industrial arm commonly ranges from USD 80-400 at small batch volumes. Prototype and engineering charges are separate, and certification testing for safety-rated controls is budgeted independently. Comparing quotes should include test coverage and traceability, because the cheapest board is expensive if it fails on the factory floor.
Choosing a Robot Arm Control PCB Manufacturer
Look for a manufacturer that understands mixed power-and-signal electronics rather than only high-volume consumer boards. Ask about their experience with motor-drive layouts, heavy copper, isolation, and functional testing of motion products, and review their handling of the fine-pitch and high-current components that define these boards. A supplier combining PCB manufacturing, assembly, and PCBA testing, with DFM feedback on your layout, will help you reach a reliable design faster. Working with a specialist in Industrial PCBA gives you a partner who already knows how the arm will be used.
Robot Arm Control PCB FAQ
Q1: How many layers do robot control boards need? Most use 4-8 layers; complex multi-axis controllers with dense logic and isolated power stages may need more.
Q2: Which MCU is typical? STM32 and ARM Cortex-M family MCUs are common, with higher-performance SoCs where advanced kinematics or vision integration is required.
Q3: Why do motor drivers and logic need separate zones? High-current switching noise corrupts sensitive feedback and control signals unless power and analog areas are partitioned and grounded carefully.
Q4: What should a control board cost? Boards commonly run USD 25-150, and complete control PCBAs for industrial arms range from USD 80-400 at small volumes before connectors and certification.
Conclusion
The robot arm control pcb decides how precisely a robot moves, how fast it responds, and how safely it stops. By balancing MCU architecture, motor drive capability, analog feedback quality, and safety isolation on one disciplined layout, teams build arms that perform reliably for years. Pair that design with a manufacturing partner experienced in power and motion electronics, and your robot will run smooth from the first prototype to full production.