How to Clean a PCB: Dust, Flux and Corrosion Methods
Learning how to clean a PCB is important because contamination can reduce reliability even when a circuit board was designed and assembled correctly. Dust, flux residue, fingerprints, moisture, and corrosion can cause leakage current, electrochemical migration, short circuits, or intermittent failures. As components become smaller, the risk from contamination increases. Proper cleaning removes foreign material without damaging components, solder joints, coatings, or the PCB laminate.
This guide explains safe PCB cleaning methods for dust, flux, and corrosion, and the precautions you should take before starting.
Contamination can also hide soldering defects during inspection. A dirty board may be difficult for AOI or visual review to interpret correctly, so cleaning improves both function and quality control.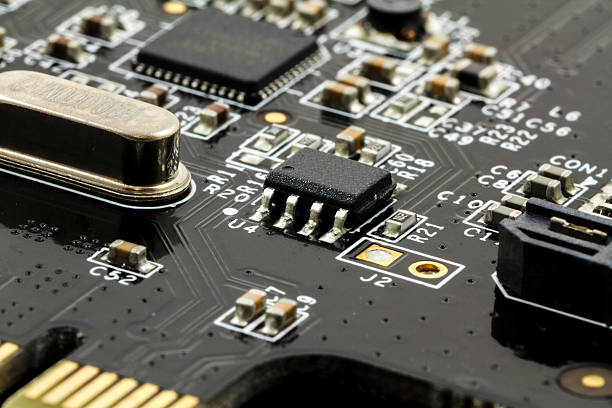
Why a Clean PCB Matters
Dust is not a simple dry material. It can contain salts, minerals, organic matter, and small amounts of water. In humid conditions, dust can absorb moisture and create conductive paths across the board.
Flux residue can also attract moisture or react with the surface over time. Some residues are conductive and can cause unintended leakage between closely spaced traces.
Corrosion can increase resistance, break thin traces, or damage component leads. Cleaning is therefore part of reliability, not only appearance.
Wear appropriate personal protection when using solvents. Some cleaning chemicals produce fumes that should be handled in a ventilated area with gloves and eye protection.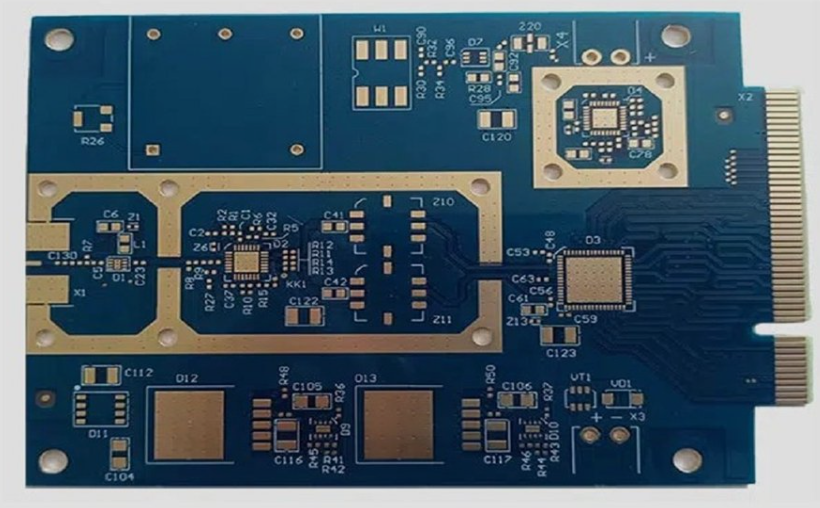
Safety Precautions Before Cleaning
Always disconnect power before cleaning a PCB. Cleaning a live circuit can cause short circuits, component damage, or electric shock.
Work in a dry, clean area and use ESD-safe tools and grounding when handling sensitive components. Static discharge can destroy ICs without visible damage.
If the board contains batteries, remove them before cleaning. Keep cleaning liquids away from connectors, switches, and other openings.
For prototype boards and repair work, a small air blower or camera lens blower can be safer than a high-pressure compressor. High pressure can damage small components or force dust under shields.
Removing Dust from a PCB
Compressed air is often the best method for removing loose dust. Use short bursts and avoid blowing material further under components. Hold the nozzle at a safe distance and use a low pressure setting when possible.
A clean, soft brush or anti-static brush can loosen dust before using air. Brushes should not be reused after contact with oil, flux, or other contaminants.
For sensitive areas, use a vacuum with an ESD-safe nozzle instead of blowing dust into connectors.
Alcohol should be at least 90 percent pure for better solvent action. Diluted alcohol contains more water and may leave moisture on the board.
After scrubbing with alcohol, let the board dry completely before applying power. Alcohol can carry dissolved flux into tight areas, so a final rinse with fresh alcohol and clean air is often beneficial.
Cleaning Flux from a PCB
Flux residue after soldering should be removed when the solder type requires it. Isopropyl alcohol, often called rubbing alcohol, is a common solvent for rosin-based flux.
Moisten a brush with alcohol and gently scrub the affected joints. The alcohol dissolves the residue, and the brush helps lift it from the surface. Do not use so much liquid that it flows under components.
No-clean flux is more difficult to remove with ordinary alcohol. It may require a stronger cleaning solvent or an ultrasonic process designed for electronic assemblies.
Cleaning solution selection is important for ultrasonic processes. Some solvents are too aggressive for plastic components, labels, or coatings, so the board manufacturer should approve the chemistry.
Ultrasonic Cleaning for Assembled Boards
Ultrasonic cleaning can reach spaces that brushes cannot access. The board is placed in a cleaning solution and high-frequency sound waves remove residue from under components.
Ultrasonic cleaning must be used carefully because some components, crystals, and sensors can be damaged by vibration. The process should be qualified for the board type.
After ultrasonic cleaning, the board must be rinsed and dried completely. Moisture left under components can create more problems than the original contamination.
After removing corrosion, the affected area should be tested for continuity. If a trace has become open, the board may need a jumper or trace repair rather than simple cleaning.
Cleaning Corrosion from a PCB
Corrosion caused by battery leakage or environmental moisture can be cleaned with a mild abrasive. A paste made from baking soda and distilled water can neutralize acid and remove light corrosion.
Use a soft brush to apply the paste gently to the affected area. Rinse with distilled water, then dry the board thoroughly.
Heavy corrosion may have already damaged traces or component pads. After cleaning, inspect the board with magnification and test it carefully before returning it to service.
The rinse water temperature should be controlled. Warm water can help dissolve residue, but water that is too hot may stress components or warp the board. Rinse gently to avoid spreading contamination.
Using Distilled Water and Rinsing
Tap water contains minerals that can leave residue on the board. Distilled or deionized water should be used for rinsing after cleaning with solvents or pastes.
The rinse removes cleaning agents and loose contamination from the surface. Keep the amount of water small and avoid soaking components that are not designed for wet cleaning.
Drying is as important as cleaning. Use low heat, compressed air, or a drying cabinet to remove moisture from under components.
Connector pins can be cleaned with a cotton swab and contact cleaner, but the swab should not leave fibers behind. Compressed air can then remove any loosened debris.
Cleaning around Connectors and Switches
Connectors and switches should be protected from cleaning solvents that can dissolve lubricants or leave residue on contacts. Mask them before cleaning or use a method that does not affect them.
If a connector is contaminated, use a contact cleaner designed for electronic connectors instead of a general-purpose solvent.
After cleaning, confirm that the connector seats correctly and that no liquid remains in the housing.
If coating is removed during repair, a professional conformal coating process should be used to restore protection after cleaning.
Cleaning Coated and Sealed Boards
Boards with conformal coating should not be cleaned in a way that removes or damages the coating. If flux residue remains under the coating, the board should be cleaned before coating is applied.
Repair work on coated boards may require local coating removal, cleaning, rework, and re-application of coating.
If the board is sealed in a module, cleaning may not be possible. The module should be evaluated separately.
Before replacing a board, compare the cost of repair with the cost of replacement and the risk of future failure. For expensive or unavailable boards, careful repair may still be worthwhile.
After cleaning, the board should be visually checked for lifted pads, damaged components, and remaining residue. If the board is clean but still fails, the problem may be an internal component.
When to Replace a Board
Cleaning does not always repair a damaged PCB. If corrosion has destroyed a trace, the pad has lifted, or the board shows a burn mark, replacement may be safer than repair.
After cleaning, test the board under normal operating conditions. If the fault remains, the problem may be inside a component rather than on the surface.
For high-reliability products, replace a board when there is doubt about its long-term performance. If the board is part of a production run, ask whether controlled PCB manufacturing and SMT PCB assembly can provide a cleaner replacement.
Document the cleaning method and result for repaired boards. This helps the team understand whether a future failure was caused by contamination, cleaning, or another process.
Keep the work area free of food, oils, and static-generating materials. A clean bench reduces the chance that the board becomes contaminated again while it is being cleaned.
Best Practices for PCB Cleaning
Start with the least aggressive method. Use air and a brush before solvents, and use mild cleaning solutions before stronger chemicals.
Check the board manufacturer’s recommendations for materials, coatings, and component compatibility. A solvent that works on one board may damage another.
After cleaning, inspect under magnification and test the board before it is used again.
Cleaning should also be followed by PCBA testing to confirm that the board still works after the process. A visual inspection alone cannot prove that moisture or residue has not affected the circuit.
Regular cleaning can prevent many intermittent failures caused by dust, flux, and corrosion. The correct method depends on the board construction and the type of contamination.
For prototype or production boards that need cleaning after soldering, the safest approach is to work with a partner that can control the solvent, drying, and test process.
If you are not sure which cleaning method is safe, test it on a scrap board first. This prevents accidental damage to the product being repaired.
Conclusion
How to clean a PCB depends on the type of contamination. Compressed air and brushes remove dust, alcohol removes flux, and baking soda paste can address light corrosion.
Safe cleaning requires power-off conditions, ESD protection, compatible solvents, proper drying, and careful testing after the work is complete.