
DXF for PCB Manufacturing: What to Send and Why
What a DXF File Is
DXF stands for Drawing Exchange Format, an open CAD format originally published so that different drafting programs could exchange geometry. It describes two dimensional shapes with lines, arcs, circles, polylines and text, and it carries no electrical meaning at all. That is precisely why it is useful in board work: the outline of a board, the position of a slot, the profile of a cutout and the path a milling tool has to follow are mechanical facts, and they are easier to express as geometry than as a set of coordinates in a manufacturing note.
What a DXF Carries That a Gerber File Does Not
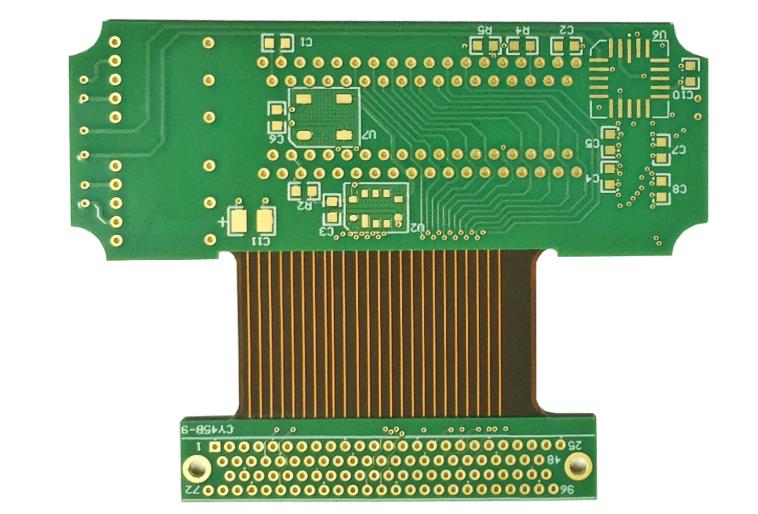
A Gerber file describes the copper, the solder mask, the legend and the drilled holes as they are drawn on the board, and it is the definitive data for the electrical and visible features. What it expresses poorly is intent. A routed profile is a series of arcs in one file; a slot is a drawn shape; the difference between a cutout the tool must remove and a line the designer drew to show a dimension is invisible once the data is flattened. The DXF brings that intent back. It carries the board outline with its corner radii, the internal cutouts and slots, the milling paths for shaped boards, the mounting and tooling hole positions, the bend lines on a rigid flex design and the mechanical keepouts where the enclosure or a connector has to fit.
Why Fabricators Ask for It
Approval is the first reason. A CAM engineer who can overlay the DXF outline on the Gerber data can see immediately whether the copper is inside the board and whether a component body will collide with a cutout, and that check catches errors before the panel is tooled. Machining is the second: shaped boards, countersunk holes and internal cutouts are produced by a router or a laser from the outline data, and an ambiguous profile becomes a scrap panel or a phone call. Assembly is the third, because the DXF documents the mechanical envelope that the pick and place fixtures, the depanelisation tooling and the enclosure have to respect. A project that sends only Gerber data spends the saved effort later in engineering questions.
What the DXF Should Contain
The board outline as a single closed contour, with the corner radii drawn as arcs rather than approximated by short straight segments. Internal cutouts and slots as closed contours on a clearly named layer. The milling path where the routed edge must leave a particular profile, including any tab or breakaway positions. Mounting and tooling holes as circles at their true centres, with the finished diameter noted separately from the drill size where a tolerance matters. Bend lines and stiffener boundaries for rigid flex and flex designs. Mechanical keepouts for connectors, sockets, batteries and shield cans. Critical dimensions as text on their own layer, so that they can be read by a person and ignored by the CAM system rather than being mistaken for geometry. If the design has a controlled profile or a press fit, the tolerance belongs in the drawing as well, because a DXF describes shape and not allowable variation.
DXF Compared With Gerber and Drill Data
The three formats answer different questions and a complete fabrication package includes all of them. Gerber answers what the copper, mask, legend and finish layers look like. The drill file answers where the holes are and how large the tools are. The DXF answers what the physical board looks like as a mechanical part: outline, cutouts, profile and the intent behind them. Where a board is a plain rectangle the outline in the Gerber package is usually enough and the DXF adds convenience rather than necessity. Where the board is shaped, has internal openings, is part of a rigid flex stack or has to fit a mechanical assembly to a tolerance, the DXF is the document that prevents a misunderstanding.
Export Settings That Avoid Trouble
Export at one to one scale and state the units, because an unlabelled drawing that is interpreted in the wrong unit is wrong by a factor of twenty five. Convert splines and ellipses to arcs and lines, since many CAM systems read splines poorly or drop them. Close every contour that represents a cut, and remove duplicate and zero length entities, which confuse contour detection and can generate a second tool path on top of the first. Use the drawing origin deliberately, ideally the board’s own origin, rather than leaving it wherever the designer happened to click. Name the layers for what they contain, and keep text, dimensions and construction lines off the geometry layers. Save to a broadly compatible version of the format rather than the newest one your tool offers, and check the export by reopening it, measuring a known dimension and confirming that the number matches the design.
Common Errors and Their Consequences
A scale mismatch produces a board that is the wrong size, which is usually caught at the quotation stage but occasionally is not. An open contour means the router cannot determine a closed profile and may cut the wrong path or leave the board connected to the panel. Spline geometry can be ignored silently, leaving a cutout unmanufactured. Duplicate entities generate a double tool path that wears the cutter and changes the finished dimension. Mounting holes drawn as a single circle without a diameter note leave the fabricator to guess between the drill size and the finished size once plating is applied. Dimension lines and text left on the geometry layer may be interpreted as cuts. None of these is expensive to fix in the CAD file and all of them are expensive to discover in the shop, which is the argument for checking the export rather than assuming it.
What to Ask a Fabricator to Confirm
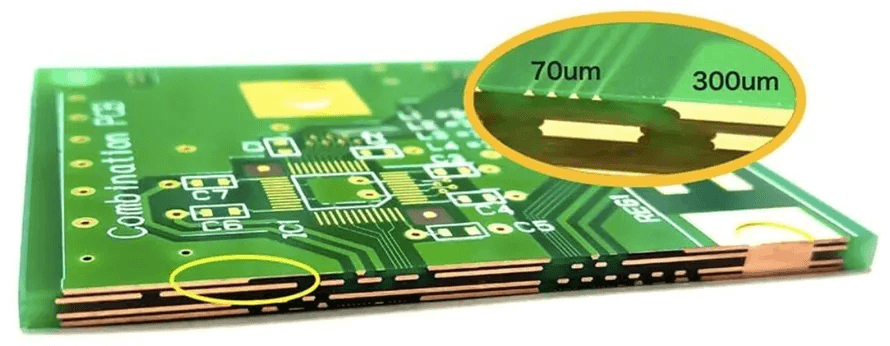
Ask which DXF version and which units they prefer, and whether they want the outline on one layer only. Ask whether the profile is routed, laser cut or punched, because that choice sets the achievable corner radius and the tolerance on the edge. Ask how the finished hole size is to be specified for plated and non plated holes, since the two behave differently after plating. Ask whether internal cutouts narrower than the routing tool can be handled and, if not, what the minimum practical width is. Confirm the tolerance on the outline and on any press fit feature, and confirm whether a first article will be measured against the drawing. Those five answers remove most of the ambiguity from a shaped board order.
How the Package Affects Cost and Lead Time
A clean, complete data package does not add cost; it removes it. Engineering review, contour repair and clarification calls are all labour, and on a shaped or rigid flex board they can consume more time than the fabrication steps they precede. A profile that cannot be routed with the available tooling may force a design change or a hand operation, and a missing tolerance may mean the first lot is scrapped. Supplying the outline, the cutouts, the tooling holes and the tolerances in one coherent DXF, alongside a Gerber set that agrees with it, is the cheapest insurance available on a mechanical part that has to fit something else.
FAQ
Is a DXF required for every PCB order? No. A rectangular board with simple holes can usually be built from the Gerber and drill data alone. A DXF becomes valuable as soon as the outline is non rectangular, cutouts are present or the board has to fit a mechanical assembly.
Can I send a DWG instead of a DXF? Some fabricators accept DWG, but DXF is the more portable exchange format and is generally preferred, particularly when the receiving system is not from the same vendor as the source.
Should dimensions be included in the DXF? Yes, but on a separate layer from the geometry, so the fabricator can read the intent without the CAM system treating the dimension lines as cuts.
What units should the DXF use? Either millimetres or inches, as long as the unit is stated in the file or in the accompanying note. An unlabelled file is the most common cause of a scale error.
Does the DXF replace the drill file? No. The drill file defines the hole sizes and positions for the drilling program; the DXF describes the mechanical shape of the part. Both are needed on a board with a formed profile.
Conclusion
A DXF is the document that tells a fabricator what the board is as a physical part, rather than what it is electrically. Export it at one to one scale with declared units, close every contour, keep text and dimensions on their own layer, and include the cutouts, tooling holes and bend lines that the routing and assembly stages depend on. Then check that it agrees with the Gerber package before sending it, because a profile that disagrees with the copper is worse than no profile at all. The mechanical features that a supplier can produce are described in PCB capabilities, the layout conventions that keep the outline and the copper consistent are covered in PCB design and layout, and the routing and profiling steps that follow are explained in PCB manufacturing. A prototype PCB assembly build confirms that the board actually fits its enclosure before volume production in 2026.