Power Supply PCB Cost in 2026: What Really Drives the Price
Why Power Boards Cost More Than Digital Boards
A power supply board can be small, simple in layer count and still cost several times what a dense digital board of the same area costs, because the price of a power board is set by copper, isolation and heat rather than by routing density. Two ounces of copper instead of one doubles the etching and plating difficulty. A creepage requirement for mains isolation forces clearance that wastes board area and limits the components that can be placed near the barrier. A thermal requirement for a hot component can push the design onto a metal core laminate or onto a heavier copper weight. Understanding which of those constraints is actually binding is the difference between a competitive quotation and an over specified one.
Copper Weight Is the Biggest Single Lever
Copper weight sets both the current capability and much of the manufacturing cost. Half an ounce and one ounce are routine and priced accordingly. Two ounces require a modified etch process and start to affect the minimum line width. Three and four ounces force a different imaging and etching approach, reduce the achievable feature size further, and are usually quoted with a minimum line width and spacing that may be two or three times the standard figure. Beyond that, heavy copper builds are a specialist process with longer lead times. The design decision is not simply how much current flows, but whether the current is continuous or short, whether it can be spread over several layers and whether the copper is really required everywhere or only in the high current path. Local heavy copper on a mostly standard stack is often cheaper than a heavy copper layer throughout.
Isolation, Creepage and Clearance
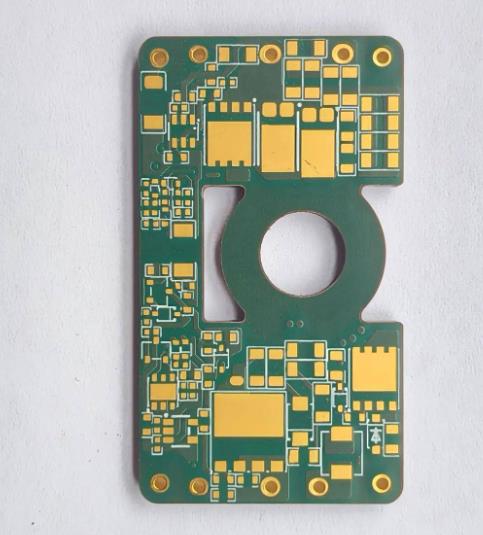
Any board that touches mains voltage has to hold a defined creepage distance along the surface and a clearance through air, and both values grow with the working voltage, the pollution degree and the required insulation class. The practical consequences are large: a slot milled through the board under an optocoupler, a wider gap between primary and secondary copper, isolation barriers that consume real area, and sometimes a requirement to remove copper entirely from the barrier zone. On a small adapter board this can eliminate a third of the usable area, which is why the isolation requirement, not the circuit itself, sometimes sets the board size and therefore the price. Deciding the insulation class early and placing the barrier in the layout before the rest of the circuit avoids a redesign that costs far more than the board.
Thermal Design and Its Cost
Heat is the third driver. A board that carries a few watts can usually spread it in copper and pass it to the enclosure. A board that carries tens of watts needs thermal vias, heavier copper, a metal core substrate or direct bonding to a heatsink, and each of those adds an operation. A metal core laminate costs more than FR-4 and needs its own drilling and profiling process. Thermal vias add drilling and plating steps. Heavy copper in a thermal spreading layer is paid for twice, once in the copper and once in the etching. The cheapest thermal solution is usually a better layout: placing the hot components where the copper is widest, spreading heat into the plane rather than into a narrow trace, and arranging the airflow path before the component placement is frozen.

Materials, Layer Count and the Rest
Standard high glass transition FR-4 is adequate for most power boards under about 130 degrees Celsius. Higher temperature operation, higher isolation requirements or a need for better thermal performance pushes towards polyimide, metal core or ceramic substrates, each with its own price step. Layer count matters less on a power board than on a digital one, because the current path and the isolation barrier usually dominate; a four layer board with two heavy outer layers and two standard inner layers is a common and efficient compromise. Surface finish is a smaller factor, but thick gold or a finish that withstands multiple reflow cycles on a heavy copper surface does add cost. Finally, the panel utilisation of a small, awkwardly shaped power board can be poor, and that shows up in the price per piece.
Prototype and Production Price Ranges
On prototype quantities, a simple two layer board at standard copper typically lands somewhere between about 30 and 150 dollars per batch, depending on size and finish. A four layer board with two ounce outer layers and a controlled impedance or isolation requirement usually falls between roughly 150 and 500 dollars. A heavy copper build at three or four ounces, or a metal core board, commonly starts around 300 dollars and can exceed 1500 dollars for a small batch, because the process is closer to a speciality than a standard one. In production, an ordinary power board runs from about 3 to 20 dollars per piece, while a heavy copper or metal core assembly runs from roughly 15 to more than 80 dollars per piece. These ranges move with quantity, panel utilisation and the number of extra operations, which is why the same outline can be quoted at very different prices by two suppliers with different capability.
Where the Cost Can Be Reduced
Confirm the isolation class that the standard actually requires, rather than designing to the worst case for the product category. Keep heavy copper where the current is, not on the whole layer, since a mixed stack is cheaper than a uniformly heavy one. Review whether the thermal problem can be solved with copper area and airflow instead of a metal core substrate. Use the largest minimal line width the circuit allows, because every step below the standard figure raises the price. Panelise to improve utilisation, especially for small or irregular outlines. Finally, agree the copper weight and the finish in writing before the quotation, because those two numbers alone can move the price by a factor of two.
FAQ
What copper weight should a power board use? One ounce is the default for low current sections, two ounces for moderate current and thermal spreading, and three to four ounces or a metal core for high current. Use heavy copper only where the current flows.
How much does a metal core PCB add to the price? A metal core substrate typically costs two to four times an equivalent FR-4 board, and it needs separate drilling, profiling and thermal handling in assembly.
Why does creepage increase the cost? The clearance requirement consumes board area, forces isolation slots and restricts component placement, so a board that must hold a large creepage distance is physically larger than the circuit alone would need.
Is a four layer power board worth it? Often yes. Two heavy outer layers carry the current and two standard inner layers provide the ground plane, which is cheaper than making every layer heavy.
Where is the biggest cost saving available? Panel utilisation and copper specification. Agreeing a realistic copper weight and panelising the outline properly usually saves more than changing the surface finish or the laminate.
Conclusion
Power board pricing follows copper, isolation and heat, in that order. Decide the current path, confirm the insulation class the standard actually demands, and solve the thermal problem with layout before reaching for a metal core substrate. Then agree the copper weight, the surface finish and the panelisation with the fabricator, because those three items move the number more than anything else on the drawing. The process limits for heavy copper and metal core work are listed in PCB capabilities, the isolation and thermal layout rules belong in PCB design and layout, and the plating and inspection sequence is described in PCB manufacturing. Running a prototype PCB assembly build with the real load confirms the thermal margin before volume in 2026.