Battery Charging Circuit Layout
Why the Layout Matters
A battery charger is a power converter with a current limit and a control loop, and its behaviour depends on the layout as much as on the component selection. The charging current is set by a sense resistor and its connection, the accuracy depends on the reference and the grounding, and the thermal behaviour depends on the copper’s area. A charger that works on a bench but behaves differently in the product is usually a layout problem rather than a component problem, and the layout is therefore part of the design rather than an implementation detail.
The Switching Loop
Where the charger is a switching design, the loop that carries the switched current has to be as small as possible. The loop is formed by the input capacitor, the high side switch, the low side switch and the return, and its area determines the parasitic inductance that produces the ringing and the radiated field. The input capacitor should be as close as possible to the switches, and the return path should be directly beneath the loop rather than routed around. A large loop produces ringing that stresses the switches, radiates noise and disturbs the current measurement, and it is the most common layout error in a switching design.
Current Sensing
The charging current is usually set by the voltage across a sense resistor, and the measurement is only as good as the connection to it. The sense resistor should be a four terminal device or should have its measurement taps taken from inside the current path, so that the resistance of the pads and the traces is not included in the measurement. The traces from the sense taps to the controller should be a differential pair, routed together and away from the switching node, because a single ended trace picks up the switching noise and changes the apparent current. The reference for the comparison should be clean, since a reference that moves with the load changes the charging current.
Thermal Design
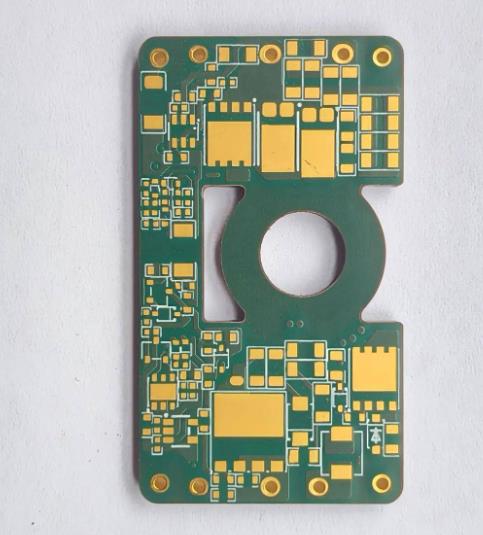
The charger dissipates power, in the pass element or the switch and in the sense resistor, and the dissipation is highest at the beginning of a charge when the current is at its maximum. The copper around the device is its heatsink, and its area and its connection to the ground plane determine the temperature rise. The device’s thermal pad should be connected to a copper area on the board and to the plane with the number of vias that the data sheet specifies, and the area should be sized from the expected dissipation rather than from the space that remains. Where the charger is in a sealed enclosure, the thermal design should account for the ambient rise inside it.
Grounding and the Measurement Reference
The charger’s accuracy depends on the ground reference, and the ground carries both the charging current and the measurement. The return current from the battery should not flow through the measurement reference, because the voltage drop across that path appears as an error in the current or the voltage reading. The standard approach is a star connection at the sense resistor’s ground, or a separate analogue ground that meets the power ground at a single point. The battery’s negative terminal, the sense resistor and the controller’s ground should be arranged so that the measurement sees the sense resistor’s voltage and not the trace’s.
Protection and Safety
The charger is a safety related circuit, and the protection is part of the design. Over voltage, over current, reverse polarity and over temperature protection are usually integrated, but their external components and their layout matter: a protection device that is far from the connector will not protect it. The battery connector should have the protection close to it, and the design should consider what happens when the battery is connected backwards, when the charger is disconnected during a charge and when a cell fails short. The thermal protection’s sensor should be placed where it measures the relevant temperature rather than the ambient.
Verification
The charger should be verified by measurement rather than by simulation. The charging current, the termination voltage, the temperature rise of the devices and the behaviour at the transitions between the charge phases are the parameters to measure, and they should be measured at the worst case conditions, including the lowest and the highest battery voltage and the highest ambient. The switching waveform should be examined for ringing, since the ringing indicates a loop that is too large, and the current measurement should be compared with the actual current, which is a direct check on the sense connection. Where a gauge is used to report the state of charge, its accuracy should be verified against the actual charge.
The Battery Connector and the Harness
The connector and the wiring to the battery are part of the charging path, and their resistance affects the accuracy and the heat. A connector with a contact resistance that varies with temperature adds an error to the measurement and a heat source at the worst place, since it is usually near the battery. The connector should be rated for the charging current with margin, and its mating cycles should match the product’s use. Where the battery is external, the harness’s length and its gauge affect the voltage drop, which the charger’s termination measurement may interpret as a change in the battery’s state rather than as a drop in the lead.
FAQ
Why does the switching loop matter? Its area sets the parasitic inductance, which produces ringing, radiated noise and disturbance of the current measurement.
How should the sense resistor be connected? With four terminal measurement taps or with the sense traces taken from inside the current path, routed as a pair.
What limits the charger’s accuracy? The reference and the grounding; a reference that moves with the load changes the charging current.
How is the charger’s heat managed? By the copper area around the device and its connection to the plane, sized for the worst case dissipation.
Why verify with a measurement? Because the layout’s parasitics are not in the simulation, and the sense connection is only proved by comparing the reading with the actual current.
Conclusion
A charger’s behaviour is set by its layout, so keep the loop small, connect the sense properly, manage the heat and protect the connector. Measure the result. Power design belongs to PCB design and layout, the assembly of the board sits in PCB assembly, and the verification is part of PCBA testing. Charger layouts are first built during prototype PCB assembly in 2026.