Board Support and Clamping in Stencil Printing
Solder paste is printed through a stencil that has to touch the board everywhere, and a board that is not flat cannot be touched everywhere. Support and clamping are therefore printing parameters, and their effect is seen as a volume variation across the panel rather than as a visible defect.
Why Support Decides the Print
The stencil is a flat sheet held under tension, and the board is a laminate that may be bowed, twisted or simply thin. Where the two do not meet, the paste does not transfer cleanly: it is smeared onto the mask, or the aperture is not fully emptied and the deposit is short.
The gap is measured in tens of micrometres, which is why the effect is invisible in the machine and visible in the deposit. A support that is one tenth of a millimetre low under a fine pitch device produces a volume loss there and nowhere else, and the printer settings are then adjusted to compensate for a mechanical fault.
Support Methods
Support comes from a grid of pins, a vacuum plate with a machined surface, a dedicated fixture for a specific panel, or a combination of pins and edge clamps. Pin arrays can be reconfigured in minutes and are the usual choice for high mix work, while a dedicated fixture is used where the panel is large or the requirement is tight.
Each method has a measurement that shows whether it is working: the pins are checked for height with a gauge, the vacuum plate for flatness and for flow, and the fixture for the fit of the panel. Checking that the pins are present is not the same as checking that they are set correctly, and the second is what matters.
Pin Layout Rules
The rules are to keep support within about 25 mm of every print position, to avoid placing a pin under a component that has already been fitted, and to keep pins away from vias on the underside where the surface may be uneven. On a second side print, the pins have to miss the components that are already there.
The layout is recorded as a drawing or a photograph with the pin positions numbered, and it is set up at changeover rather than invented at the machine. A support layout that exists only in the operator’s memory changes with the shift; our warpage control notes describe how the board’s own flatness is measured as part of the same exercise.
Clamping and Board Tension
Clamping holds the board at its edges and can either pull it flat or bow it, depending on how the force is applied. Edge clamps that squeeze the panel along two sides flatten a bowed board in one direction and bow it in the other, which is why the support underneath has to do most of the work.
Top clamps hold the board against the supports and are the more predictable arrangement, because the force is applied downwards onto a known surface. The clamping force is set so that the board is held without being deformed, and it is checked at changeover with a feeler gauge or by measuring the deposit pattern.
The Stencil Gasket and Its Failure
The stencil gasket is the seal between the stencil and the board surface, and it fails locally wherever the two are not in contact. The failure produces paste on the mask beside the aperture, a reduced deposit and, on fine pitch, a bridge between adjacent pads.
The gasket is verified by printing onto a sheet of paper or onto a bare board and examining the transfer, or by measuring the deposit volume across the panel with an inspection system. A print that is good in the centre and poor at the corners is a support problem rather than a paste problem, and our SPI data is what shows the pattern.
Thin Boards and Large Panels
A thin board flexes under the squeegee pressure even when it is supported, because the pressure is applied along a line and the board bends between the supports. A large panel adds its own weight to the same problem, and the effect grows with the cube of the unsupported span, so a small change in pin spacing has a large effect.
The countermeasures are closer pin spacing, a vacuum plate instead of pins and a lower squeegee pressure with a harder blade. Where the board is very thin, a carrier is used and the panel is printed in the carrier, which also stabilises it for the rest of the line.
Panel Design for Support
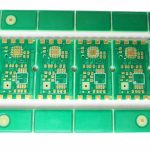
The panel’s own features are part of the support system: the tooling holes locate it, the breakaway rails give the clamps something to hold, and the board outline determines where pins can sit. A panel designed without tooling holes is printed from the outline, which is a less repeatable reference.
Where the panel will run on more than one line, the tooling holes and the support positions are agreed with each line rather than being designed for one machine. The tooling is part of the panel specification for that reason, and it appears on the fabrication drawing alongside the outline.
Verification of the Setup
The verification is a print onto a paper or a bare board for the gasket, and a printed production board measured for deposit volume at several positions. The two are complementary: the paper shows where contact was missing, and the measurement shows how much paste was lost.
The check is repeated after every changeover and after any maintenance on the supports or the clamps, because the support layout is the part of the printer that is easiest to disturb. A first article printed and measured before the run starts is what prevents a whole panel from being printed on a badly supported board.
Records and Changeover
The record for a product carries the support layout, the clamp positions, the vacuum setting where one is used, the squeegee pressure and the first article result. Those items travel with the product between machines, so that a product moved to a second line is set up the same way.
At changeover the support is the first thing that is set and the last thing that is verified, and the paste volume measurement is the evidence that both happened. A product that prints well on one line and poorly on another is usually a support difference rather than a printer difference.
Board support comes from a grid of pins, a vacuum plate with a machined surface, a dedicated fixture for a specific panel, or a combination of pins and edge clamps. Pin arrays can be reconfigured in minutes and are the usual choice for high mix work, while a dedicated fixture is used where the panel is large or the requirement is tight.
The panel’s own features are part of the support system: the tooling holes locate it, the breakaway rails give the clamps something to hold, and the board outline determines where pins can sit. A panel designed without tooling holes is printed from the outline, which is a less repeatable reference.
FAQ
How many support pins are needed? Enough that no print position is more than about 25 mm from support, with closer spacing used for thin boards and for fine pitch devices. The layout is designed for the panel rather than copied from the last product.
Can a vacuum plate replace pins entirely? It can where the panel is flat enough to seal against the plate, and it is the better choice for a thin board. Where the panel has large cut-outs or a rough underside, the seal is lost and pins are still required.
Why does the print improve when the squeegee pressure is reduced? Because less force is applied to the board between the supports, so the board stays flatter and the gasket stays closed. The reduction is limited by the need to wipe the stencil clean, which is why the support is fixed first and the pressure adjusted afterwards.