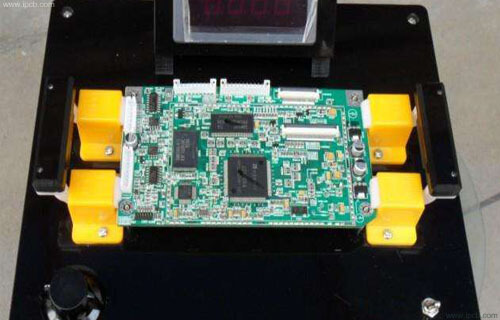
During PCB assembly, accurate temperature control is essential for achieving reliable solder joints and preventing defects. To obtain an accurate temperature profile, thermocouples are commonly attached to selected points on the PCB and monitored as the board passes through the reflow oven.
For solder paste printing and subsequent reflow soldering, an unassembled PCB cannot always provide a suitable location for securely attaching the measuring end of a thermocouple. Therefore, in many cases, an actual assembled PCB or representative production board must be used for temperature testing.
PCB Test Sample Requirements
A PCB test sample should generally not be reused more than twice for temperature profile testing. If the measured temperature remains within the PCB and component manufacturer’s specified limits, a board that has undergone one or two tests may still be suitable for normal production.
However, repeatedly exposing the same PCB assembly to high temperatures for an extended period is not recommended. Multiple thermal cycles can gradually affect the PCB substrate, solder joints, components, surface finish, and other materials.
After prolonged exposure to high-temperature reflow soldering, the PCB surface may become darker and can even develop a brownish appearance. Although heating in a reflow oven is primarily achieved through convection, a small amount of radiant heat transfer also occurs.
A dark-brown PCB surface may absorb more radiant heat than a conventional bright-green PCB surface. Consequently, the measured temperature can differ from the temperature obtained from a new production board. If this difference is not considered during lead-free soldering, the process window may shift and increase the risk of insufficient soldering or cold solder joints.
For this reason, PCB temperature testing should use representative production materials and should be performed under conditions that closely match the actual manufacturing process.
How to Perform PCB Temperature Testing
The following procedure provides a practical approach for measuring the temperature profile of a PCB during reflow soldering.
1. Select Appropriate Temperature Test Points
The number and location of test points should be determined according to the complexity of the PCB assembly and the number of available channels on the temperature profiler. A typical data logger may provide approximately 3–12 thermocouple channels.
At least three representative points should normally be selected to identify different thermal conditions across the PCB:
- Hot spot: The location where the PCB reaches a relatively high temperature.
- Typical point: A representative area that reflects the general thermal condition of the board.
- Cold spot: The location where the PCB reaches a relatively low temperature.
The hot spot is often located near the central area of the reflow chamber, particularly where there are few or relatively small components.
Cold spots are commonly found around large components, such as PLCC packages, large copper areas, areas close to conveyor rails, edges of the heating chamber, or locations where hot-air circulation is relatively weak.
When determining test locations, engineers should also consider PCB thickness, copper distribution, component density, thermal mass, and the board’s orientation in the reflow oven.
2. Secure the Thermocouples
The measuring ends of multiple thermocouples must be firmly attached to the selected test points.
One method is to solder the thermocouple ends directly to the designated test points using a high-temperature solder alloy. Before attaching the thermocouples, any existing solder on the test point should be removed or properly prepared to ensure a stable connection.
Another method is to use high-temperature adhesive tape to secure the thermocouple ends to the selected locations on the PCB.
Regardless of the method used, the thermocouple must be firmly secured. Poor contact between the thermocouple and PCB surface can result in inaccurate temperature readings and an unreliable temperature profile.
The thermocouple wire should also be routed carefully to prevent it from interfering with components, conveyor rails, or other parts of the PCB assembly.
3. Connect and Identify the Thermocouples
Insert the other ends of the thermocouples into the corresponding channels of the temperature profiler, such as channels 1, 2, 3, and so on.
Pay close attention to polarity. Connecting a thermocouple incorrectly may result in incorrect temperature readings.
Each thermocouple should be numbered, and its corresponding position should be clearly marked on the PCB or documented in the test record.
A test-point diagram can be especially useful when several thermocouples are used. It allows engineers to quickly identify which curve on the temperature-profile software corresponds to each physical location on the PCB.
4. Run the PCB Through the Reflow Oven
Place the tested PCB assembly on the conveyor chain or mesh belt at the entrance of the reflow oven.
If a temperature profiler is being used, place the profiler behind the PCB assembly and maintain an appropriate separation distance from the board and conveyor system, following the profiler manufacturer’s operating requirements.
Start the temperature profile measurement program and allow the PCB to pass through the complete reflow process.
During this stage, the thermocouples continuously record the temperature at their respective test points as the board moves through the preheating, soaking, reflow, and cooling zones.
5. Monitor the Real-Time Temperature Curve
If the equipment is connected to temperature-profile software, the temperature data can be monitored and displayed as the PCB passes through the reflow oven.
The software normally generates multiple temperature curves corresponding to the thermocouple locations.
Engineers can use these curves to evaluate important process parameters, including:
- Preheat rate
- Soak temperature and duration
- Time above liquidus (TAL)
- Peak temperature
- Time at peak temperature
- Cooling rate
These parameters should be compared with the recommended solder-paste process window and the requirements of the components and PCB materials.
6. Complete the Test and Analyze the Temperature Profile
After the PCB has passed through the cooling zone, carefully retrieve the PCB assembly and temperature profiler.
If the profiler is connected to the thermocouples through wires, pull the assembly back only after it has safely passed through the required process zones and reached an appropriate temperature.
The completed temperature profile can then be viewed and analyzed using the corresponding software.
The final report should include the temperature curves and key parameters, particularly the peak temperature and the time required to reach peak temperature.
The test results should be reviewed to determine whether all monitored points remain within the recommended reflow soldering process window.
Why Accurate Temperature Profiling Matters
A properly controlled PCB temperature testing process helps manufacturers identify thermal differences across the PCB and optimize the reflow soldering process.
If the temperature is too low, solder paste may not fully melt or properly wet the component terminals and PCB pads, increasing the risk of cold solder joints, insufficient soldering, and poor electrical connections.
If the temperature is too high or the board remains above the recommended temperature for too long, components and PCB materials may be exposed to excessive thermal stress. This can lead to component damage, PCB warpage, delamination, discoloration, or reduced long-term reliability.
For lead-free soldering in particular, the process window must be carefully controlled because lead-free solder alloys generally require higher reflow temperatures than traditional tin-lead solder.
Best Practices for PCB Temperature Testing
To obtain reliable results, manufacturers should consider the following practices:
- Use representative PCB assemblies that closely match the actual production configuration.
- Select test points strategically according to component size, copper distribution, and thermal mass.
- Secure thermocouples firmly to minimize measurement errors caused by poor contact.
- Verify thermocouple polarity and channel identification before starting the test.
- Record the exact location of every thermocouple for future comparison.
- Avoid excessive reuse of test samples, especially after repeated high-temperature cycles.
- Compare the measured profile with the solder-paste manufacturer’s recommended process window.
- Repeat profiling whenever major process conditions change, such as PCB design, component loading, solder paste, conveyor speed, or reflow-oven settings.
Kingda’s Approach to Reliable PCB Assembly
For manufacturers seeking consistent PCB assembly quality, temperature profiling should be treated as an important part of process validation rather than simply a one-time inspection.
Kingda can use controlled reflow soldering processes, appropriate temperature-profile monitoring, and systematic process verification to help maintain stable soldering quality across different PCB designs.
By combining proper test-point selection, accurate thermocouple installation, controlled reflow parameters, and detailed profile analysis, manufacturers can reduce soldering defects and improve the reliability and consistency of finished PCB assemblies.
Accurate PCB temperature testing is therefore an important foundation for stable SMT production and reliable electronic products.