Audio PCB Guide: Design, Manufacturing and Cost
Ask any audio engineer what shapes the sound of a product, and the circuit board will come up quickly. In speakers, amplifiers, headphones, and studio gear, the audio PCB is where every signal is carried, filtered, and amplified, and its design determines how clean the sound stays from input to output. Beginners who want to understand or build audio electronics, and buyers who source boards for audio brands, both benefit from knowing what makes an audio circuit board different from an ordinary one. This guide explains the role of audio equipment PCBs, their components and structure, the design rules that protect sound quality, manufacturing and cost, and how to choose a producer for your next project.
What Is an Audio Equipment PCB?
An audio equipment PCB is a circuit board designed specifically to process and transmit audio signals. Compared with a general-purpose board, it emphasizes low noise, low distortion, and high-fidelity signal transfer. The copper routing is planned so that weak audio signals are not contaminated by power switching or digital noise, and the components are chosen for stable electrical behavior rather than the lowest possible price. Analog stages handle the natural amplification and tone shaping of the music, while digital stages perform precise processing such as filtering, effects, and noise reduction. Getting the two to coexist on one board without audible interference is the central challenge of audio PCB design.
Key Components of an Audio Circuit Board
A typical audio board carries a familiar set of parts, each with a specific job. Resistors set gains, control current, and balance the signal path. Capacitors filter noise, stabilize supply voltages, and couple signals between stages, and their type and quality noticeably affect the sound. Transistors and operational amplifiers amplify the weak signal from a microphone, pickup, or player up to speaker level. Audio-specific integrated circuits handle codec conversion, digital signal processing, and amplification in compact modern designs. Connectors and pads bring the board together with the outside world through input jacks, output terminals, and control interfaces. The layout must let these components work as one coherent chain, because a single noisy routing decision can degrade the whole signal path.
How an Audio PCB Works
The signal journey is easy to follow. Audio enters at the input connector, passes through input protection and volume control, is amplified and shaped by the analog stages, optionally converted and processed in the digital domain, and finally drives the output stage connected to speakers or headphones. Along the way, the board layout decides how much interference joins the signal. Traces that run close to switching power circuits pick up noise; ground loops between stages create hum; and poor decoupling lets supply ripple reach the audio path. An optimized layout separates sensitive analog traces from noisy digital and power areas, returns every signal over a clean ground path, and keeps the audio traces short and direct. In high-end equipment, the low-noise design is what separates a transparent, detailed sound from a flat, hazy one.
Types of Audio PCBs
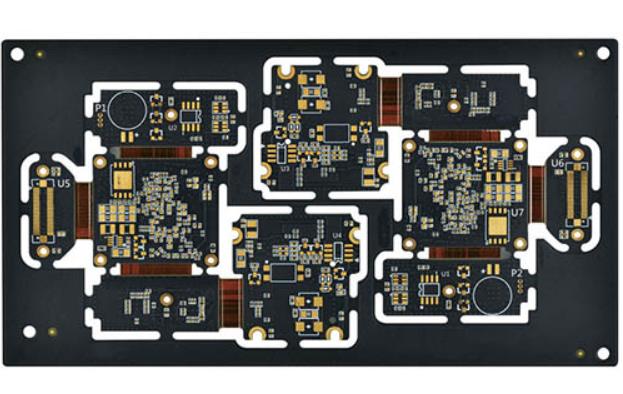
Audio boards come in several constructions matched to the product. Single-layer boards are inexpensive and appear in simple radios and small amplifiers where routing demands are modest. Double-layer and multilayer boards support complex circuits and are standard in studio equipment, Hi-Fi amplifiers, and digital audio converters, with dedicated layers for ground and power to keep noise out of the signal. Flexible boards are thin and bendable, which makes them ideal for wireless earbuds, neckband speakers, and portable Bluetooth speakers that must fit into tight enclosures. Some premium products use rigid-flex constructions so the circuit can fold around batteries and drivers. Choosing the type means balancing cost, performance, and the physical constraints of the device.
Applications of Audio Circuit Boards
Audio PCBs are everywhere sound is reproduced or recorded. Home systems rely on them in amplifiers, home theater receivers, and soundbars. Professional studios use them in mixing consoles, audio interfaces, and digital audio processors where precision matters. Musical instruments such as electronic keyboards, guitar amplifiers, and synthesizers depend on boards that preserve the character of the sound. Portable products including headphones, Bluetooth speakers, and wireless microphones need compact low-power designs. Each application stresses different qualities, but every one of them starts with a board that keeps the audio signal clean from the first stage to the last.
Audio PCB Design Essentials
High-quality audio starts with layout discipline. Low-noise design is the first priority: use a solid ground plane or a star ground topology to prevent ground loops, keep analog and digital ground areas connected at a single point, and route sensitive audio traces away from switching supplies and clock lines. Power management is second: linear regulators or well-filtered switching supplies, plus decoupling capacitors at every active stage, keep supply noise out of the signal. Thermal design matters because power amplifiers dissipate real heat; generous copper, thermal vias, and ventilation prevent drift and early failure. Component quality is the final lever, because precision resistors, film capacitors, and low-noise integrated circuits measurably improve the result. Most of these decisions are made during the PCB design and layout phase, where an experienced engineer can hear the difference in a good schematic long before the first board is built.
Audio PCB Manufacturing Process
Production follows the standard electronics sequence with extra attention to consistency. The board is fabricated first: copper layers are etched, laminated, drilled, and plated to create the circuit, then finished with solder mask and surface finish. Components are placed and soldered, typically with reflow for surface mount parts and wave or selective soldering for through hole components such as large capacitors, connectors, and heatsinked transistors. After assembly, each board is inspected and tested. Electrical testing verifies connections and power, functional testing confirms the audio path works at the expected gain, and acoustic or signal testing checks noise and distortion where the product demands it. Some audio products also receive conformal coating to protect against moisture and dust in portable or outdoor use, a process that should be specified early because it affects component selection and test access. A disciplined partner runs these checks as standard procedure and documents the results, and thorough PCBA testing catches marginal boards before they ship.
Audio PCB Cost
The price of an audio board scales with layers, size, and the quality of the parts and finish. Simple single-layer boards typically cost about 5 to 15 dollars per bare board. Double-layer designs with a proper ground plane and reasonable component count fall in the 15 to 25 dollar range. Multilayer professional audio boards, which may include four or more layers, premium capacitors, and low-noise regulators, generally cost 20 to 50 dollars or more per board before assembly. Quantity is the largest lever: small prototype runs pay the highest unit price, while volume production can cut the bare board price substantially. Buyers should compare complete quotes covering fabrication, assembly, testing, and finish, because a board that saves two dollars but adds audible noise is a poor bargain for any audio brand.
Choosing an Audio PCB Manufacturer
Not every factory is equally good at audio work, so evaluate candidates against the specific demands of sound products. Look for experience with analog and mixed-signal designs, because the factory must understand why a noisy ground plane or a poorly routed supply matters in a way that digital-only boards do not. Confirm certifications such as ISO quality systems and RoHS compliance, and check whether the manufacturer can meet UL requirements where the product needs them. Ask whether it offers OEM and ODM support, which is valuable when you want the factory to refine the design or adapt it to a new enclosure. Prefer a supplier that provides engineering feedback during the design review and can combine the PCB manufacturing with assembly and testing in one workflow. Fast prototyping, transparent pricing, and consistent delivery complete the list, because audio product launches are often tied to trade shows and seasonal demand.
Balancing Analog and Digital Circuits
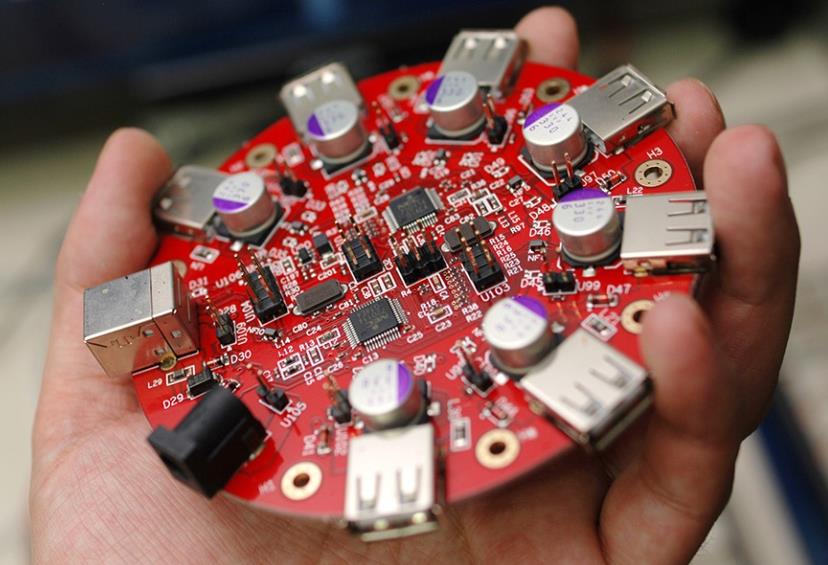
Nearly every modern audio product mixes analog and digital circuitry on a single board, and the boundary between them decides the final sound quality. The digital side contains the audio codec, digital signal processor, Bluetooth radio, and control microcontroller, while the analog side carries the microphone preamplifier, filters, and output stage. If the two are interleaved carelessly, the switching noise from the digital logic and wireless radio leaks into the delicate analog path. Good designs separate the sections physically, keep the analog input stage as far as possible from the antenna and switching regulators, and connect the analog and digital ground areas at a single point so digital return currents cannot circulate through the audio ground. Clock and data lines are kept short and away from analog traces, ferrite beads filter the power entering sensitive stages, and a dedicated low-noise regulator supplies the analog rail. Applied consistently, these rules let a compact consumer board deliver studio-quality signal integrity, and they explain why two products using the same chips can sound completely different.
Future Trends in Audio PCBs
Audio technology keeps evolving, and the boards evolve with it. Miniaturization continues as wireless earbuds and portable speakers pack more processing into tiny spaces. AI integration is appearing in new products, with dedicated chips for adaptive noise cancellation, voice enhancement, and automatic sound tuning. Environmental rules are pushing manufacturers toward lead-free solder and recyclable materials, and digital audio over wireless links is improving as Bluetooth and Wi-Fi hardware matures. Board makers that invest in fine-pitch assembly, good analog practice, and high-speed digital capability will serve the next generation of audio products well, and a partner that handles PCB assembly alongside fabrication keeps these increasingly complex builds under one quality roof.
Frequently Asked Questions
Q1. How long does an audio equipment PCB last? Most audio boards last 5 to 10 years in normal use, and high-quality products with good capacitors and thermal design can last much longer.
Q2. Can a damaged audio PCB be repaired? Minor damage such as a broken trace or a burned resistor can often be repaired, but for mass-market products replacing the board is usually more economical.
Q3. How long does audio PCB production take? Typical lead times run 7 to 20 days depending on layer count, component sourcing, and order quantity.
Q4. Why does my amplifier pick up hum and noise? Hum usually comes from ground loops or poor power filtering; a clean star ground and well-decoupled supplies eliminate most cases.
Q5. Are expensive components necessary for good audio? Quality matters most in the signal path, but a superb component on a poor layout still sounds bad; the layout is the foundation of the sound.
Conclusion
The audio equipment PCB is the quiet foundation of every sound product. From component selection to grounding strategy, every choice shapes how faithfully music is reproduced. Understanding the structure, the low-noise design rules, the manufacturing steps, and the cost structure helps engineers and buyers turn a good idea into a product that sounds the way it was intended. With careful design and a manufacturing partner that respects analog quality, an audio board can deliver clean, detailed sound for years.