Breadboard PCB Guide: Structure, Types and Advantages
Every electronics project starts somewhere, and for most engineers and hobbyists that somewhere is a breadboard. The classic solderless breadboard is perfect for quick experiments, but its spring contacts become unreliable when a circuit must run for days or carry real current. That is where the breadboard PCB comes in: a permanent, solder-friendly version of the breadboard layout that keeps the familiar 2.54 millimeter grid while replacing flaky contacts with solid copper. This guide explains what a breadboard PCB is, how it is structured, the available types, its advantages over solderless boards, costs, and how to choose and design one for your project.
What Is a Breadboard PCB?
A breadboard PCB, also called a prototype PCB, is a printed circuit board designed for soldered prototype circuits. It uses the standard 2.54 millimeter, or 0.1 inch, hole spacing that matches common components, ICs, and jumper wires, so a circuit prototyped on a solderless board can be transferred directly. Instead of spring clips, the board uses plated through holes connected by copper traces in a predictable pattern: vertical groups of holes for component legs and long horizontal strips that act as power and ground rails. The result is a stable, permanent circuit that behaves the same tomorrow as it does today.
Structure of a Breadboard PCB
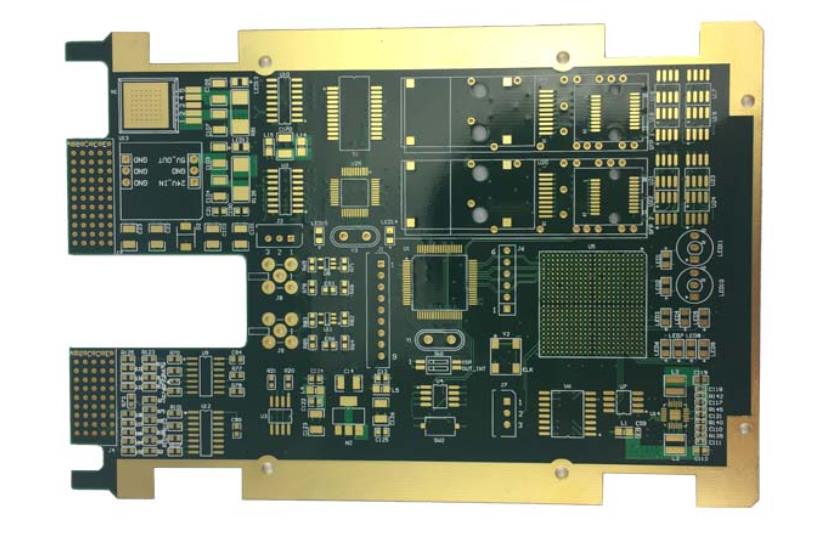
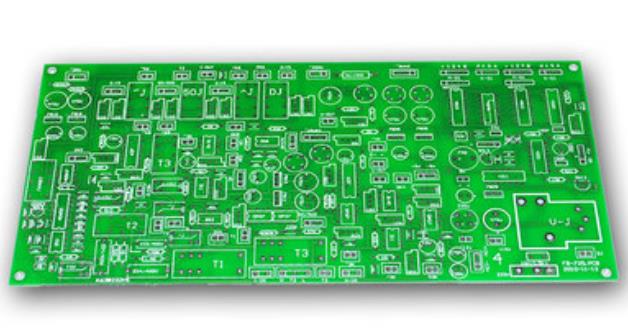
A typical prototype board is easy to recognize. The main area is an array of plated through holes arranged on the standard grid, with small copper pads around each hole for reliable soldering. Around the edges run horizontal power buses that carry the supply voltage and ground to every part of the circuit. Copper traces under the surface connect the holes in the familiar breadboard groups, and silkscreen markings show the polarity, numbering, and component positions. The most common construction uses FR-4 laminate with one ounce of copper, which gives a good balance of strength, cost, and current capacity for general experimentation.
How a Breadboard PCB Works
The working principle is simple but effective. Copper foil inside the board connects groups of holes, so when you solder a component lead into one hole and a wire into the connected neighbor, the circuit is made permanently. The horizontal power rails distribute the supply along the whole board, the vertical hole groups carry IC pins and discrete components, and you join different groups with short jumper wires. Because the connection is a real solder joint rather than a spring contact, the circuit keeps working through vibration, temperature changes, and long test periods. That reliability is the entire reason engineers move from a solderless breadboard to a soldered prototype board once the idea is proven.
Types of Breadboard PCBs
Prototype boards come in a few forms to match different needs. Single-sided breadboard PCBs are the cheapest and suit beginners and simple circuits, with all copper on one side. Double-sided boards add a second routing layer, which increases the usable area and makes complex layouts easier to wire. Custom prototype boards are designed for a specific component or module, such as a development board footprint or a sensor breakout, and are ordered as small production runs. Some boards add extra features such as dedicated ground planes, labeled regions for power supplies, or castellated edges for module mounting. Choosing the type is mostly a question of circuit size and how permanent the prototype needs to be.
Breadboard PCB vs Solderless Breadboard
The comparison comes down to the connection. A solderless breadboard uses spring clips that are convenient for instant changes but can lose contact when the wire is thin, the clip is worn, or the board vibrates. A breadboard PCB uses solder, which gives a stable joint with lower contact resistance, supports higher current, and does not degrade with age. The trade-offs are that soldered boards are not designed for repeated reconfiguration, and changes mean desoldering rather than pulling a wire. For short experiments, the solderless board wins on speed; for anything that must run reliably for hours, weeks, or in the field, the soldered prototype board is the right tool.
Advantages of Breadboard PCBs
The benefits explain why these boards remain popular after decades of electronics history. Connections do not loosen, because solder holds every joint firmly. Contact resistance is much lower than a spring clip, which matters for power circuits and precise measurements. Higher current is possible because the copper traces and plated holes carry more than the thin clips of a solderless board. The boards do not age or deform with use and can be stored for years and reused for new projects after desoldering. Silkscreen labels and an organized grid make the circuit readable, which is a quiet blessing when you return to a prototype weeks later to debug it.
Applications of Breadboard PCBs
Prototype boards appear wherever circuits are learned and tested. IoT prototyping uses them to connect microcontrollers, sensors, and radios before committing to a custom design. Robotics experiments rely on them for motor drivers, encoders, and control wiring that must survive movement. Embedded development teams use them as training and test platforms, and education labs fill shelves with them for student circuits. They also serve as adapter boards when a component footprint does not fit the main prototype, and as the base for one-off instruments and jigs. In every case the board provides the same service: a fast, reliable way to turn a schematic into a working circuit.
Materials and Finishes
Material choice affects durability and solderability. FR-4 fiberglass is the standard substrate because it is strong, affordable, and performs well across normal temperature ranges. The copper foil layer carries the traces, typically one ounce for general use, with two-ounce copper available for boards that must handle more current. Surface finish determines how easily the pads solder and how long they resist oxidation: HASL is economical and fine for most prototypes, while ENIG gold finish solders easily and stays clean much longer in storage. Lead-free compatibility is standard today, and boards that will see repeated high-temperature soldering benefit from higher-Tg laminate that resists warping.
Choosing the Right Breadboard PCB
Picking the correct board for a project is straightforward when you check a few specifications. Verify the hole spacing is the standard 2.54 millimeter grid so all components fit. Choose the board area by the size of the circuit and leave room for wiring and future additions. Match the copper thickness to the current the circuit carries, typically one to two ounces. Select the surface finish by how long the board will sit before soldering and by the environment. Check the thermal rating if the board will be soldered frequently or run hot, because high-Tg material keeps the board flat under repeated rework. Finally, confirm the component compatibility, especially for unusual packages that may need a custom footprint.
Design Tips for Beginners
A little forethought makes prototype boards much easier to use. Add clear silkscreen markings for polarity and pin numbers so wiring mistakes are visible at a glance. Reserve test points at the important nodes, because a scope probe needs a clean pad to clip onto. Keep the power traces wide, especially the main supply and ground paths, so voltage drops stay small. Put power rails on both edges of the board so every IC has a short path to supply and ground. Plan the layout with some open area for heatsinks and future parts, and leave solder clearance around dense pads so bridges are easier to see and avoid.
Common Mistakes Beginners Make
Most rework on prototype boards traces back to a few predictable errors. Using non-standard hole spacing makes components and ICs impossible to place cleanly. Placing the power rails too close together invites accidental shorts when wiring is dense. Routing copper traces too narrow causes voltage drop and overheating on power paths. Forgetting thermal pads under regulators and drivers leads to hot spots and premature failure. Ignoring solder clearance between adjacent pads creates bridges that are hard to find. Each of these mistakes is free to avoid during design and expensive to fix after the board is built, which is why careful planning beats fast fabrication every time.
Breadboard PCB Cost
Prototype boards are among the cheapest PCBs you can buy. A typical soldered breadboard PCB costs about 0.3 to 0.8 dollars per board for prototype quantities, depending on size, material, and finish. Small-batch orders bring the price down to roughly 0.25 to 0.55 dollars per board, and larger volumes reduce it further. The cost drivers are layer count, surface finish, copper weight, substrate grade, and order size, so a standard single-sided FR-4 board with HASL finish at volume is the lowest-cost configuration. For a few dollars, a student or engineer can stock enough boards for an entire semester of experiments, and a professional team can order custom layouts without a large budget commitment.
Where to Buy Reliable Breadboard PCBs
Quality varies between suppliers, so check the basics before ordering, and suppliers that also offer low volume PCB assembly can carry a project from this first stage into a small pilot run. Confirm that the factory holds relevant certifications such as UL recognition and follows standard process controls, because hole quality and plating directly affect how easily components solder. Ask about the drilling accuracy, since a misaligned hole grid defeats the entire purpose of a breadboard PCB. Compare lead times, and look for a supplier with low minimum order quantities and responsive engineering support for custom layouts. Most reputable manufacturers offer custom silkscreen, copper patterns, and hole arrangements, so a project can move from a generic board to a tailored layout without changing suppliers.
From Prototype to Production
A breadboard PCB is usually the first physical form of a circuit, but it should also be the launching point for the next stage of the product. Once the design is stable on the soldered prototype board, the same schematic can be turned into a custom layout that shrinks the circuit, adds the connectors the product needs, and removes the experimenter conveniences. That custom board can move through quick-turn prototype PCB assembly to validate the real form factor, then scale into volume production with the same manufacturing partner. This path is why prototype boards remain valuable even in an age of advanced design tools: they prove the circuit works in the real world, catch the layout and wiring mistakes that simulation misses, and give the team confidence before investing in tooling. Keeping the transition in mind while you experiment makes the jump from breadboard to product much smoother.
Frequently Asked Questions
Q1. Can a breadboard PCB be reused? It can be reused by desoldering and re-soldering, but frequent removal is hard on the plated holes, so treat it as a semi-permanent platform.
Q2. What is the hole spacing? The standard spacing is 2.54 millimeters, or 0.1 inches, matching most ICs, headers, and jumper wires.
Q3. How much current can it carry? Current capacity depends on copper weight; one to two ounces of copper handles the currents found in typical prototype circuits.
Q4. How long does a breadboard PCB last? Stored properly, a soldered prototype board can last more than 10 years without degrading.
Q5. Can I get a custom breadboard PCB? Yes, manufacturers offer custom silkscreen, copper routing, and hole layouts for specific modules and applications.
Conclusion
The breadboard PCB is the quiet workhorse of electronics development. It gives every experiment a stable, permanent home while keeping the familiar grid that makes prototyping fast, and it costs almost nothing compared with the value of the circuits it carries. Understanding the structure, types, materials, and costs helps students, hobbyists, and engineers choose the right board and design with confidence, turning a working idea into a reliable foundation for the next step toward a finished product.