Solder Paste Printing on PCB: How It Works
Solder paste printing on PCB is one of the most important steps in SMT assembly. The paste must be deposited on the correct pads in the correct amount before components are placed. If the print is misaligned, too thick, too thin, or smeared, the final solder joint can be weak or shorted. The solder paste printer uses a stencil to control where paste is applied, while the squeegee moves across the stencil to force paste through the openings.
This guide explains the printing process, machine types, quality requirements, and the factors that determine a good paste deposit.
Paste printing is often called the most critical process in SMT because soldering defects can often be traced back to the print quality on the pad.
Purpose of Solder Paste Printing
The PCB contains many pads that must receive solder paste. The stencil has precise openings that match the pad locations, allowing solder paste to reach only the required areas of the PCB.
After the stencil and board are aligned, the squeegee pushes solder paste through the stencil apertures onto the pads.
Accurate positioning is necessary because even a small misalignment can place paste on the wrong area and create a defective solder joint.
The printing machine should be calibrated for board thickness, stencil height, and squeegee travel. Small changes in setup can change the paste volume significantly.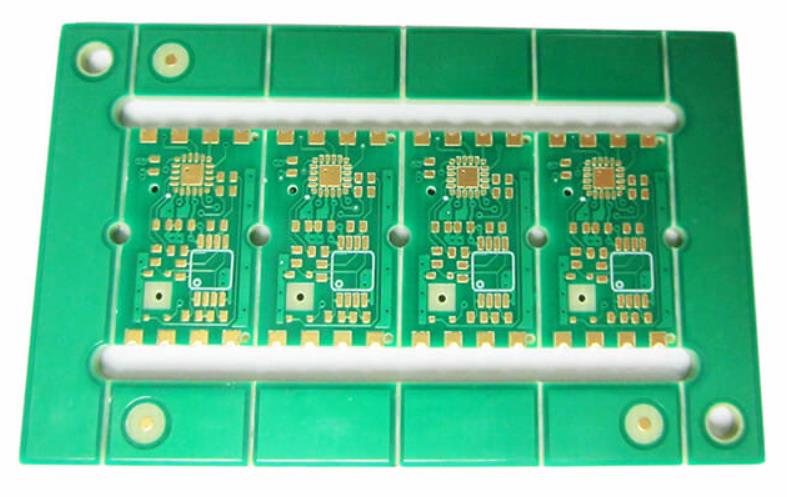
How the Printing Machine Works
A solder paste printer holds the stencil above the PCB. The board is aligned with the stencil using reference marks and vision systems.
The squeegee moves across the stencil, forcing paste through the openings. After printing, the stencil is separated from the board.
The printed board then moves to the placement machine for component assembly.
Automatic printers can also clean the stencil and inspect the board automatically. This reduces the chance of a defect continuing across many boards.
Automatic Solder Paste Printers
Fully automatic printers are common in high-volume SMT lines. They automatically load the board, align the stencil, apply paste, and send the board to the next station.
Automatic printers provide higher consistency and require less operator skill than manual methods.
They are usually integrated with solder paste inspection to verify the result on every board.
Operators of semi-automatic printers should be trained to check alignment and print quality before starting a run. The first board should always be verified.
Semi-Automatic Printers
Semi-automatic printers are often used for prototypes, small batches, or mixed product lines. Board loading, stencil alignment, and unloading may be done manually.
Only the printing action is automatic. This type of printer requires more operator experience because alignment can vary.
Semi-automatic equipment is less expensive than a fully automatic line and is useful for low production volumes, prototypes, and mixed product runs.
If manual printing is used, the operator should follow a detailed checklist and use magnification to check the deposit after every few boards.
Manual Printing
Manual printing uses a stencil, squeegee, and paste without powered equipment. It is rare in modern factories because it is slow and less repeatable.
Manual printing may still be used for very low-cost assembly, simple boards, or repair work in some regions where automated equipment is not justified.
It is not suitable for fine-pitch, high-density, or high-volume boards where repeatability is essential.
Paste height should be measured in the center of each pad rather than only at the edges. This gives a better indication of the true volume.
Print Quality Requirements
The two main quality requirements are correct position and correct volume. Paste must be placed only on the intended pads.
The volume should be sufficient to form a reliable joint without creating bridges.
Printed paste should have a clean shape and not slump or spread beyond the pad.
Squeegee blades should be inspected for wear and damage. A worn blade can cause uneven pressure and inconsistent paste deposits.
Squeegee Type
The squeegee should be selected according to the paste or adhesive being used. Stainless steel squeegees are common for solder paste.
Metal squeegees provide better paste transfer and are suitable for fine apertures.
Polyurethane squeegees may be used for certain applications, but they wear more quickly.
The paste roll should be inspected visually during setup. A rolling movement of paste is better than a flat sliding action.
Squeegee Angle
The squeegee angle affects how paste rolls across the stencil. Typical angles are between 45 and 60 degrees.
A consistent angle helps maintain paste pressure and filling of the apertures.
The angle should be checked when the printer is set up and after maintenance.
Pressure settings should be recorded for each product so the same result can be repeated on the next production order.
Print setup should include a trial board before production. The trial result is used to adjust pressure, speed, and separation before the first good board is printed.
Squeegee Pressure
Too much squeegee pressure can remove paste from the apertures or damage the stencil. Too little pressure can leave incomplete deposits.
The printer should maintain a small and consistent gap between the stencil and board so paste is deposited cleanly without smearing.
Pressure should be adjusted for the paste viscosity and stencil design.
The speed setting should also be reviewed when the paste viscosity changes or a new stencil is installed. Speed affects paste filling and print shape.
The operator should record the squeegee speed and pressure for every product so the printing process is repeatable when the same board returns to production.
Squeegee Speed
Squeegee speed affects the shape and amount of paste. Common speeds are about 20 to 80 mm per second.
Higher-viscosity paste may need faster squeegee speed to maintain a proper roll.
The correct speed should be established through testing and documented for each product.
Separation speed should be tested when a new stencil is used. Some stencils need a slower release to avoid pulling paste from small apertures.
Stencil Separation
After printing, the stencil must separate from the PCB cleanly. If separation is too fast, paste can be pulled into tails or sharp peaks.
Separation speed should be controlled to allow paste to release from the aperture.
A vacuum board support helps keep the PCB flat and improves separation.
Support pins should be positioned under areas that are not already occupied by bottom-side components. Incorrect support can cause the board to flex during printing.
Support settings should be checked when the board thickness changes. A board that is thinner or thicker than the previous product may need different pins or vacuum zones.
Board Support and Flatness
The PCB must be held flat during printing. A warped board can produce uneven paste, incomplete deposits, or solder bridges between adjacent pads.
Vacuum supports and tooling pins hold the board in position.
Board flatness and thickness should be checked before printing, especially for thin, flexible, or panelized boards.
The stencil manufacturer should provide data on aperture area ratio and paste release. This information helps the process engineer choose the correct stencil for each product.
Stencil Aperture Design
The stencil aperture controls the paste volume. Aperture size and thickness should be matched to the pad and component requirements.
Area ratio should be sufficient for paste release. A small opening with a large wall can trap paste.
Stencil design is usually reviewed with the PCB and assembly files during process planning.
Automatic cleaning should be scheduled by board count or time. The cleaning frequency should increase when small apertures or sticky paste are used.
Wiping the underside of the stencil removes paste that may have transferred to the board surface and caused contamination on non-print areas.
Stencil Cleaning
The stencil must be cleaned regularly to prevent dried paste from blocking apertures. Cleaning can be done manually or automatically.
Solvent removes paste from the openings, especially the small apertures used for fine-pitch pads.
Cleaning frequency should be high enough to maintain consistent print quality without slowing the line.
The printed board should be linked with PCBA testing and controlled PCB manufacturing for complete traceability.
SPI should be programmed for every board design and updated whenever the pad layout changes. This keeps inspection aligned with the current product.
Inspection and Control
Solder paste inspection measures height, area, volume, and position after printing to catch defects before components are placed. This is faster and more accurate than visual inspection.
SPI data should be linked to the placement and reflow process so defects can be traced to their cause.
A good printing process supports a strong SMT PCB assembly flow and a disciplined quality management system.
The printing process should be reviewed whenever a new board, stencil, paste, or component layout is introduced. Print quality data helps the factory make the right process decision.
For factories producing multiple board types, print parameter sheets should be stored with each product file so the same setup can be recalled quickly for repeat orders.
Conclusion
Solder paste printing on PCB requires the correct printer type, stencil design, squeegee settings, and cleaning routine. Accurate paste position and volume are essential for reliable SMT soldering.
By controlling the printing process and inspecting every board, factories can reduce solder defects and improve yield.