PCB Laser Marking Legibility: Depth, Contrast and Readability Grading
A laser marking step looks trivial compared with drilling or lamination, and it is one of the few operations whose output is checked by a human or a camera rather than by an instrument. That is exactly why it drifts: nothing in the process raises an alarm when the mark becomes too faint to read.
What a Laser Mark Has to Survive
A mark on a board has to remain readable through everything the board will meet: cleaning chemistry, solder mask cure, reflow, conformal coating and years of service. A mark that is legible at the marking station and unreadable after coating has failed, even though the marking machine reported no fault. The requirement should therefore be written against the post assembly surface, not against the freshly marked one.
The three properties that decide survival are depth, contrast and edge definition. Depth is what resists abrasion and coating; contrast is what makes the mark visible to a camera; edge definition is what allows a reader to decode a data matrix code reliably. A mark can have good contrast and poor depth, which looks acceptable and erases under a coating, or good depth and poor contrast, which survives but cannot be read. Specify all three.
Depth: How Deep Is Enough and How Deep Is Too Deep
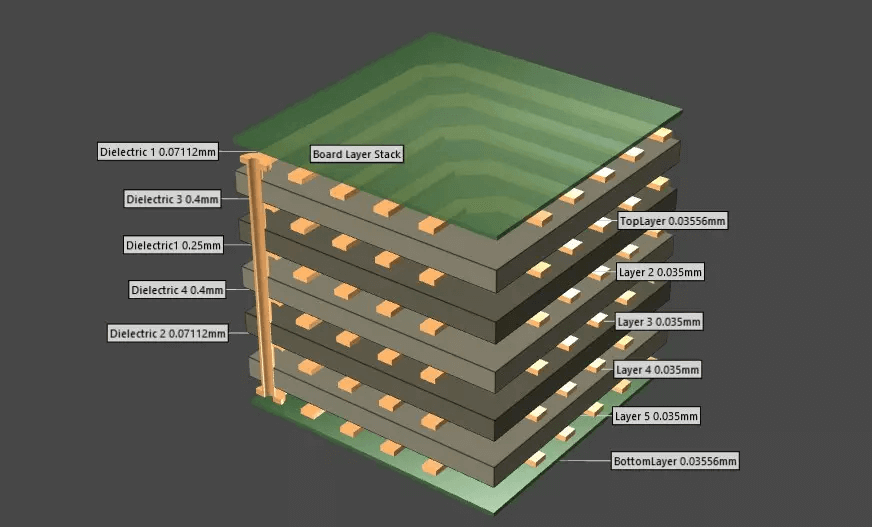
On solder mask, a mark is usually cut into the mask layer and, where the mask is thin, into the laminate below. A depth of 15 to 25 microns below the mask surface is enough to survive handling and coating while leaving the underlying copper and the laminate structure intact. Deeper marks remove more of the mask and expose the laminate, which then absorbs moisture and provides a path for ionic migration between conductors.
Depth has to be controlled against the mask thickness, not as an absolute figure. A mask that measures 25 microns thick cannot accept a 25 micron mark without reaching the laminate, so the marking parameters have to be set from the measured mask thickness on the panel being marked. Where the mask is thinner than the minimum mark depth, choose a surface modification mark instead of an engraved one. Measure depth with a stylus profilometer across the mark, or with a confocal microscope. A single point measurement is not enough, because the depth varies with the energy density, which varies with focus and with the local reflectivity of the surface underneath. Take a profile across several characters and record the mean and the range.
Contrast Without Depth: Surface Modification Marks
Where the board cannot accept an engraved mark, the laser can be used to change the surface rather than remove it. On solder mask, a low energy pass produces a colour change through carbonisation of the resin; on bare copper or on anodised surfaces, it produces an oxide layer that reads darker or lighter than the surrounding metal. These marks have essentially no depth and survive because there is nothing to abrade away.
The trade off is contrast. A surface modification mark depends on lighting to be read, and it fades with thermal exposure because the carbonised layer oxidises further in reflow. Where the mark must be read by an automated optical inspection camera, measure the contrast ratio under the lighting arrangement the reader will use, and re measure it after a reflow cycle. A mark that reads at 60 percent contrast before reflow and 20 percent after is not a practical marking solution. Surface marks are also sensitive to the surface they are made on. The same parameters produce a different contrast on a green mask, a black mask and a matte white legend, so the recipe has to be qualified per surface. Where a panel carries several mask colours, either qualify each or standardise on one.
Fonts, Dot Matrix and Cell Size
Two fonts are used for board marking. A vector or stroke font draws continuous lines and produces a clean character that reads well at small sizes; a dot matrix font places a grid of discrete spots and is faster to write but has a minimum cell size below which the dots merge into an unreadable blob. For character heights under 1 mm the vector font is usually the only practical choice.
For machine readable codes, the module size decides everything. A data matrix code needs at least three camera pixels across each module for reliable decoding, and ideally five, so the marking resolution and the reader resolution have to be considered together. A code marked with 0.1 mm modules requires a reader that resolves about 0.02 to 0.03 mm on the board surface, which in turn sets the field of view and the working distance. Allow for quiet zones. A data matrix needs a clear margin of at least one module width around it, and a mark placed too close to a pad, a via or a mask dam will be read intermittently. The failure looks like a reader problem and is actually a layout problem.
Readability Grading and Verification
Mark legibility should be graded against a defined scale rather than judged as pass or fail by eye. The standard approach for printed marks applies here too: define a grade from the measured contrast and the measured edge definition, and set the minimum acceptable grade for the product. A single grade figure makes it possible to compare a supplier, a machine and a production lot.
Verify with the same reader that production will use, under the same lighting and at the same working distance. Where the mark is a data matrix code, report the decode rate over a sample of at least thirty marks on several panels, and treat anything below full decode as a failure until the cause is found. A code that decodes on the ninth attempt is a code that will stop a line at the customer’s facility. Keep the graded samples. A retained reference panel with marks at the bottom of the acceptable range is the most useful tool in a dispute, and it also gives the operator a physical standard for board quality decisions that a specification alone cannot provide.
Marking Solder Mask Versus Bare Laminate Versus Copper
The surface determines the parameters. Solder mask is a filled epoxy or acrylate that absorbs the laser energy efficiently and produces a controllable mark; bare laminate has a lower and more variable absorption, so the depth is harder to control and the surface finish is rougher. Copper reflects much of the energy at near infrared wavelengths, so marking copper requires either a shorter wavelength or a higher energy density, and the resulting mark is a thin oxide rather than a cavity.
Where the mark crosses a boundary between two surfaces, the result is uneven. A serial number that runs across a mask dam and a copper plane will be deep on one and shallow on the other, and the readable part of the mark may be only half the string. Define marking areas on a single surface, and verify the layout before the marking program is written. Marking on a finished surface also has a thermal effect. The laser removes material by local heating, and the heat spreads into the mask and the laminate around the mark. Where a mark is placed close to a fine pitch component or to a solder joint, the local heating can be enough to affect adhesion. Keep marking areas at least 1 mm from the nearest pad edge. Where the product uses a serialisation scheme, the marking layout should be agreed with the fabrication notes and traceability requirements before the panel is released, since changing the mark position later means re qualifying the program and re issuing the artwork.

Process Drift: Lenses, Power and Focus
A marking machine drifts in three ways. The lens becomes contaminated by the vaporised material it removes, which reduces the delivered energy and produces progressively shallower marks. The laser source output falls slowly with age, which has the same effect. The focus position moves as the workpiece support wears or as the board thickness varies within its tolerance, which changes the spot size and therefore the energy density.
Check all three on a schedule. Clean the lens at defined intervals, measure the delivered power with an external meter rather than trusting the machine’s internal setting, and verify the focus by marking a test panel at the top and bottom of the board thickness tolerance. A mark that is acceptable at nominal thickness and marginal at the tolerance limits shows that the focus window is too narrow, not that the material is inconsistent. The z axis height also changes with the panel. Where a marking machine handles panels of different thicknesses in the same shift, the focus has to be re set for each, and the setting should be recorded with the program. Assuming that a 1.6 mm panel and a 2.0 mm panel focus the same way produces a mark that is deep on one and absent on the other.
Records and Requalification
Record the program identification, the surface being marked, the measured mark depth, the contrast grading, the decode rate and the lens cleaning date with each production lot. When a customer reports an unreadable mark, the record shows whether the mark was at the low end of its window at the time it was made or whether it was correct and later damaged by coating or handling.
Requalify the marking program whenever the mask type, the mask thickness, the panel thickness or the reader changes. Each of those alters either the mark or the measurement, and a program that was qualified on one combination cannot be assumed to work on another. Run a fresh set of graded samples and keep them with the qualification record.
FAQ
How deep should a laser mark be? Fifteen to twenty five microns below the mask surface is enough to survive handling and coating. Set the depth against the measured mask thickness rather than as an absolute figure, and treat a mark that reaches the laminate as a rejection because the exposed material absorbs moisture.
Why do laser marks fade after reflow? Surface modification marks work by carbonising the resin, and the carbonised layer continues to oxidise at reflow temperature, so the contrast falls. Measure the contrast again after a reflow cycle before approving the marking recipe, and choose an engraved mark where the contrast requirement is high.
What causes a data matrix code to stop decoding? Usually the module size relative to the reader resolution, or a missing quiet zone. Allow at least three reader pixels per module, keep a margin of one module around the code, and check that the whole code sits on one surface so the depth is uniform.