Trace Resistance: 6 Rules for Reliable Measurement
Trace resistance measurement checks the resistance of a conductor, a plated hole or a solder joint by driving a known current through it and reading the voltage that appears across it. It is the electrical method behind continuity testing, coupon evaluation and joint quality studies on a PCB assembly line, and the same rules apply in the laboratory and on the production floor.
The numbers involved are small, often milliohms, so the measurement is far more sensitive to setup than a normal multimeter reading. Probe contact, lead routing, temperature and settling time all move the result, and a careless reading can easily be an order of magnitude away from the truth.
What Trace Resistance Measurement Detects
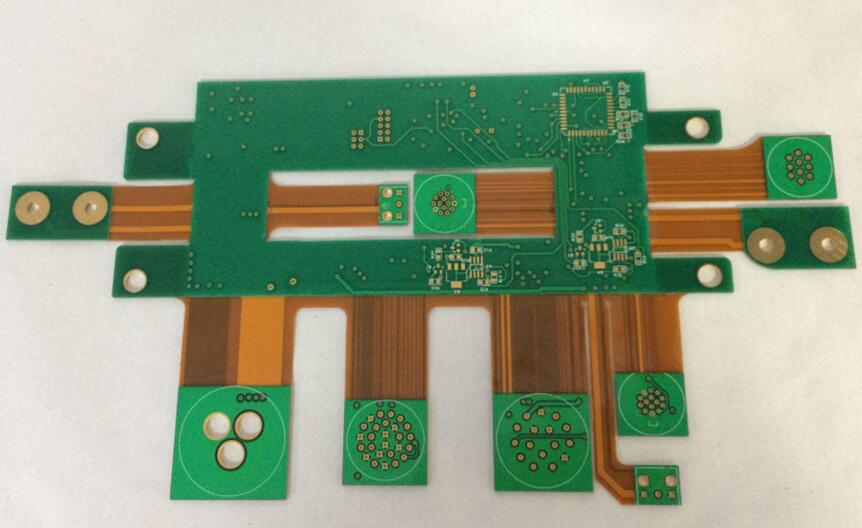
The measurement responds to anything that narrows or interrupts the conductor. A necked trace after etching, a plated barrel that is thin at the middle, a cracked knee on a flexible circuit and a solder joint with a partial void all raise the resistance, and each of them can pass a simple continuity check.
Because the change is small, the value has to be compared with a reference rather than judged on its own. That reference is normally a coupon on the same panel, built with the same process and measured with the same setup. A reference coupon also removes the effect of day to day instrument drift.
Why Four Wire Measurement Is Needed
A two wire ohmmeter measures the resistance of the trace plus the resistance of the probes, the leads and the contact points. Those extra terms can be larger than the trace itself when the traces are short and the probes are small. On a short trace the lead and contact terms can easily be five or ten times the value being measured.
Four wire measurement separates the two circuits: one pair carries the current and the other pair senses the voltage, so the contact resistance drops out of the result. The principle behind the technique is set out in four wire Kelvin measurement, and it is the reason joint resistance work relies on the same method.
Test Coupon and Probe Arrangement
A coupon is only useful when its geometry is known: trace width, length, copper weight and the layer it sits on. With those fixed, the measured value can be converted back into a resistance per square and compared with a calculation.
Probes should land on the intended pads rather than on the trace edge, and the current and sense probes should be arranged so that the sense points sit inside the current path, with the sense pair on the inside wherever the layout allows it. The coupon designs described in test coupon fabrication and the role of the coupon in PCB test coupon practice both assume that arrangement.
Contact Resistance and Probe Pressure
Contact resistance is the error that ruins the most readings. Oxide, flux residue and loose debris on the pad add a resistance that varies from touch to touch, which appears as scatter rather than as a shift and is easily blamed on the board. A worn probe tip spreads the contact area, which lowers the pressure exactly where it is needed.
Enough probe force to break through the surface film and a clean pad are the two requirements. Where spring probes are used, the force has to be checked against the fixture design, in the same way the probe work described in four wire joint resistance testing depends on stable contact.
Temperature and Its Effect on Resistance
Copper resistance rises with temperature at roughly four tenths of a percent per degree, so a coupon measured warm reads higher than the same coupon at room temperature. A ten degree difference is enough to look like a process shift.
Record the ambient temperature with every reading, or measure and report a temperature coefficient corrected value. Thermal effects are also why resistance readings taken during a thermal cycle have to be treated differently from readings taken at a stable bench temperature. Where the coupon sits on an inner layer, the copper warms more slowly and the reading settles later.
Continuity Test Versus Resistance Measurement
Continuity testing asks whether a connection exists, while resistance measurement asks how good it is. Incoming bare boards are usually checked for continuity and isolation, and the more sensitive resistance step is reserved for coupons, qualification samples and failure analysis.
Combining the two in one fixture is efficient, but the limits have to be separated. A continuity limit placed where a resistance limit should be will pass boards that a joint study later rejects. Isolation testing, which confirms that separate nets do not touch, uses the same fixture with the opposite criterion.
Setting Limits and Tolerances
The limit should come from the design, from a capability study or from a validated reference coupon, not from a number copied out of a book. Where a specification is quoted, such as the acceptance documents issued by IPC, the test method should be named with it so the value has a context.
A tolerance that is too tight generates false failures and wastes engineering time, while one that is too loose lets real defects through. The habit of judging a measurement against a defined criterion is the same one used in judging PCB quality.
Measurement Uncertainty and Repeatability
Repeatability is checked by measuring the same coupon several times without moving the probes, then again after lifting and replacing them. The first test shows the instrument, and the second shows the probing, and the two are usually very different numbers.
Where a limit sits close to the measured value, the uncertainty band has to be known. Data without an uncertainty statement cannot support an acceptance decision on a critical trace. Every reading should carry the instrument range, the drive current and the settling time, because all three change the number.
Records, Trends and Failure Analysis
Recorded over time, trace resistance becomes a process monitor. A slow rise across lots points at plating thickness or etch control, while a step change points at a material or equipment change that can be dated from the records. A coupon measured on the same fixture every week gives the most useful trend.
For failures, the resistance value locates the problem to a section of the circuit, and the section is then confirmed by grinding or by a thermal image. The record should carry the coupon identification, the setup, the temperature and the operator, so that the comparison between lots is honest.
FAQ
Why is my trace resistance reading so high? Contact resistance is the usual cause: a dirty pad, too little probe force or a lead arrangement that drops the sense circuit onto the current path. Cleaning the pads and re-seating the probes normally brings the reading back.
Can a multimeter measure trace resistance? Only for coarse checks. A handheld meter cannot separate the lead and contact terms from a few milliohms of trace, so four wire measurement is needed whenever the value matters.
How often should coupons be measured? Every panel lot during a new process or a change, then at a reduced frequency once the process is stable. The chart trends, not any single coupon, are what show that the process has moved.