
Solder Mask Spray Coating: 6 Rules for Even Films
Solder mask spray coating builds the protective film by atomizing liquid ink and depositing it on the panel surface, layer by layer, instead of pushing it through a screen. It is chosen where the copper is tall, the features are dense or the panel is too uneven for a screen printed film to cover reliably.
The process is judged by two things at once: the thickness of the film and how evenly it follows the topography underneath. A spray line that meets the thickness target on flat laminate can still leave thin corners, voids over a tall track and a film that will not survive the assembly thermal cycle.
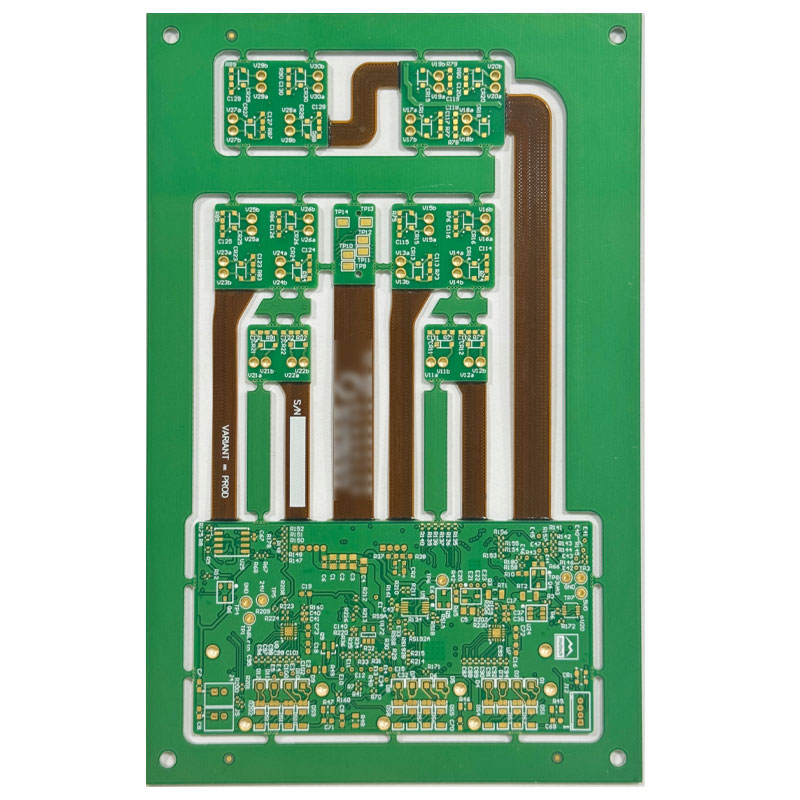
What Solder Mask Spray Coating Is Used For
Spray application suits boards with heavy copper, thick plated edges and large height differences, because the droplets can reach the sides of a raised track that a squeegee cannot fill. It is also used where the panel is short and the screen printing setup cannot be justified.
The trade is scheduling: a spray line is easier to start and harder to control than screen printing. Coverage is excellent, while thickness uniformity across a large panel, edge definition and the amount of solvent released into the workshop all depend on how well the parameters are held, and none of those variables is visible in the finished panel.
Surface Preparation Before Coating
The panel surface has to be clean, dry and free of oxide before the first pass. Residue from previous steps, fingerprints and moisture all sit between the ink and the copper, and they produce skips and poor adhesion that only appear after development.
Roughening the copper slightly improves the mechanical key, and the copper surface condition that plating leaves behind is part of that story. Any handling after cleaning should use gloves, and the interval between cleaning and coating should be short and defined rather than left to the shift.
Atomizing Pressure and Spray Pattern
Atomizing pressure breaks the ink into droplets and controls how they travel to the panel. Pressure that is too low produces a coarse spray with large droplets that flow together into a wet patch, while pressure that is too high sends fine droplets that dry in the air before they land.
The pattern overlap between passes is the second control. A fixed overlap gives a uniform film, and a nozzle that is partly blocked changes the pattern without any change in the pressure reading, which is why nozzle condition and the maintenance described in solder mask viscosity control belong in the same routine.
Viscosity and Solvent Balance
The ink arrives as a formulated product with a working viscosity that the spray head expects. Solvent added on the line lowers that viscosity, and solvent lost from an open reservoir raises it, so the value drifts in both directions during a shift unless it is measured.
Temperature moves the viscosity as well, which is why a cooler morning and a warm afternoon can produce different films from the same drum. Measuring viscosity at a controlled temperature and recording the solvent additions is the only way to keep the two ends of a shift comparable. The reading should be taken on the circulating ink rather than from the drum.
Film Thickness and Edge Coverage
Film thickness is built up over several passes, and each pass adds a small amount. The total has to sit inside the range that the specification and the assembly process allow, because a film that is too thin offers no dielectric protection and one that is too thick traps solvent and cracks.
Edge coverage is the harder target. The film naturally thins over a raised track and at the panel border, and the minimum coverage over a trace is what usually decides whether the panel passes. Thickness work such as solder mask thickness effects describes why that minimum matters more than the average.
Pre-Cure and Handling Between Steps
Pre-cure is the intermediate bake that removes most of the solvent and leaves the film dry enough to touch without being fully cured. It is a narrow window: too little and the film sticks to the photo tool, too much and the image will not develop cleanly. The solvent content at the transfer point is what decides both.
The pre-cure schedule should be qualified with the thickness and the oven, and the film should be handled by the edges only. Where the panel waits between the oven and exposure, the waiting time is part of the process and should be written down, because the film continues to change as it cools.
Exposure, Development and Final Cure
The exposed image is developed away in the areas that will be soldered, and the quality of that step depends on the pre-cure, the exposure energy and the developer. A film that was under-cured before exposure will lose fine openings during development, and the loss is rarely uniform across the panel.
Final cure follows the ink supplier schedule and sets the mechanical and electrical properties. Adhesion after cure is verified with methods such as the solder mask adhesion test, and it is the point at which a marginal spray process usually reveals itself.
Defects: Orange Peel, Skips and Sags
Orange peel appears when droplets dry before they can flow together, leaving a surface that looks like the skin of a citrus fruit. Skips come from contamination or an interrupted pattern, and sags appear where too much ink was applied in one pass and it runs before the pre-cure.
Each defect points at a specific cause: orange peel at atomizing pressure and solvent balance, skips at cleaning and nozzle condition, sags at pass thickness and gun distance. The appearance and cure consequences of a textured surface are covered in solder mask orange peel work.
Inspection, Records and Maintenance
Inspection should cover thickness, coverage over the tallest features and the appearance of the film, with a coupon from every panel or every few panels, at a frequency that matches the stability of the line. Where the process follows a published method, such as the coating guidance from IPC, that method should be named in the record.
The record should carry the ink lot, the viscosity reading, the solvent addition, the number of passes, the pre-cure and final cure schedules, and the thickness result. Contamination left on the film is also worth monitoring, since the test used in ionic contamination work shows what a later cleaning step has to remove.
FAQ
Is spray coating better than screen printing for solder mask? It is better for tall copper and dense topography, where a squeegee struggles to fill the sides of a raised feature. Screen printing still wins on thickness uniformity, edge definition and ink consumption on flat panels.
How many passes are needed to reach the thickness target? Enough to build the range the specification calls for, measured on a coupon rather than counted from a recipe. The number follows the ink, the nozzle and the line speed, and it should be re-qualified after any change to those.
Why does the film look dry before exposure? The pre-cure has removed more solvent than the process needs, which can also mean the image will not develop cleanly. Shortening the pre-cure or reducing its temperature is the usual correction, followed by a fresh adhesion check.