How to Clean a PCB: PCB Design, PCB Manufacturing & PCB Cleaning Guide
Printed circuit boards (PCBs) can easily become contaminated by dust, flux residues, oils, moisture, fingerprints, particles, and other foreign materials during handling, transportation, storage, assembly, and manufacturing. As electronic devices become smaller and PCB layouts become increasingly dense, even a small amount of contamination can affect electrical performance and long-term reliability.
Proper PCB cleaning is therefore an important part of PCB assembly, rework, maintenance, and quality control. Depending on the type of contamination, board construction, components, and required cleanliness level, different cleaning methods and cleaning agents may be appropriate.
This guide explains how to clean a PCB, introduces common PCB cleaning methods and cleaning agents, and provides practical recommendations for achieving reliable and repeatable cleaning results.
What Are the Benefits of Cleaning a PCB?
As circuit density and component integration increase, maintaining PCB cleanliness becomes more challenging and more important. Proper cleaning can help improve electrical reliability, reduce contamination-related failures, and extend the service life of electronic assemblies.
1. Prevent Corrosion
Contaminants can retain moisture and create conditions that accelerate corrosion of copper conductors, component terminals, and other exposed metal surfaces.
Certain ionic or chemically active residues can be particularly problematic. Removing contaminants helps reduce the risk of corrosion and supports long-term PCB reliability.
2. Reduce the Risk of Electrical Failures
Fine-pitch components and densely routed circuit boards have smaller spacing between conductive features. Dust, metallic particles, flux residues, or other conductive contamination can create unintended electrical paths between adjacent pads, traces, or component terminals.
Proper PCB cleaning helps reduce the risk of:
- Electrical leakage
- Short circuits
- Insulation resistance degradation
- Intermittent failures
- Electrochemical migration
3. Improve PCB Reliability
PCB cleanliness is closely related to the reliability of an electronic assembly. Residues left on the board may absorb moisture or interact chemically with conductive surfaces.
For applications requiring high reliability, cleaning should be treated as part of the overall manufacturing and quality-control process rather than as an optional cosmetic operation.
4. Improve Surface Appearance
Although appearance does not necessarily determine electrical performance, a clean PCB provides a more professional appearance and makes subsequent inspection easier.
A clean surface also makes it easier for technicians to identify:
- Soldering defects
- Flux residues
- Damaged components
- Contamination
- Corrosion
- PCB surface defects
5. Support Conformal Coating and Subsequent Processing
If a PCB will receive a conformal coating, contamination must be properly controlled beforehand. Residues, oils, moisture, and other contaminants can interfere with coating adhesion and coverage.
Therefore, cleaning may be an important preparation step before conformal coating, depending on the coating manufacturer’s process requirements.
Common PCB Cleaning Methods
There is no single cleaning method suitable for every PCB. The appropriate method depends on the contamination type, PCB construction, component sensitivity, cleaning chemistry, production volume, and required cleanliness level.
The most common PCB cleaning methods include manual cleaning, ultrasonic cleaning, aqueous or semi-aqueous cleaning, and vapor degreasing.
1. Manual PCB Cleaning
Manual cleaning is commonly used for prototypes, repairs, rework, maintenance, and low-volume production. It provides direct control over the cleaning area but requires appropriate tools and trained personnel.
Step 1: Disconnect Power
Before cleaning, completely disconnect the PCB from its power source.
Remove batteries, power connectors, and other sources of stored electrical energy where applicable. The board should not be powered during cleaning.
Step 2: Inspect the PCB
Inspect the board under adequate lighting.
Look for:
- Dust and loose particles
- Flux residues
- Oil or grease
- Fingerprints
- Corrosion
- Moisture
- Foreign materials
- Damaged components
For densely populated PCBs, magnification or a microscope can help identify small contaminants.
Step 3: Remove Loose Particles
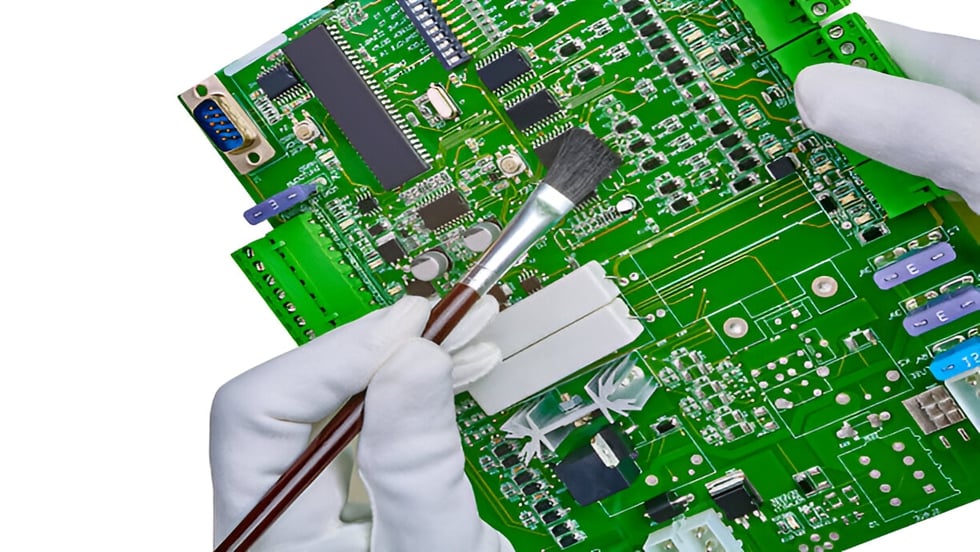
Use an appropriate antistatic brush to gently remove loose dust and particles.
Controlled air can also be used where appropriate. Avoid using excessive air pressure because it can dislodge small components or force contamination into connectors and narrow gaps.
Step 4: Apply an Appropriate Cleaning Agent
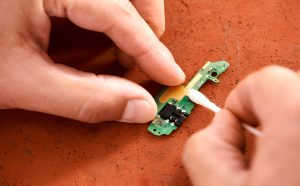
For compatible PCB assemblies, apply a suitable cleaning agent such as isopropyl alcohol (IPA) to a lint-free cloth, swab, or appropriate cleaning tool.
Gently wipe contaminated areas to loosen flux residues and other surface contamination.
Do not assume that IPA is suitable for every PCB, component, connector, plastic housing, label, or coating. Always consider material compatibility before applying a solvent.
Step 5: Remove Residues
Use a clean lint-free cloth or swab to remove dissolved contamination.
For stubborn residues, controlled mechanical action may be necessary. Avoid excessive pressure, especially around small components, fine-pitch packages, and delicate solder joints.
Step 6: Dry the PCB
Allow the board to dry completely.
Controlled air may be used to remove remaining solvent or moisture. Make sure cleaning liquid has not accumulated underneath components, connectors, shields, or other areas where it may be difficult to evaporate.
Step 7: Perform a Final Inspection
Inspect the PCB again after cleaning.
If contamination remains, repeat the appropriate cleaning process. The board should only proceed to the next manufacturing or service step after the required cleanliness level has been achieved.
2. Ultrasonic PCB Cleaning
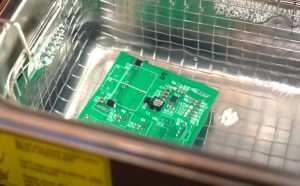
Ultrasonic cleaning uses high-frequency acoustic energy to create cavitation in a cleaning solution. The resulting microscopic activity can help remove contaminants from difficult-to-reach areas.
This method can be useful for certain batch-cleaning applications, but it should not automatically be considered safe for every assembled PCB.
Some components, sensors, crystals, MEMS devices, displays, microphones, speakers, and other structures may be sensitive to ultrasonic energy. Therefore, compatibility should be confirmed before ultrasonic cleaning.
Typical Ultrasonic Cleaning Process
- Disconnect all power sources from the PCB.
- Remove batteries or other components that should not be immersed.
- Place the PCB in a suitable basket or fixture.
- Select a cleaning solution compatible with the PCB materials and components.
- Set the cleaning temperature, time, and ultrasonic parameters according to the cleaning chemistry and assembly requirements.
- Run the cleaning process.
- Rinse the PCB when required by the cleaning process.
- Use appropriate drying methods to remove remaining moisture.
- Inspect the PCB for residual contamination.
For production environments, the cleaning process should be validated rather than relying on a generic ultrasonic time or temperature.
3. Aqueous and Semi-Aqueous Cleaning
Aqueous cleaning uses water-based chemistry to remove contaminants such as flux residues and process residues. Semi-aqueous cleaning uses a combination of water and organic components.
These methods are commonly used in controlled manufacturing environments because the process can be automated and scaled for production.
Typical Process
- Remove power and prepare the PCB for cleaning.
- Select a compatible aqueous or semi-aqueous cleaning chemistry.
- Apply the cleaning solution using the specified equipment and process parameters.
- Rinse the PCB thoroughly when required.
- Remove residual moisture using an appropriate drying process.
- Inspect the PCB to confirm that contamination has been adequately removed.
A major consideration with aqueous cleaning is drying. Water trapped underneath components, connectors, shields, or other structures can create reliability problems if the assembly is returned to service before it is completely dry.
4. Vapor Degreasing
Vapor degreasing uses solvent vapor to dissolve and remove certain types of oils, grease, flux residues, and other contaminants.
A typical process includes:
- Place the PCB in an appropriate basket or fixture.
- Position the board in the vapor zone.
- Allow solvent vapor to condense on the cooler PCB surface.
- Allow the condensed solvent to dissolve and carry away compatible contaminants.
- Rinse the PCB according to the selected process.
- Remove the PCB from the vapor zone.
- Allow the board to cool and dry.
- Inspect the assembly for remaining contamination.
Because vapor degreasing involves solvents and specialized equipment, the process must be operated according to the equipment manufacturer’s safety requirements and the solvent manufacturer’s instructions.
What Types of PCB Cleaning Agents Are Available?
Different contaminants require different cleaning chemistries. Selecting a cleaning agent should therefore begin with identifying the contamination rather than simply choosing the strongest available solvent.
Common categories include solvent-based cleaners, aqueous cleaners, and semi-aqueous cleaning solutions.
Solvent-Based PCB Cleaners
Solvent-based cleaners can be effective against organic contaminants such as oils, grease, and certain flux residues.
Common examples include:
- Isopropyl alcohol (IPA)
- Acetone
- Hydrocarbon-based solvents
- Specialized electronics cleaning solvents
However, solvent compatibility must always be considered. Some solvents can damage plastics, labels, adhesives, coatings, or other materials used in an electronic assembly.
Adequate ventilation and appropriate handling procedures are also essential.
Water-Based or Aqueous Cleaners
Aqueous cleaners use water as the primary medium and may contain surfactants, builders, or other additives designed to remove specific types of residues.
They can be particularly useful for compatible water-soluble fluxes and other process residues.
However, aqueous cleaning normally requires effective rinsing and drying. Incomplete rinsing can leave chemical residues, while inadequate drying can leave moisture trapped within the assembly.
Semi-Aqueous Cleaners
Semi-aqueous cleaning combines water with an organic cleaning component.
These cleaners can be useful for certain flux residues, oils, and other contaminants that may be difficult to remove using water alone.
The chemistry should be selected according to the contamination type and the materials present on the PCB.
How to Choose the Right PCB Cleaning Method
Choosing the correct PCB cleaning process requires more than simply selecting a cleaning solvent.
Consider the following factors:
1. Identify the Contaminant
Determine whether the contamination consists primarily of:
- Flux residues
- Dust
- Oil or grease
- Fingerprints
- Ionic residues
- Corrosion products
- Moisture
- Manufacturing debris
Different contaminants respond differently to different cleaning chemistries.
2. Consider PCB Construction
Review the PCB’s:
- Number of layers
- Component density
- Surface finish
- Solder mask
- Conformal coating
- Connectors
- Switches
- Sensors
- Sensitive components
A cleaning method that works well for a bare PCB may not be appropriate for a fully assembled PCBA.
3. Check Component Compatibility
Not every component is suitable for immersion, aggressive solvents, ultrasonic energy, or high-temperature cleaning.
Always check component and assembly documentation when necessary.
4. Consider Production Volume
Manual cleaning may be practical for prototypes and repair work, while automated spray, aqueous, or other production cleaning systems may provide better consistency for high-volume manufacturing.
5. Define the Required Cleanliness Level
The required cleanliness level depends on the application and reliability requirements.
For demanding applications, cleanliness verification may involve specialized analytical methods rather than visual inspection alone.
PCB Cleaning Inspection and Verification
Cleaning should not end when the PCB looks clean.
Visual inspection is useful, but it cannot detect every type of contamination. Depending on the application, additional verification methods may include:
- Visual inspection
- Magnified inspection
- Ionic contamination testing
- Ion chromatography
- Surface insulation resistance testing
- Electrical testing
- Coating adhesion evaluation
The appropriate inspection method should be selected according to the contamination risk and product requirements.
For high-reliability assemblies, cleanliness criteria should ideally be defined during the PCB Design and manufacturing planning stages rather than added after production problems occur.
PCB Cleaning Best Practices
To achieve consistent cleaning results, manufacturers and technicians should follow several basic principles:
- Always disconnect power before cleaning.
- Identify the contamination before selecting a cleaning agent.
- Verify chemical compatibility with PCB materials and components.
- Use ESD-safe tools when handling sensitive electronics.
- Avoid excessive mechanical force around delicate components.
- Avoid uncontrolled high-pressure air.
- Ensure complete drying after aqueous cleaning.
- Do not use ultrasonic cleaning without confirming component compatibility.
- Avoid repeated unnecessary heating or solvent exposure.
- Inspect the PCB after cleaning.
- Validate the cleaning process when moving into production.
- Maintain documented cleaning parameters and inspection criteria.
PCB Cleaning in PCB Manufacturing and PCB Assembly
Cleaning should be considered as part of the broader PCB Manufacturing and PCB assembly process.
During manufacturing and assembly, PCBs can encounter different types of contamination at different stages. These may include fabrication residues, handling contamination, soldering residues, flux, dust, oils, and other foreign materials.
A well-controlled production workflow integrates cleaning with:
PCB Design → DFM Review → PCB Fabrication → PCB Assembly → Soldering → Cleaning → Inspection → Electrical Testing → Final Quality Control
The exact sequence depends on the product and assembly process. Not every PCB requires the same cleaning operation, and some no-clean processes are designed to leave residues within specified process limits.
Therefore, cleaning requirements should be established according to the solder paste or flux chemistry, component requirements, PCB materials, coating requirements, environmental conditions, and final product reliability targets.
How Kingda Supports PCB Manufacturing and Assembly Quality
For companies looking for an integrated manufacturing partner, Kingda provides PCB fabrication and PCBA services covering design support, PCB manufacturing, component sourcing, SMT assembly, through-hole assembly, inspection, and testing.
A controlled manufacturing workflow can help reduce contamination-related risks by integrating process control, inspection, assembly, and testing rather than treating PCB cleaning as an isolated operation.
For engineers and purchasing teams, this integrated approach can simplify supplier management while improving consistency between PCB Design, PCB Manufacturing, and PCB assembly requirements.
Common Mistakes When Cleaning a PCB
Using an Incompatible Solvent
A solvent that removes contamination effectively may also attack plastics, adhesives, coatings, or labels.
Always verify material compatibility.
Cleaning a Powered PCB
Cleaning an energized PCB creates unnecessary electrical and safety risks.
Always disconnect power before cleaning and consider stored energy where applicable.
Using Excessive Mechanical Force
Aggressive brushing or scraping can damage solder mask, component markings, solder joints, or delicate components.
Use controlled mechanical action.
Failing to Dry the Board Completely
Moisture trapped under components or inside connectors can cause problems after the board is powered.
Complete drying is particularly important after aqueous cleaning.
Assuming a Visually Clean PCB Is Electrically Clean
A PCB can appear clean while still containing ionic or microscopic contamination.
For demanding applications, appropriate cleanliness verification may be necessary.
Conclusion
Proper PCB cleaning is an important part of maintaining electronic performance, reliability, and long-term service life. Contaminants such as flux residues, dust, oils, moisture, and foreign particles can contribute to corrosion, leakage, electrical failures, and other reliability problems.
The best cleaning method depends on the contamination type, PCB construction, component sensitivity, production volume, cleaning chemistry, and required cleanliness level. Manual cleaning can be practical for prototypes and repair work, while aqueous, semi-aqueous, ultrasonic, or other controlled processes may be more suitable for specific production applications.
Most importantly, PCB cleaning should be treated as a controlled engineering process. Proper chemical selection, process parameters, drying, inspection, and verification are essential for achieving consistent results.
By integrating cleaning requirements into PCB Design, PCB Manufacturing, and PCB assembly planning, manufacturers can reduce contamination-related failures and improve overall product reliability.
Article Summary
Cleaning a PCB is more than simply removing visible dirt. It is a controlled process designed to remove harmful contaminants while protecting PCB materials and components. Choosing the right cleaning method, verifying chemical compatibility, ensuring complete drying, and performing appropriate inspections can significantly improve PCB reliability and service life.
For complex or high-reliability electronic products, working with an experienced PCB manufacturing and assembly partner such as Kingda can help integrate design, fabrication, assembly, inspection, testing, and process control into a more consistent production workflow.