PCB Tooling Holes: Purpose, Design and Registration Guide
Why PCB Tooling Holes Exist
Pcb tooling holes, sometimes called registration or target holes, are precision holes drilled at defined positions on a production panel so that every processing step, imaging, lamination, drilling, solder mask and routing, aligns to the same physical reference. A multilayer board is built by stacking several copper layers that must line up within tight limits, and no single layer can serve as the reference for all the others once the panel moves between machines. Tooling holes give each operation a fixed datum so the artwork, drill program and final profile land where the design intends.
How Registration Targets Work
Modern multilayer production usually combines two ideas. First, inner layer targets, often cross, circle or chevron patterns in the copper, are printed on inner layers and later located by X-ray through the panel; the X-ray machine finds these hidden targets and drills the outer tooling holes through the whole stack at the correct position. Second, the exposed tooling holes then guide drilling, imaging and routing fixtures mechanically. This two-stage approach converts an invisible inner reference into a physical hole that every downstream process can use, which is why the operation is often called target drilling in the factory.
Where Tooling Holes Are Placed
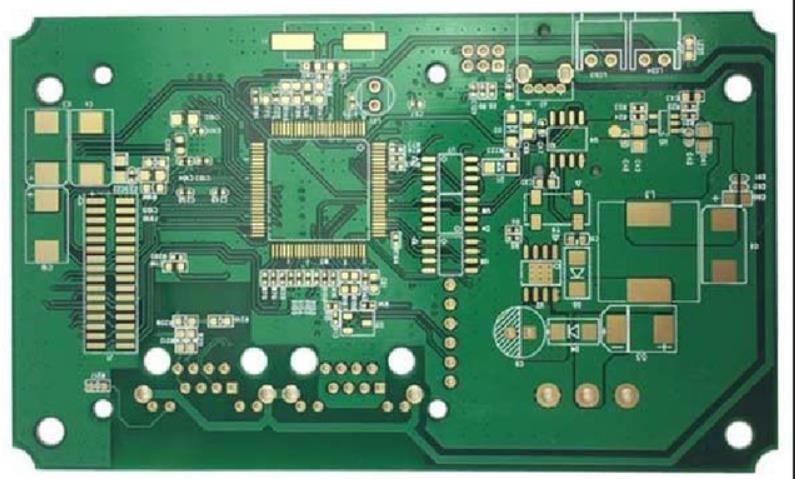
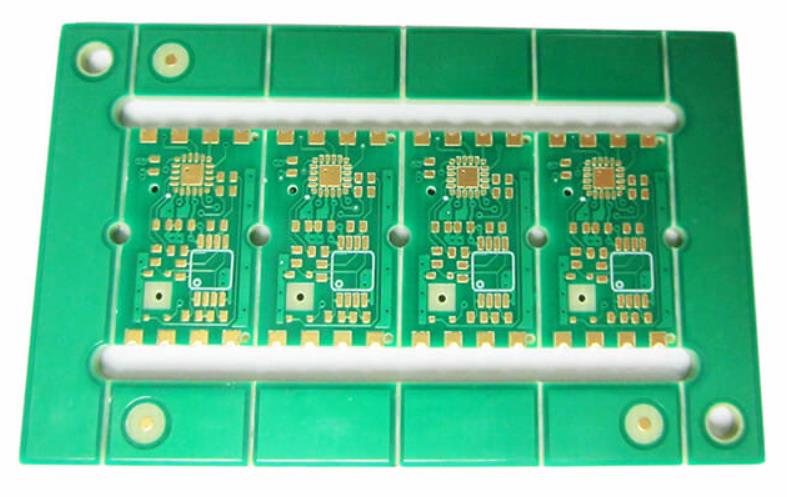
Tooling holes sit in the production border or scrap area of the panel, never inside the individual board outline, so they do not remain on the finished product. Their positions are defined by the panel design and agreed with the manufacturer, typically near the panel edges and distributed to keep the board stable during processing. Large panels may carry several sets so each section of the panel stays registered, and the holes are sized for the pins used by the drilling and imaging machines. The panel drawing must identify them clearly so CAM does not treat them as product holes.
Alignment Accuracy Matters
Layer-to-layer registration directly controls whether buried traces meet their vias, whether inner planes connect at the right points and whether the mask openings stay centered on pads. As layer count and density grow, the allowed offset shrinks, and the accuracy of tooling holes becomes a limit on the whole board. Poorly drilled or damaged tooling holes allow the panel to rotate or translate slightly between steps, which shows up as layer offset, misregistered vias or pads that appear in the wrong place. High-density and HDI boards therefore demand the most precise target drilling and the most careful handling of the tooling holes afterward.
The Target Drilling Process
Target drilling normally happens after lamination but before functional drilling. The panel enters an X-ray drill that reads the inner layer targets, computes the actual position and rotation of the layers, and drills the tooling holes at the correct coordinates so that all layers, not just the outer copper, are centered on the reference. Any skew between layers is averaged or corrected at this stage, and the resulting holes become the datum for the through-hole drilling program and later artwork. For blind and buried via structures with sequential lamination, target drilling repeats at each build-up stage so every lamination cycle starts from an accurate reference.
Fiducials and Optical Registration
Tooling holes handle machine registration in the factory, while copper fiducials handle optical alignment at assembly. SMT pick-and-place machines and AOI systems use fiducial marks on the finished board, usually three marks in an L pattern or a global plus local set, to correct for board position and rotation on the line. Designers should include both systems correctly: tooling holes for fabrication panel processing and fiducials for assembly. Confusing the two, or omitting fiducials on dense boards, makes accurate placement much harder even when the fabrication registration is perfect.
Design Rules for Tooling Holes
Follow the manufacturer panel specification when placing tooling holes, keep them out of the board outline and away from scored or routed edges, and define their size and position in the panel drawing. Choose tooling hole positions that give stable, repeatable clamping, and add extra sets for very large panels. When a design is panelized for production, the CAM team normally adds the tooling automatically, so review the panel layout early to confirm the holes do not collide with test points, tabs or other features. Tolerances on hole position and diameter should match the process capability instead of asking for tighter values than the equipment can hold.
Quality Checks
Factories verify registration by measuring layer-to-layer offset on coupons or actual panels, checking tooling hole position and diameter, and inspecting alignment after imaging and drilling. X-ray inspection of coupons confirms the inner layer targets stayed aligned through lamination, and cross-sections reveal how accurately vias meet the inner rings. When offset trends appear, the factory reviews target drilling data, pin wear, panel handling and lamination shrinkage before more panels run, because continuing production with a drifting reference wastes material and time.
Working With the Manufacturer
Registration quality starts with data. Submit the stack-up, layer targets and panel requirements clearly, and during PCB design and layout review confirm the tooling hole plan with the PCB manufacturing team. For dense and HDI boards, ask how target drilling and registration are controlled at each build-up stage, and use PCBA testing plus assembly feedback to confirm that pads and vias align well enough for fine-pitch placement on the finished product.
A useful habit is to review the panel drawing together with the drill file before ordering, because registration problems are far cheaper to fix in CAM than on the production floor.
Panel Design Considerations
The way a panel is laid out affects how well tooling holes can do their job. Keep the individual boards oriented consistently, leave enough border width for the holes and pins, and avoid placing heavy copper imbalance that bends the panel between steps. Scored panels need tooling that holds both halves of the score line rigidly, and routed panels should locate the tooling clear of the router path. When multiple designs share one panel, each design still uses the same global tooling datum so nothing shifts when the panel is separated.
Tooling Holes FAQ
Q1: What are PCB tooling holes for? They are precision reference holes in the production border that keep imaging, lamination, drilling, mask and routing aligned to the same datum.
Q2: Do tooling holes stay on the board? No; they are placed in the panel border and removed with the outline after routing, so the finished product has none.
Q3: How are registration targets found through the layers? X-ray machines locate the copper targets on inner layers and drill the tooling holes through the panel at the correct position.
Q4: Are tooling holes the same as fiducials? No. Tooling holes guide fabrication processing, while fiducials are copper marks that SMT placement and AOI use on the finished board.
Q5: Why does registration matter on HDI boards? Dense and HDI designs have tight layer offset budgets, so accurate target drilling at each build-up stage is essential for via-to-pad alignment.
Conclusion
Pcb tooling holes are the quiet foundation of multilayer accuracy, translating hidden inner layer targets into physical reference holes that every process step can trust. Design them into the panel correctly, let X-ray target drilling align each lamination stage, and verify registration with coupons, and the resulting board will place, solder and perform as designed.