Footprint: Pre-Prototype Review: The Checks That Save a Week
The first prototype is the most expensive board a project will ever build, not because of its price but because of what a delay at that stage costs. Reviewing the design before the prototype removes most of the reasons a first board fails.
Why First Boards Fail
The failures are rarely caused by the circuit being wrong. They are caused by a footprint that does not match its package, a polarity mark that was misread, a net that was not connected in the schematic, or a power rail that was never enabled.
Those are mechanical and administrative faults rather than design faults, and each has a check that takes minutes. The checks are worth doing because a first board that works on the first attempt saves a week.
Footprint and Package Verification
A footprint is drawn once and reused, and an error in it propagates to every design that uses it. The verification compares the footprint dimensions with the package drawing rather than with another footprint.
The items that matter are the pad dimensions, the pitch, the pad spacing, the courtyard and the position of pin one. A footprint that is correct in every respect except the pin one orientation is as damaging as one that is wrong throughout. Our component selection notes describe the package parameters.

Schematic and Netlist Checks
The netlist check finds nets that are connected to nothing, outputs that are tied together and inputs that are floating. The errors are generated automatically and they are the cheapest defects to remove.
The schematic and the layout must also agree on the reference designators and on the values. A discrepancy between them produces a board that is built to one document and tested against another.
Power and Enable Paths
Every rail needs a source, an enable and a path to the load, and the enable is the one most often missed. A regulator that is held disabled by a floating enable pin produces a board that appears dead with no measurable fault.
The check is to trace each rail from its source to its load and to confirm that every enable has a defined state. A pull-up or pull-down on each enable pin costs one resistor and removes an entire class of bring-up failure.
Reviewing the Layout Against the Rules
The design rule check finds the violations that the constraints encode, and it is only as good as the constraints. The minimum width, the clearance, the annular ring and the mask expansion all have to be set for the process rather than left at a default.
The results should be reviewed rather than accepted, because a violation may be deliberate. Each waiver should be recorded with its reason so that a later reader does not treat it as an oversight. Our design review notes describe the order.
Silkscreen and Assembly Instructions
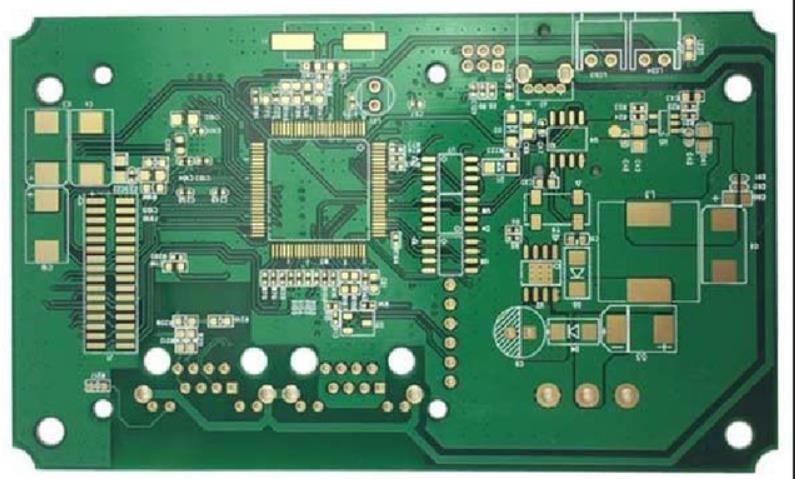
The silkscreen is what the assembly house reads, and it should show the reference designators, the polarity and the pin one of every part where those are not obvious from the package outline.
The assembly drawing carries the instructions that the silkscreen cannot: the height limits, the parts that must not be washed, the sequence for a mixed board and the torque for a fastener.
The Manufacturing Review
The design should be compared with the capability of the shop before the data is sent, covering the minimum features, the aspect ratio, the finish, the panel arrangement and the impedance targets. The comparison is a checklist rather than a study.
Where a design sits at a limit, the discussion should happen before the order rather than after the boards arrive. Our data review notes describe the items.
Planning the Bring-Up
The bring-up provisions belong in the layout: a link or a removable component at the source of each rail so that the current can be measured, test points on the clock and the reset, and a debug header that remains accessible after assembly.
With those in place, the first hour with the board is a sequence of measurements rather than an investigation. Without them, it is an investigation that ends in a rework.
Process Control and Verification
On a design of this kind, netlist check is the item that decides how the rest of the board is arranged. The measurements that matter are the repeatable ones: conductor width and spacing, annular ring, finished hole size, plating thickness and surface finish are all verifiable on a coupon that travels with the panel. Running a first article through the same checks as the production panel confirms that the two agree, and that comparison is the cheapest form of process control available at prototype stage.
Keeping a sample from the panel turns a dispute into a measurement, because the same coupon can be re-examined by both parties without rebuilding the batch. Reviewing the design before the data is released is cheaper than correcting it after the panel is in the tank, because every step downstream inherits the decision made at the front end.
Documenting the assumption is part of the design work, and a short note on the drawing prevents a question that would otherwise arrive a day later and cost a day of schedule. The process window is set by the narrowest step in the flow, so an improvement anywhere else shows up as margin rather than as yield until that step is addressed.
Process Control and Verification
On a design of this kind, netlist check is the item that decides how the rest of the board is arranged. The measurements that matter are the repeatable ones: conductor width and spacing, annular ring, finished hole size, plating thickness and surface finish are all verifiable on a coupon that travels with the panel. Running a first article through the same checks as the production panel confirms that the two agree, and that comparison is the cheapest form of process control available at prototype stage.
Keeping a sample from the panel turns a dispute into a measurement, because the same coupon can be re-examined by both parties without rebuilding the batch.
Process Control and Verification
On a design of this kind, netlist check is the item that decides how the rest of the board is arranged. The measurements that matter are the repeatable ones: conductor width and spacing, annular ring, finished hole size, plating thickness and surface finish are all verifiable on a coupon that travels with the panel. Running a first article through the same checks as the production panel confirms that the two agree, and that comparison is the cheapest form of process control available at prototype stage.
FAQ
How long should the pre-prototype review take? An afternoon for a moderately complex board, which is a small fraction of the week a failed first prototype costs. The review is mechanical and does not require new analysis.
What is the most common cause of a dead first board? A power rail that is not enabled, or a regulator that is soldered with the wrong orientation. Both are caught by a visual check and by a resistance measurement before power is applied.
What does gopcb check before building a prototype? We check the data against our capability, the stack and the impedance targets, the panel arrangement and the drill table. Where something in the data would prevent the board working as drawn we raise it before the panel is released.