SMT Placement Machine Programming: Setup and Optimization
SMT placement machine programming is the process of creating, optimizing, and verifying the program that controls a pick-and-place machine. The program tells the machine which components to pick, where to pick them, where to place them, and how the placement head should move between each position. A well-written program improves speed, accuracy, and first-pass yield.
Programming is more than entering a list of components. The engineer must prepare board images, register components, arrange feeders, optimize pickup order, and check the program against the assembly documentation.
This guide explains the main steps used to program an SMT placement machine and how to avoid common causes of low placement efficiency.
Edit and Optimize the Product Program
The placement program usually starts from the PCB design data. The engineer imports the board layout, component list, and coordinates into the machine software, then optimizes the program for the available feeders and nozzles.
Optimization determines the order in which components are picked and placed. A good program reduces the distance the head travels, balances the work between multiple placement heads, and groups components that can be picked from the same feeder area.
The program should be reviewed whenever the product changes. Component values, package types, board revisions, and feeder locations all affect how the machine can work.
Prepare PCB Fiducial and Mark Images
The placement machine needs reference images so it can find the board on the conveyor. Fiducial marks on the PCB are used as alignment references for the vision system.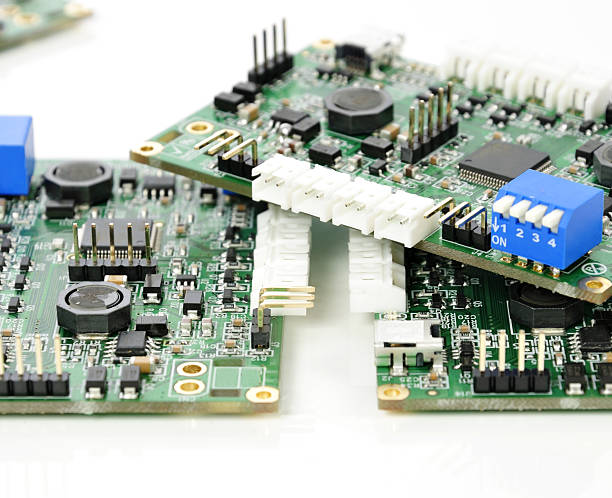
The engineer should create and save fiducial images in the machine program. The camera uses these images to measure the board position before placement begins.
Additional mark images may be needed for panel arrays, local alignment, or unusual board features. Every reference image should be checked under production lighting so the camera can detect it reliably.
If the fiducial image is unclear, the machine may stop repeatedly or place components in the wrong position. The program should therefore be verified with a real board before mass production.
Register Components in the Image Library
Every component type used in the program should have a component image or data record in the machine library. The library contains the body size, lead pattern, height, and visual characteristics needed for correct placement.
If a component has not been imaged before, the engineer must create an image and register it in the image library. The image is used by the camera to inspect the component after it is picked and before it is placed.
Components that are not registered must be added before production. Unregistered components can cause false detection errors, incorrect orientation, or missed placements.
The library should be reviewed when a supplier changes its package dimensions. A small change in body size or lead position can affect the vision system and placement accuracy.
Arrange Feeders to Reduce Travel
Feeder arrangement has a large effect on placement speed. Components that are used frequently should be placed close together so the head does not travel long distances between pick and place operations.
When multiple vibrating feeders or tape feeders are used, components with short bodies should be arranged efficiently on the same machine frame. The engineer should avoid leaving empty feeder stations in the middle of a component group because an empty station increases the distance between adjacent picks.
Feeder assignment should be balanced across the machine. If one placement head has a much longer sequence than the others, the total cycle time will increase even when the machine has unused capacity.
The program should be re-optimized after any feeder location change. Small layout improvements can reduce cycle time by several seconds per board on a high-volume line.
Use Single Pickup for Difficult Components
Large or fragile components should not be picked in the same sequence as ordinary chips. Devices such as a QFP with more than 160 leads, a large PLCC, a BGA, or a long connector need careful handling to maintain placement accuracy.
The program should assign these components to single pickup mode. A single-pick sequence lets the machine inspect the component, correct its orientation, and place it without stress from a simultaneous multi-nozzle operation.
Single pickup may be slower for that component, but it protects the part and reduces placement errors. The engineer should identify high-risk devices during program preparation instead of discovering the problem on the production line.
Save and Check the Program
After the program has been edited, it should be saved to the machine. The software should be checked for error messages before the program is used for production.
Error messages may describe missing components, invalid coordinates, unregistered images, feeder conflicts, or incompatible nozzle assignments. Each error should be corrected until the program check is clear.
Do not assume that a program without an error message is correct. The engineer should still compare the program with the assembly documentation and run a first-article placement before high-volume production.
Check the Component List Against the BOM
The placement program should be compared with the component list in the PCBA process document. The engineer should check every program step for the correct component name, reference designator, package type, model, and specification.
If the program does not match the BOM, the machine can place the wrong component or place the correct component at the wrong location. Changes should be corrected in the program and the documentation before the first board is built.
The BOM check should also confirm that the polarity of diodes, capacitors, and connectors is correct. Orientation errors are difficult to identify after reflow unless the design has clear visual markers.
Check Every Feeder Station
The component loaded at each feeder station must match the component named in the placement program. A feeder containing the wrong tape or the wrong orientation will place the wrong part even if the program is otherwise perfect.
The engineer should compare the part number on each feeder with the pick program before the first board is run. Feeder positions should be marked clearly so operators can reload the line correctly.
When a component runs out, the new reel should be verified against the same part number. Reels with similar body sizes may contain completely different values or specifications.
Verify Component Coordinates With the Camera
The machine camera should be used to check the X and Y coordinates of each component against the center of the pad on the PCB. This verifies that the imported data matches the actual board artwork.
The rotation angle of each component should also be checked against the position drawing in the process document. A rotation error of 90 or 180 degrees can create a functional failure after soldering.
If the program is not corrected now, the operator may need to adjust every placement after the first board. This is slower and less accurate than correcting the coordinate data in advance.
After the program has been verified, the placement positions should be confirmed by placing a sample board and comparing the actual results with the design.
Back Up the Approved Program
A verified placement program should be saved to a backup drive. The backup should include the board image, component library data, feeder setup, and program revision information.
If the machine memory is lost or the program is changed accidentally, the backup allows production to restart quickly. The backup should be stored in a controlled location and updated after each approved change.
The program name should include the product, revision, and date so the operator can identify the correct version. A clear revision system prevents a repeat run from using outdated component data.
Check the First Article Before Production
After the program is saved and checked, a first article should be produced and inspected. The first board verifies that all components are placed in the correct position with the correct orientation.
The first article should be inspected under magnification, especially around fine-pitch components and connectors. If a placement error is found, the program should be corrected before the full batch is run.
After inspection passes, the program can be released for production. Production should continue to monitor placement quality so that feeder, nozzle, and component changes do not create new errors.
Why Placement Efficiency Drops
One common cause of low placement efficiency is inadequate vacuum at the nozzle. If the machine cannot hold the component securely, it will fail to pick, drop the part, or place it in the wrong position.
Vacuum problems can come from a worn nozzle, an aged rubber air hose, a damaged seal, or an incorrect pressure setting. The machine should detect low vacuum and stop so the operator can correct the condition.
External contamination can also block the nozzle. Cut-tape components packed in woven or paper carrier tape can release fibers that collect inside the nozzle over time. Nozzles should be cleaned and inspected on a regular schedule.
Program errors reduce efficiency because the machine spends time on false picks, missed components, and repeated vision checks. The operator should receive training on program setup and feeder preparation so these errors are avoided.
Component Quality and Mechanical Maintenance
Component quality directly affects placement efficiency. Bent leads, damaged packages, incorrect tape pockets, and missing components cannot be placed reliably by any machine.
Incoming components should be inspected before they are loaded. The placement nozzle should be selected according to the component size so it does not bend leads or crush the package.
Mechanical parts such as nozzles, cameras, rails, and motors wear over time. Regular preventive maintenance extends the life of the machine and keeps placement accuracy within specification.
A machine that is not maintained will gradually produce misaligned components, missing picks, and other quality problems that are difficult to separate from program issues.
Combine Programming With Process Control
SMT placement programming should be integrated with solder paste printing, reflow, and inspection. The placement program must match the stencil layout and the board artwork so that components align with their pads.
A professional SMT PCB assembly service uses verified placement programs for every product. The engineering team should review coordinates, feeder assignment, and component libraries during new product introduction.
For a full turnkey project, the assembly partner should coordinate PCB assembly documentation, BOM data, and placement programming so there are no mismatched versions.
Automated optical inspection and PCBA testing should be used after placement and reflow to confirm that the machine placed every part correctly.
First article inspection and quality management records help the factory track placement performance and correct small process changes before they become defects.
When components are large or sensitive, the placement program should be reviewed with the PCB design and layout team so that pad geometry and component spacing support reliable machine placement.
Conclusion
SMT placement machine programming is a repeatable engineering process. The engineer prepares board references, registers components, arranges feeders, optimizes the pick order, and verifies the program against the BOM and artwork.
Low placement efficiency is usually caused by a small number of process problems. Checking vacuum, cleaning nozzles, training operators, and maintaining the machine prevents most lost production time.
When programming is done carefully, an SMT line can place components quickly and accurately, producing boards with high first-pass yield and reliable performance.