Double-Sided PCB Manufacturing and Assembly Guide
Double-sided PCB manufacturing allows copper traces and components on both sides of the board, making it possible to fit more functions into a compact design. These boards are usually made from epoxy glass copper-clad laminate and are widely used in communication devices, instruments, computers, and industrial electronics. Manufacturing a double-sided PCB requires drilling, through-hole plating, imaging, etching, solder mask, surface finish, and electrical testing. Assembly adds components on one or both sides and verifies the finished product.
This guide explains the process and assembly steps for double-sided PCBs and how to ensure quality from bare board to final enclosure.
Double-sided boards also make routing easier for mixed signal designs. Analog traces can be separated from digital or power traces on opposite sides, improving signal integrity when the design is planned carefully.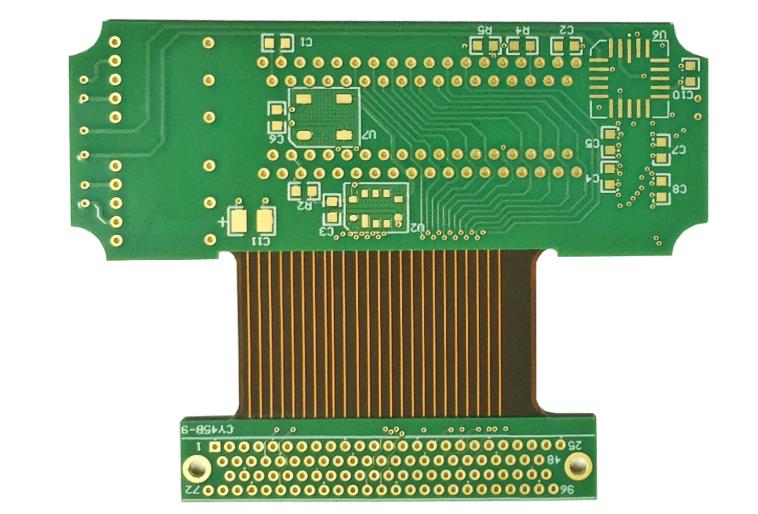
By using both sides effectively, designers can reduce the board area and fit the product into a smaller enclosure without immediately moving to a more expensive multilayer stackup.
Why Use a Double-Sided PCB
When a single-sided board cannot provide enough routing space, a double-sided design gives designers a second layer for traces and components.
Through-hole plating creates electrical connections between the top and bottom layers. This allows traces to cross over or under each other without the space restrictions of a single-sided layout and improves routing efficiency.
Double-sided boards remain more economical than multilayer boards when the circuit complexity is moderate.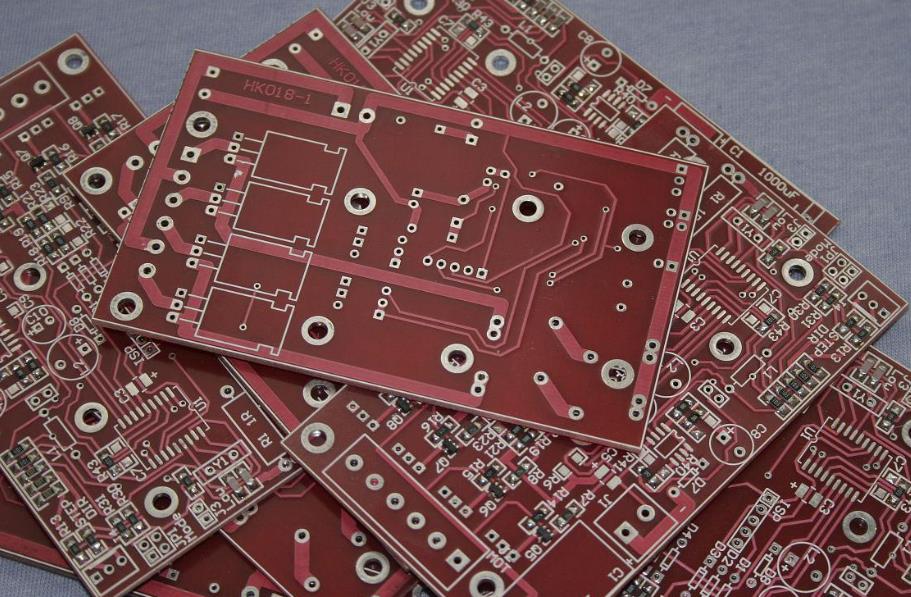
Material thickness and copper weight must be specified on the fabrication drawing. If the design requires controlled impedance, the dielectric thickness between the top and bottom copper layers must be defined.
Common Base Materials
Epoxy glass laminate, commonly known as FR-4, is the most common material for double-sided PCBs. It provides good electrical insulation, mechanical strength, and process compatibility.
Other laminates may be used when the board requires higher temperature, lower loss, or flexible construction. The material should match the final operating environment.
The copper foil weight is selected according to current requirements and manufacturing capability.
SMOBC Process Overview
Many double-sided plated-through boards use the solder mask over bare copper process, or SMOBC. This process leaves copper traces exposed only where solder mask is not printed.
SMOBC improves solderability, controls solder thickness, and is widely accepted for plated through-hole boards.
The process sequence must be controlled carefully to prevent contamination and maintain accurate registration.
The drilling program should be created from the final Gerber file. Any change in hole size or location after drilling requires a new panel and can affect the entire manufacturing route.
Step 1: Cutting and Drilling
The double-sided copper-clad laminate is cut into panels according to the required size. Drilling creates through holes that will later be plated to connect both sides.
Drill quality affects the reliability of the plated connection. Burrs and debris must be removed after drilling so the hole wall is clean.
For high-volume production, CNC drilling improves position accuracy and repeatability.
The plating process should be controlled for copper thickness inside the hole as well as on the surface. A thin barrel can fail during assembly or thermal cycling.
Step 2: Through-Hole Metallization
After drilling, the hole walls are non-conductive and must be made conductive. Electroless copper plating creates a thin metal layer inside each hole.
This step is often followed by panel plating to add copper thickness over the whole surface. The plated through hole then provides a reliable electrical path between layers.
Plating quality should be verified because a void inside the hole can create an intermittent connection.
Registration accuracy depends on the artwork, exposure tool, and board dimensional stability. A double-sided board should be measured after lamination to confirm it is still within tolerance.
Step 3: Pattern Imaging
Pattern imaging transfers the circuit design onto the copper surface. The board is coated with dry film or liquid photo resist, exposed through a film or laser, and developed to create the desired pattern.
Accurate alignment between the top and bottom patterns is essential in double-sided board production.
Inspection after imaging can catch damaged tracks before etching.
Etch rate and copper grain structure affect the final line shape. Over-etching produces narrow traces, while under-etching can leave copper slivers between pads.
Step 4: Pattern Plating and Etching
In pattern plating, copper and tin are added to the exposed circuit areas. The tin acts as an etch resist in the next stage.
Etching removes unwanted copper while the tin-protected traces remain. After etching, the tin layer is stripped, leaving clean copper circuits.
The etch process must be controlled to avoid over-etching fine traces or leaving copper residue between tracks.
Surface finish selection should consider the assembly method and the component types. ENIG is useful for fine-pitch parts, while HASL remains economical for many standard boards.
Step 5: Solder Mask and Surface Finish
Solder mask is applied over the board to protect the copper and prevent solder bridges during assembly. The mask is exposed and developed so pads remain open.
The surface finish may be HASL, lead-free HASL, OSP, ENIG, or another finish depending on the assembly process and reliability requirement.
Solder mask registration is important because a misaligned opening can expose adjacent traces or cover a pad.
The bare board should be tested before assembly whenever possible. Electrical test and visual inspection provide a baseline for identifying assembly defects later.
Step 6: Profiling and Final Fabrication Check
The panel is routed or punched to the final board outline. Any slots, mounting holes, and edge features are completed at this stage.
Electrical testing checks for opens and shorts in the finished bare board.
Final visual inspection verifies solder mask, silkscreen, surface condition, and dimensional accuracy before shipment.
If components are placed on both sides, the assembly order should protect parts on the first side during the second reflow. Small components may need adhesive or a different soldering method.
Before assembly, the production team should also check that the solder stencil and placement program match the current board revision. Using an old program can place components in the wrong locations.
Double-Sided PCB Assembly
Assembly begins by preparing the components, board, enclosure, and test equipment. The board should be inspected before placement to confirm that it has no obvious damage.
Components may be placed on one side or both sides depending on the design. Double-sided SMT requires careful planning of the reflow sequence.
Through-hole components are soldered after SMT when they cannot be placed by the SMT line.
The technician should also check the board finish and pad condition. Oxidized pads can create poor solder joints even when the assembly process is correct.
After final assembly, the board should be inspected again for damage caused by handling, soldering, or enclosure mounting. Any physical defect should be repaired before the product is released.
Pre-Assembly Inspection
Before assembly, the technician should compare the board with the assembly drawing and confirm the component list.
The enclosure should be checked for damage, and the printed board should be inspected for solder mask defects, shorts, and damaged traces.
A quick resistance check between power and ground can detect a major short before expensive components are placed.
Mechanical assembly should not stress the PCB. Screws should be tightened to the correct torque, and standoffs should support the board where it may flex.
Labels and markings should be legible and placed according to the customer’s drawing. Wrong labels can cause the product to fail incoming inspection even when the electronics are correct.
Enclosure Assembly
After the board is assembled and tested, it may be installed in the product enclosure. Boards with BGAs or large ICs should be protected with thermal material or anti-vibration padding.
The board is aligned with the enclosure holes and mounting features. Floating components should not touch the enclosure or create a short.
After fastening, the assembly is inspected for physical damage, labels are applied, and the product moves to aging or final test.
Functional testing after assembly should verify the completed board, and PCBA testing records should be kept for traceability.
Customers should receive complete documentation including the board drawing, surface finish, impedance test if required, and electrical test result. This information helps them plan assembly and inspection.
Quality Control and DFM
A strong PCB manufacturing process with SMT PCB assembly support can reduce double-sided board defects. The design should be reviewed with DFM principles before fabrication and documented under a disciplined quality management system.
Testing and inspection should follow a documented plan so the completed assembly meets the customer’s requirements.
Panel utilization should also be considered during design. A double-sided board with a good panel layout reduces material waste and lowers the unit cost of production.
Aging or burn-in can also be added after assembly to screen early failures. The required test should be defined in the customer specification.
Conclusion
Double-sided PCB manufacturing uses through-hole plating, imaging, etching, solder mask, and surface finish to create boards with conductive paths on both sides. Assembly then places components and verifies the finished product.
By controlling each process step and reviewing the design early, manufacturers can produce reliable double-sided PCBs for a wide range of electronic products.