SMT Stencil Production Process and Inspection Guide
The SMT stencil production process starts with detailed requirements from the PCB assembly engineer and ends with a quality inspection before the stencil is shipped to the factory. A stencil controls the volume, position, and shape of solder paste deposited on every pad. If the stencil is incorrect, the placement and reflow process cannot correct the defect.
The template processing factory must know how the stencil will be used, what components will be placed, and what printing machine will hold the frame. These details determine the aperture shape, stencil thickness, marking method, and frame requirements.
This guide explains the SMT stencil production requirements and the incoming inspection steps used to verify a new stencil.
Mark Points on the Stencil
The stencil should include mark points that help the solder paste printer align the stencil with the PCB. The engineer should define whether marks are needed and where they should be placed on the stencil side.
The side of the stencil containing the mark pattern depends on the printing machine structure and the position of its camera. The correct side must be confirmed before the stencil is made.
Mark points can be produced by full engraving, half engraving on one side, or half engraving on both sides. The engraving method is selected according to the machine recognition system.
Some stencils use sealed vinyl marks or another special treatment. The processing factory should follow the printing machine specification so that the marks are visible and reliable.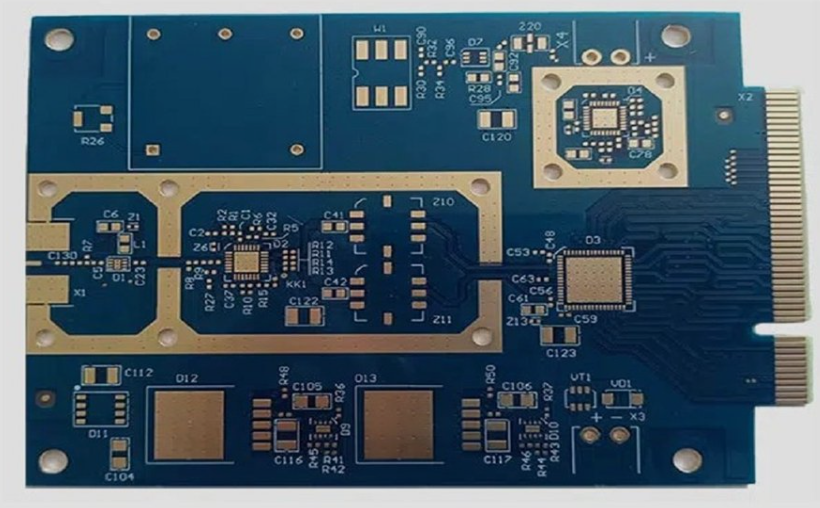
Panel and Board Requirements
The stencil must match the PCB format used by the assembly line. If the board will be assembled as a panel, the stencil process file should include the full panel PCB file.
Panel-level apertures must be repeated at the same spacing as the circuits on the panel. A mismatch between the PCB panel and the stencil causes every circuit to receive misaligned paste.
The engineer should confirm whether the board is a single circuit, an array, or a panel with tooling rails. The stencil size and frame must fit the printer for the same format.
Backing Ring and Through-Hole Requirements
Some boards contain plug-in or through-hole components that will be soldered with reflow. These components need more solder paste than surface mount parts because solder must fill the plated hole.
If a through-hole component requires the reflow process, a backing ring or special aperture can be used to deposit additional paste. The stencil supplier should receive a clear requirement for these locations.
Without the extra solder, the through-hole joint may have insufficient fill and fail after assembly.
Aperture Size and Shape
Aperture geometry controls the amount of solder paste transferred to the board. The opening for each pad should be matched to the pad size, component type, and paste type.
For pads larger than 3 millimeters, the aperture often uses a bridging or slot design to prevent paste slumping and solder ball formation. The bridge line width may be about 0.4 millimeters, while smaller openings can be divided according to pad size.
Different components have different requirements for stencil thickness and aperture opening. A stencil that works for a large connector may place too much paste on a fine-pitch QFP.
The stencil supplier should provide the opening design for each component group and recommend the correct thickness.
Apertures for BGA, CSP, and Flip Chip
The aperture shape is especially important for packages such as mBGA, CSP, and flip chip. Square openings generally provide better print quality than round openings for these devices.
A square opening transfers more paste and creates a more predictable solder ball shape. The aperture size should be controlled so that paste does not spread beyond the solder mask opening.
The stencil supplier should work with the process engineer to choose the correct aperture ratio for the ball diameter and pad size.
When the print quality is uncertain, the new stencil should be tested on a sample board before the full production order is released.
Aperture Reduction Without Cleaning
If the assembly process does not use cleaning solder paste and does not include a cleaning step, the stencil opening should be reduced by about 5 to 10 percent. The reduction prevents excess paste and minimizes flux residue after reflow.
The exact reduction depends on the pad size, paste type, and process requirements. A very large reduction can create insufficient solder, while no reduction can create bridges and solder balls.
Lead-free processes generally require larger apertures than tin-lead processes. Solder paste should cover the bonding pad as completely as possible without extending beyond the solder mask.
The engineer should compare the expected paste volume with the joint requirement before selecting the aperture reduction.
Aperture Shape for Small Chip Components
The aperture shape can improve placement and soldering quality for very small chip components. When a component is smaller than metric 1005, the distance between its two pads is very small.
If too much paste is printed on the inner part of each pad, the paste can contact the bottom of the component after placement. During reflow, this can create bridging or solder balls under the component.
To reduce that risk, the interior of a pair of rectangular pad openings can be modified into a sharp or bow shape. This reduces the amount of paste at the inner edge and improves solder wetting at the component ends.
The exact modification should follow the template supplier opening design guide and be tested before volume production.
Test Points and Special Features
The stencil should include apertures for test points only when the PCB design requires them. If no test point requirement is specified, test point openings should not be added.
Unnecessary openings can deposit paste onto a pad that must remain clean, creating a cosmetic or electrical problem.
The stencil may also require an electropolishing process. Electrolytic polishing is used when the opening center distance is less than 0.5 millimeters because it smooths the aperture wall and reduces paste sticking.
The purpose of the stencil should be stated clearly, whether it will print solder paste or another paste material. Different materials may need different aperture treatments.
Stencil Marking
Useful information can be engraved on the stencil frame, including the PCB product code, stencil thickness, and processing date. The mark should be readable but must not block apertures or interfere with printing.
If the product code is wrong, the factory may use a stencil for the wrong board and print all solder paste in the wrong locations.
The stencil supplier should mark the frame and keep records of the version. When the PCB is revised, the stencil version should be compared with the board revision.
Confirmation Before Processing
After the stencil supplier receives the email or fax with requirements, it should send back a confirmation form. The buyer should review the file and confirm the design before the stencil is processed.
If there are questions, the buyer and supplier should discuss them by phone or fax and wait for written confirmation. Processing without confirmation can create an expensive stencil that does not match the board.
The confirmation should include the frame size, stencil thickness, aperture shape, mark location, and special requirements.
Inspect the Screen Frame
When the stencil arrives, the factory should check the screen frame size and tension. The frame must fit the printer and hold the mesh tight enough for accurate printing.
The operator can place the stencil on a flat table and press the stainless steel screen surface to feel the tension. Higher screen quality and tighter stretching normally produce better print quality.
The bonding quality around the screen frame should also be checked. A loose mesh or poor frame bond can move the aperture pattern during printing.
Visual Inspection of Apertures
The stencil should be lifted and inspected visually for obvious defects. The operator should check the aperture shape and the distance between adjacent openings for IC pins.
A magnifying glass or microscope should be used to check the aperture wall. The horn of the pad opening should face downward, the inner wall should be smooth, and there should be no burrs.
Narrow-pitch IC pin openings need special attention because a small burr can trap paste and create inconsistent print volume.
If an aperture is undersized or blocked, the defect will be repeated on every board printed with that stencil.
Alignment Test With the PCB
The final inspection step is to place the product PCB under the stencil and align the apertures with the pads. The operator should check that the pattern is completely aligned.
The check should also look for unnecessary openings, which are sometimes called floor drain or hole openings. Any opening that does not match a pad must be reviewed.
If a problem is found, the factory should first determine whether it was caused by an error in the buyer confirmation. If the stencil itself has a processing defect, the PCB manufacturer should report it to the stencil supplier and find a solution.
After the stencil passes inspection, it should be labeled, stored, and used only for the correct product.
A capable SMT PCB assembly service should verify every stencil before it enters the line and document the inspection result.
The stencil must be integrated with PCB design and layout data so that pad geometry, aperture design, and board revision stay aligned.
Good stencil quality supports the complete PCB assembly process by giving every pad a controlled solder paste deposit before reflow.
Printing quality can be checked with solder paste inspection, and the final board should be verified by PCBA testing and optical inspection after reflow.
Using quality management records for stencil versions prevents the line from using an outdated aperture design on a new board.
Conclusion
The SMT stencil production process must account for mark points, panel format, through-hole paste, aperture shape, and printing machine requirements. Clear requirements prevent expensive errors.
Incoming inspection should verify frame tension, aperture quality, marking, and alignment with the PCB. Every defect found before production saves time and prevents scrap.
A well-designed and well-inspected stencil gives the SMT line a strong start for reliable solder paste printing and high-quality PCBA output.