
Thermal Vias: Design and Copper Filling
Where the Heat Goes
A surface mount power device conducts most of its heat into the board through the thermal pad on its underside, not through the package body into the air. That pad sits on a copper land, and the land has to move the heat into the rest of the board, where a plane and the surrounding area can spread it. Thermal vias are the vertical part of that path: they carry heat from the component-side land through the dielectric to an internal or opposite-side plane. Without them the heat has to travel through the laminate itself, whose thermal conductivity is roughly a thousand times lower than copper, and the junction temperature rises accordingly.
Counting the Vias
The number of vias follows from the thermal resistance required. Each via contributes a resistance in parallel with the others, so doubling the count halves that part of the resistance, but there are limits. The vias have to fit inside the thermal pad, they have to keep a minimum wall to neighbouring vias, and they must not compromise the solder joint above them. A useful starting point is a grid with a pitch around 1.0 to 1.2 mm inside the pad, which for a typical 5 mm square pad gives around sixteen vias. Beyond a point the vias stop helping, because the spreading resistance in the plane beneath them and the package’s own internal resistance dominate the total.
Via Diameter and Spacing
Within reason, a larger via is more effective than a smaller one, because its cross section of copper is bigger and its thermal resistance is lower. The limit is the drill size the fabricator will plate reliably and the space the wall takes from the neighbouring vias. Spacing matters because the heat has to spread sideways in the plane between the vias; vias packed so closely that the plane between them is very narrow lose some of the benefit. A common compromise is a drill in the 0.2 to 0.3 mm range on a pitch of about 1.0 mm, which keeps the plane connected between the vias and leaves enough wall for reliable plating.
Filled or Open
An open via under a thermal pad is a reservoir that wicks solder away from the joint, so the vias have to be capped, filled or tented. Tenting, where the via is covered by solder mask on the opposite side, prevents wicking and is cheap, but it traps air in the barrel and leaves the thermal path partly empty. Filling with conductive paste plugs the barrel and reduces the void, and copper filling gives the lowest thermal resistance of all, at the highest cost. Where the thermal demand is moderate, a tented via with a mask plug is often enough; where the device runs hot, copper filling is the reliable answer. Whichever is chosen, the pad above has to remain flat enough for the paste stencil to seal.
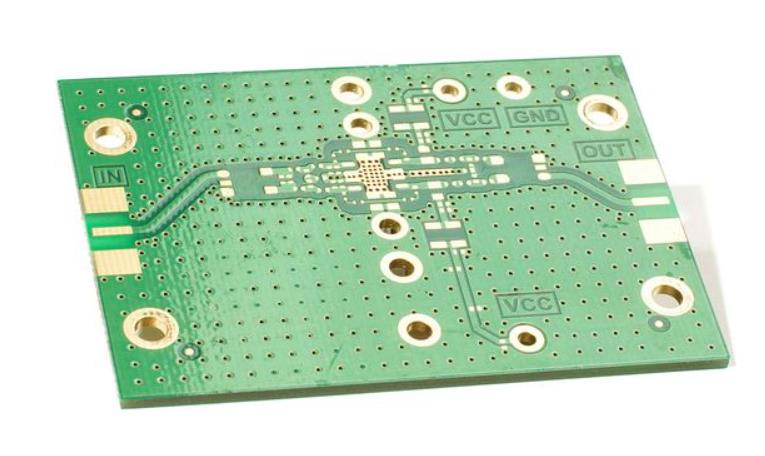
Attachment to the Plane
The vias are only useful if they land on copper that can spread the heat. The receiving layer should be a solid plane rather than a set of traces, and it should be large enough that the heat does not simply back up. Where the plane is on the opposite side of the board and exposed to air, adding a copper area on the surface increases the dissipation; where the plane is buried, the heat has to conduct to the edges of the board or to other vias that reach a surface. On a multilayer board, connecting the thermal vias through several planes creates a vertical heat pipe, which is far more effective than a single attachment.
Thermal Relief Versus Solid Connection
For a soldered joint, a thermal relief on a plane makes hand soldering and selective soldering easier because it slows the heat loss from the iron or the wave. For a thermal via array, the opposite is true: the whole purpose is to conduct heat away, so the connection between the via land and the plane should be as solid as the process allows. A thermal design that includes relief spokes around the pad is working against itself. Where a pad carries both a thermal function and a through-hole solder joint, the compromise has to be made deliberately, with the relief sized for the soldering process and the vias placed to carry the heat.
Verifying the Result
A thermal design should be verified by measurement rather than by assumption. The usual approach is to measure the case or the board temperature at a known power dissipation and derive the thermal resistance, then compare it with the target. Thermal imaging shows whether the heat is spreading as intended, or whether a single hot spot suggests that the vias are not connected where the model assumed. Where the result is worse than predicted, the common causes are an interrupted plane under the vias, a mask or fill material that was more insulating than assumed, or a soldering void that removed the contact between the pad and the land.
Interface Materials and the Whole Path
The vias are only one element between the die and the ambient air, and the weakest element sets the total. A thermal interface material between the package and the board, the solder joint and its voids, the copper thickness of the land and the plane, and the airflow over the surface all sit in the same series. Improving the vias while leaving a large void under the pad produces almost no benefit, because the void removes the contact at the very point where the heat enters the board. The same is true at the other end: a copper-filled via array that lands on a small isolated plane has nowhere to send the heat, so the plane area and the ability of the surrounding board to spread and dissipate have to be considered together with the via count. The useful way to treat a thermal design is as one path from junction to ambient, with an estimate and a measurement for each element, rather than as a set of independent features each specified to an optimistic value.

FAQ
How many thermal vias do I need? Enough to reach the target thermal resistance, typically a grid of vias at roughly 1.0 to 1.2 mm pitch inside the thermal pad.
Does a bigger via help? Yes, up to the limit of what can be plated and fitted while keeping the plane connected between the vias.
Should thermal vias be filled? They should at least be tented or plugged to prevent solder wicking; conductive paste or copper filling is used where the thermal demand is high.
Do thermal reliefs help? They help soldering but work against heat spreading, so they should not be used on a pad whose job is to dissipate.
How is the design verified? By measuring the temperature rise at a known power and deriving the thermal resistance, then comparing it with the target.
Conclusion
Thermal vias are a parallel thermal resistance in the middle of a longer path, so they should be sized and counted against a target rather than added by habit. Land them on a solid plane, connect them through more than one plane where possible, plug them so the joint above stays sound, and measure the result. Thermal design connects to PCB design and layout, the via and filling capability is described under PCB capabilities, and the assembly and reflow consequences are covered by SMT PCB assembly. Power assemblies are usually qualified through PCBA testing in 2026.