DIP Insertion and Post-Solder Recheck on PCBA
Surface mount assembly tends to dominate the discussion, and yet a great many industrial boards are not purely surface mount. Terminals, connectors, electrolytic capacitors, relays, fuses, transformers and pin headers are still inserted through the board and soldered, and those joints carry functions that no surface mount joint performs: they are mated, pulled, clamped and exposed to the movement of a cable.
DIP insertion and the soldering that follows therefore deserve the same attention as the placement stage, particularly on equipment controllers, power boards and instruments where the inserted parts are both numerous and mechanically significant.
Three Ways to Solder an Inserted Part
The choice of method follows the structure of the product and the size of the batch.
Hand soldering is the most flexible and suits small quantities, unusual components and repairs. It depends heavily on the operator, which is why the iron temperature, the tip geometry and the time allowed for the joint are specified rather than left to preference, and why the inspection that follows is defined in writing.
Selective soldering applies flux and heat to defined positions, which suits a board that mixes fine surface mount work with a handful of large inserted parts and cannot tolerate the thermal load of a full wave. It requires a programme and a fixture, so it rewards a product that will be repeated.
Wave soldering remains the most efficient method for a board with many inserted parts on one side, and it produces consistent joints when the board, the pallet and the process parameters have been designed together. Boards with a heavy copper plane, a large thermal mass or a component that must not be wetted need those features addressed before the run rather than during it.
Mixing the methods on one board is normal: a wave for the bulk of the inserted parts, selective or hand work for the devices that cannot be exposed, and a recheck that covers both.
What a Reliable Joint Has to Do
Continuity is the minimum. A joint that a meter reports as closed can still be too small, too brittle or inadequately wetted, and on a terminal or a connector the joint has to survive forces that a surface mount joint never sees.
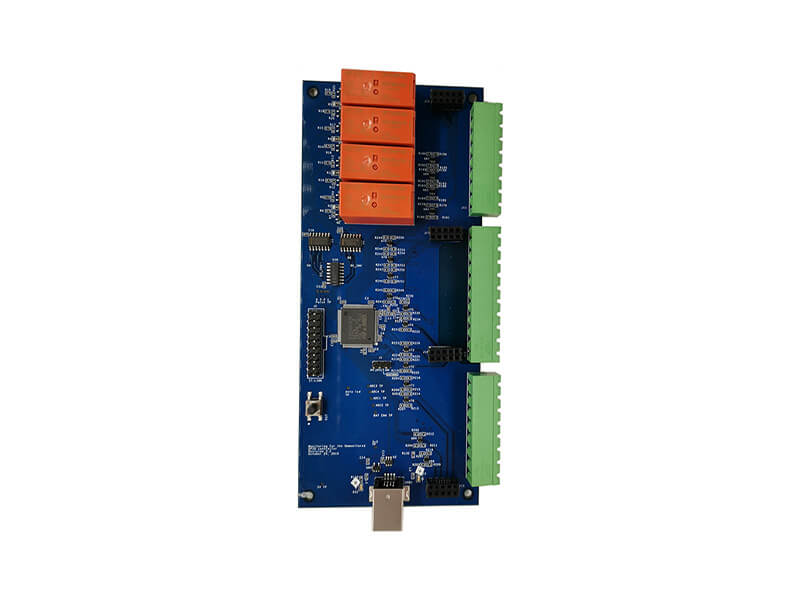
The qualities that matter are visible in a good solder fillet: solder that has wetted both the pad and the lead, a concave shape rather than a ball, penetration through the barrel so that the solder is present on both sides, and a lead that protrudes by a defined length rather than an arbitrary one.
For the larger inserted devices, mechanical support is part of the specification. A heavy transformer or a large capacitor held only by its pins will eventually load those pins, and the mounting hardware, adhesive or supplementary fixing that the design expects has to be present in the assembly.
Where the Defects Actually Appear
The faults in inserted assembly are repetitive, and knowing them makes inspection faster. Insufficient solder leaves a joint that has not filled the barrel or the fillet. Excess solder hides the joint and can conceal a bridge to an adjacent pad. A void inside the barrel reduces the cross-section of a connection that is supposed to carry current. Residue and flux that have not been removed obscure the surface and, on a board with insulation requirements, may change the leakage behaviour.
Distortion is a mechanical defect with the same consequence. A terminal that leans slightly, a capacitor that is taller than the space allowed for it or an interface that does not line up is discovered at the point of final assembly, which is the most expensive place to discover it.
Damage also belongs on the list. Repeated heating during a repair can lift a pad or degrade the barrel, and a soldering iron held on a small pad for too long produces a defect that is attributed to the board rather than to the operation.
<img src="https://www.gopcba.com/wp-content/uploads/2026/08/Final-Inspection.jpg" alt="solder fillet on a terminal block after wave soldering” />
Post-Solder Recheck and Structural Requirements
Because several of these faults are invisible from the top, the inspection that follows the soldering operation is the stage that decides whether the batch is usable. A terminal block that looks intact from above may have a joint that has only partially filled the barrel, and that is a connection which will fail under load rather than at the bench.
The recheck is therefore targeted rather than general. The positions that deserve it are the high-current terminals, the relays, the power connectors, the headers, the fuse holders, the electrolytic capacitors and the transformers, together with any device whose height or orientation is critical to the enclosure.
The structural requirements belong in the same procedure. Whether a part sits against the board or stands off it, whether the leads are trimmed, whether there is a restricted height zone, and whether the component has to clear a housing or a rail are all decisions that affect assembly, and all of them are easier to state in the drawing than to negotiate on the line.
Pallets, Fixtures and Thermal Mass
The hardware that carries the board through the soldering operation does as much to decide the result as the solder itself. A wave process relies on a pallet to mask the surface mount side, hold the assembly flat and present the joints to the wave in a consistent direction. Where the pallet is worn, or where the openings do not match the component positions, the outcome varies from board to board.
Thermal mass is the other half of the same problem. A ground plane, a heavy terminal or a large transformer draws heat away from the joint being formed, which can leave a barrel that is only partly filled even though the process settings are correct for a lighter board. The remedy is usually local: preheat, a longer contact time at that position, or a selective process for the parts that need it.
Direction matters too. Leading edges receive more solder than trailing ones, and shadowing by a tall component can starve a joint on the far side. Reviewing the assembly orientation before the run is far cheaper than discovering a shadowed terminal afterwards.
Fixtures also protect what must not be soldered. Connectors that must stay clean, contacts that must not be wetted and labels that cannot take the heat all become constraints on the process, and each of those constraints is easier to accommodate while the pallet is being designed than during the run.
Preparing the Insertion Data
The inserted parts are often described less precisely than the surface mount devices, because they are large and considered obvious. The opposite is more useful. A list that states the orientation, the mounting height, the stand-off, the trimming requirement and any restricted area around each inserted device removes the interpretation that otherwise varies between shifts.
Where the product will be fitted into an enclosure, that information should travel with the order, since it is the requirement that the assembly cannot infer from the board itself. The relevant operations are SMT assembly for the placed section, through-hole assembly for the inserted parts and mixed technology assembly where the two are combined, with verification through PCBA testing.
FAQ
Is hand soldering acceptable for a production batch? It is for small quantities and unusual components, provided the parameters and the inspection criteria are written down rather than left to the operator.
What makes a through-hole joint reliable? Solder that has wetted both surfaces, penetration through the barrel so that both sides are filled, a proper fillet and, for heavy parts, mechanical support.
Why recheck after the soldering operation? Because several of the important defects, including partial barrel fill and small bridges, are not visible from the top of the board and are much cheaper to find at the bench than in the field.