AI Phone PCB Design: Stackup, Power and Thermal Paths
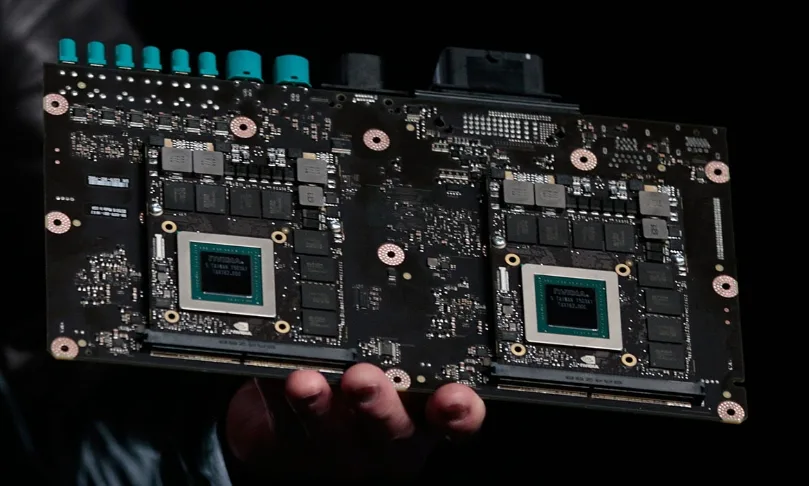
A flagship handset is no longer a phone with a few smart features bolted on. It is a continuously running inference platform, and the board inside it has to carry camera streams, microphone arrays, an always-on vision pipeline and a cellular modem while fitting into a chassis that gets thinner every generation. An AI phone PCB design is therefore not a wiring exercise but a joint electrical, thermal and mechanical problem solved on a board smaller than a credit card.
What Changes When Inference Moves On-Device
Cloud inference let the handset stay simple: send data, receive an answer. On-device inference reverses that flow. Sensor data now travels inward to a neural processing unit, is transformed, and comes back out as pixels, audio or haptics. The bus that used to be an accessory becomes the main road, and the layout has to keep that road short, wide and quiet. In practice, routing density rather than component count sets the layer budget.
The second change is temporal. Inference runs in bursts. Processing a single camera frame can pull several hundred milliamps for a few milliseconds and then fall back to a low-power idle state. A supply network sized for a steady load will not survive that step load, because the edge of the current step is measured in microseconds and the regulator loop has to respond before the rail collapses.
Stackup and Layer Budget
A current flagship main board typically uses 10 to 14 layers with a laser-drilled build-up pair on each side. The HDI stackup is what makes escape possible: microvias with 0.1 mm laser drills and 0.25 mm capture pads let a dense processor fan out into inner layers without consuming the outer surface, which is reserved for the components that must sit there. Keep the ground reference within 0.1 mm of every high-speed signal layer, and never route a controlled-impedance line across a plane split. The CAM preparation for HDI boards is where the drill schedule and the pad-per-layer rules get frozen, so settle the stackup before layout rather than after.
A practical rule is to budget one signal layer for roughly every two ball rows on the largest package. A 0.35 mm pitch device with 20 rows needs about ten signal layers before the memory bus is counted, which is why the layer count climbs so quickly once an application processor is involved. Capping the vias also matters: a filled and capped microvia is flat enough to place a component over, an open one is not.
Routing the Sensor-to-Processor Corridor
Camera and display links dominate the high-speed budget. MIPI lanes are differential, typically 90 to 100 ohm, and they must stay within a few mils of matched length across a pair; skew of 0.1 mm is already visible on a 1.5 Gbps lane. Keep the pair on one layer from connector to processor wherever possible, place ground stitching vias next to every layer transition, and never let a switching node run parallel to a lane for more than a few millimetres.
signal integrity problems on these links are expensive because they look like intermittent frame drops rather than clean failures, and a marginal link can pass a bench test and fail on the production line. Check the return path at every via, keep the lane away from the display backlight boost circuit, and give the connector enough ground pins that the return current is not forced through the signal pair.
Power Delivery Under Bursty Loads
The power delivery network has to hold the rail inside a few tens of millivolts while the load swings by hundreds of milliamps. That means placing the smallest capacitors closest to the die, then working outward through larger values, and keeping the loop area of each capacitor to a minimum. Use wide, short connections from the capacitor pad to the via pair, and place the via pair on the pad edge rather than at the end of a stub. DC-DC converter layout routing conventions apply directly: keep the switch node tiny, the input capacitor on the same layer as the controller, and the feedback divider away from the inductor.
Copper weight matters as much as placement. A plane with a 3 mm wide neck behaves as a different conductor from the same plane with a 0.3 mm neck, and the burst current will find the narrow point every time. Where a rail crosses the board, carry it on two layers in parallel rather than one wide trace.
Thermal Paths in a Sealed Enclosure
There is no fan and no airflow in a phone, so heat has to leave through the board and the chassis. thermal vias under the processor and the power management IC are the cheapest thermal improvement available: a 6 by 6 array of 0.3 mm vias on 0.8 mm centres, filled and capped, drops the junction-to-board resistance enough to measure. Connect them to an inner copper area, spread that area as widely as the layout allows, and couple it to the shield frame with a compressible thermal pad instead of relying on air.

Watch the neighbouring parts. Put a crystal or an oscillator next to a hot inductor and the frequency drift will cost more than the placement saves in area. If a thermal camera shows a 15 C gradient across the board the layout is working; a 40 C hotspot means the spreading copper is too small or the via array is too sparse.
Antenna Integration and Keepouts
Antenna keepouts are a mechanical constraint that layout has to honour literally. Ground must be removed from the keepout area, no copper or battery metal may sit inside it, and the feed line should be a controlled-impedance trace with a solid reference. With several antennas for cellular, Wi-Fi and ultra-wideband, isolation between radiators becomes a layout property: separate them, rotate their polarisation, and check coupling in simulation before committing to the mechanical stack.
Reference Planes, Clocks and Analogue Blocks
A phone board carries audio codecs, touch controllers and sensor hubs alongside the digital core. Splitting the ground into tidy digital and analogue regions usually makes things worse at these frequencies. What works is a single continuous ground with careful control of the return currents, so that an analogue return path is never shared with a switching return. Mixed-signal PCB design guidelines point to a workable compromise: place the converters at the boundary between the power-hungry area and the quiet area, and give the quiet side a local ground pour tied to the main plane at one point per functional block.
Design for Assembly, Test and Rework
Boards this dense are assembled with 0.3 mm paste stencils and reflowed twice, once per side. Component clearances have to respect the placement machine nozzle diameter and the rework tooling that will follow, because a part that cannot be replaced is a yield liability. Provide test access for the rails you cannot afford to lose, keep probe points off the fine-pitch nets, and add panel fiducials that survive the first reflow.
Plan the mechanical interfaces early as well. Connector positions, shield can outlines and screw bosses all constrain routing, and moving any of them afterwards means a full re-layout on a board with this many nets.
FAQ
How many layers does an AI phone board need? Most current designs use 10 to 14 layers with a build-up pair on each side. The count is driven by the escape from the largest package and by the memory bus rather than by the neural accelerator itself, so start with a fanout study and let the layer count follow.
Can a phone board use a standard FR-4 stackup? Yes for most of the board, provided the glass transition temperature and the dielectric constant are controlled. Loss becomes the limit at higher lane rates, and at that point a mid-loss laminate on the high-speed layers is cheaper than adding layers or repeating the design.
What causes dropped frames when the layout looks correct? Usually a return path problem rather than a spacing problem. Check that every differential pair crossing a layer boundary has ground stitching next to the transition, and that no plane split sits under the pair. Crosstalk and reference discontinuity produce the same symptom at the receiver.