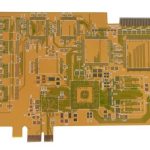
ESP32 PCB Design: Layers, RF Layout and Antenna Clearance
A board built around an ESP32 looks simple in the block diagram and behaves very differently in the layout. It carries a radio, a fast digital core and a switch mode supply on a board that is often smaller than a business card, and the radio imposes requirements that a plain microcontroller board never has. Getting the layers, the ground and the antenna region right is most of the work on an ESP32 PCB.
What an ESP32 Board Contains
Beyond the module or the chip itself, the board usually carries a regulator or a converter, a USB connector and its protection, a programming and debug interface, a crystal, flash memory, decoupling, indicator LEDs, buttons and the interface connectors for the product. Each of those is ordinary, but together they draw current in bursts and place switching noise a few millimetres from a receiver that must resolve signals in the microvolt range.
The radio also dictates the geometry. A module with an integrated antenna needs a defined region where no copper, no battery and no metal hardware may be placed, and a design that uses an external antenna needs a controlled impedance feed and a connector footprint that will be soldered without disturbing the impedance. Those two constraints shape the board outline before any routing is considered.
Module or Chip Down
A module simplifies the radio: the crystal, the matching network and the certification are supplied, and the designer reproduces the recommended land pattern and the keep-out area. The cost is board area and a small amount of bill of materials value. A chip down design saves that area and that cost but brings the radio frequency layout, the matching network and the regulatory testing inside the project.
For most product teams the module is the faster and safer route, and it is the one that keeps the schedule predictable. The exceptions are products where the module is too large, where the antenna must be a specific design, or where volume makes the module cost significant. In those cases the chip down design should be treated as a radio frequency project rather than as a digital one.

How Many Layers the Board Needs
A two layer board is adequate for a simple sensor with a module, provided the ground is handled carefully. Once the design carries a supply with meaningful switching current, a fast interface such as USB or an external memory, or several analogue inputs, four layers become the practical choice because they allow a continuous reference plane directly beneath the signal layer rather than a fragmented ground routed around traces.
Six layers are justified when the design combines a radio with Ethernet, CAN and a high pin count processor, or when the board must meet a stricter emission limit. The stackup decision should be made with the layer arrangement in view, not just the layer count, and the options are described in layer stackup for one to eight layers.
The Ground Plane Under the Radio
The radio section needs an unbroken reference directly beneath it. A ground plane with slots, with traces routed on it, or with a row of vias that forces the return current around them degrades the performance of the supply decoupling and of the antenna feed. On a four layer board this is easy to arrange, because the second layer can be a solid plane with almost no exceptions.
Where the radio meets the digital section, keep the noisy nets out of the radio area rather than relying on a filter to repair them. A switching node routed past the radio can couple into the matching network directly, and no amount of decoupling will recover the sensitivity. The principles that govern this separation are set out in EMI suppression design principles.
Antenna Clearance and Placement
Antenna clearance is the single requirement that most often forces a layout change. For a module with a PCB antenna, the vendor specifies a region below and around the antenna where copper must be removed on every layer and where no component or metal part may sit. Extending the board beyond that region so the antenna overhangs the edge of the product is often the simplest way to satisfy it.
Placement follows the clearance. Keep the antenna away from the battery, from the display and from any metal structural part, and keep it away from the switching supply. If the enclosure is conductive, the antenna must be outside it or must be a different type entirely. A ground plane that is deliberately extended under the digital section but removed under the antenna is the arrangement that most designs converge on.

RF Layout and the Feed Line
The RF layout between the module and an external connector is short, impedance controlled and free of stubs. A trace that is a fraction of a wavelength long still matters, because a mismatch at the connector reflects back into the radio. Keep the feed on one layer, keep the reference continuous under it, and keep other nets and any test points away from it.
The geometry of a controlled impedance line and the parameters that set its impedance are described in microstrip and stripline routing. Impedance control on the feed is normally specified as fifty ohms single ended, and the fabricator calculates the width from the stackup rather than accepting a width chosen by the designer.
Power, Decoupling and the Burst Current
The radio transmits in bursts, and the supply has to supply those bursts without collapsing. Place the local decoupling as close to the supply pins as the layout allows, with short connections to the ground plane, and make the path from the regulator to the module low impedance. A wide, short route or a small copper pour is better than a thin trace, because inductance rather than resistance is what limits the response to a burst.
If the board uses a switching converter, its layout determines how much noise reaches the radio. The input capacitor loop, the switch node and the inductor should be small and compact, and the converter should be physically separate from the radio section. The layout rules for that circuit are covered in DC to DC converter layout and routing.
Materials, Finish and Manufacture
Standard FR4 with a glass transition temperature above one hundred and forty degrees Celsius suits most products, with high transition temperature material reserved for industrial or outdoor equipment. Surface finish follows the assembly requirement: an immersion gold gives a flat, solderable pad for the fine pitch parts around the module, while an organic preservative is adequate for a simple board assembled promptly.
Manufacturing attention goes to the smallest features, the via in pad if the module ground pad requires it, and the routing of the board outline so that the antenna region is not disturbed. Where the module has a large thermal pad, the vias beneath it must be filled or capped so that solder does not wick away during reflow, and the pad geometry should be taken from the module datasheet rather than approximated.
FAQ
Can an ESP32 board be made on two layers? Yes for a simple sensor board with a module and a careful ground. Designs with switching supplies, fast interfaces or strict emission limits are easier on four layers.
Does the antenna need to hang over the board edge? It helps on a module with a PCB antenna, because it moves the radiator away from the ground plane and from nearby metal, but the vendor keep-out rule is the requirement.
Is impedance control needed on the whole board? No. It is needed on the antenna feed line and any other controlled impedance net. The rest of the board is designed to ordinary rules.