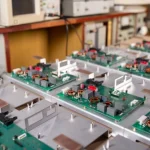
Aluminum Substrate PCB Thermal Design for Power Boards
When a board has to carry several amperes and has nowhere to put a heatsink, designers reach for an aluminum substrate. A metal base spreads heat far better than any amount of copper on a standard laminate, but the same structure changes how the board is designed, drilled, assembled and mounted. Aluminum substrate PCB thermal design is therefore a system problem rather than a material choice.
How a Metal Core Board Is Built
A metal core board consists of an aluminum base, a thin dielectric layer and copper foil, laminated under heat and pressure. The dielectric is the electrically insulating layer, typically 60 to 150 micrometers thick, and it is also the dominant thermal resistance in the stack. Copper thickness on the circuit side usually ranges from 35 to 105 micrometers, and the aluminum base is commonly 1.0 to 2.0 millimeters thick.
Because the dielectric is thin, the board achieves low thermal resistance in the vertical direction while remaining an electrical insulator. It cannot, however, support plated through holes the way a conventional multilayer board does, and that single limitation shapes most of the design rules that follow. Understanding the stack before choosing it prevents a specification that the fabricator cannot build economically.
Thermal Resistance and Dielectric Choice
Thermal resistance is the number that decides whether the metal base helps. Total resistance is the sum of the junction-to-case path, the dielectric layer, the aluminum base and the mounting interface. The dielectric contributes the largest share, so its thermal conductivity, typically 1 to 3 W per meter-kelvin for standard products and higher for filled materials, matters more than the aluminum thickness.
Thinner dielectric reduces thermal resistance but also reduces breakdown voltage and increases capacitance between the trace and the base. Circuits that switch fast may see that capacitance as a coupling path to the metal plane. Choose the dielectric thickness from the voltage and frequency requirement, then verify the resulting case temperature rather than assuming the metal base alone is sufficient.

Layout Rules for Metal Core Boards
Copper on the circuit side is the heat collector, so make it generous. Heat-generating components should sit over solid copper areas connected to the thermal path, with the copper extending well beyond the component outline. Thermal vias are not available through aluminum, so the copper geometry does the work: short, wide connections to the base through the dielectric are what actually spread the heat.
Keep high-current paths wide and short, and calculate the required width from the current and the allowed temperature rise, using the same principles described in trace width and current calculation. Where a component dissipates significant power, place its thermal pad directly over the metal base area rather than over an isolated region of the board.
Single Layer Constraints and Alternatives
A single-sided circuit on a metal base cannot cross conductors, which forces jumpers or zero-ohm links when signals must cross. Where that becomes unacceptable, a two-layer metal core construction with an insulating layer between the two copper layers is used, though its thermal performance is lower because heat must pass through additional material. Another option is a copper core board, where the metal base is copper rather than aluminum, which offers better spreading at higher cost and weight.
The choice between aluminum and copper depends on the required thermal performance per unit of cost. Aluminum wins for LED lighting, motor drives and power supplies where the heat flux is moderate. Copper is chosen when the spreading requirement is severe or when the mechanical design needs a specific thermal expansion behavior. Compare the two options with the actual load, as outlined in aluminum versus copper core PCB comparisons.

Mechanical Design and Mounting
Mounting a metal core board is different from mounting a laminate board. The aluminum base is stiff, so it resists bending but transfers mechanical stress directly into the dielectric layer. Use mounting holes with adequate clearance and avoid clamping forces that deform the base, because the dielectric is brittle compared to the metal it sits on. A warped or over-clamped board can crack the insulating layer and create a short to the base.
The base is often used as a structural element, which makes flatness a specification rather than a detail. Specify the flatness tolerance that the thermal interface and the assembly process need, and confirm with the fabricator that the finished panel can hold it. If a thermal interface material is used, choose one whose thickness and hardness match the flatness actually achieved, not the ideal value.
Assembly and Process Considerations
Assembly on a metal core board is largely compatible with standard surface mount processes, with two caveats. First, the aluminum base absorbs and redistributes heat, so reflow profiles need more soak time, the choice of lead free versus leaded solder changes the window, and the board may need support to stay flat through the oven. Second, the mass of the base makes hand soldering and rework difficult; preheating is essential and hot air alone is rarely enough.
Cleaning and finishing also deserve attention. Choose a solder mask and a surface finish qualified for the expected temperature and light exposure, especially in LED products where the mask must resist ultraviolet degradation. gopcb fabricates single and two-layer metal core boards with dielectric options matched to the thermal requirement, and reviewing the copper layout alongside the stack choice usually avoids a second thermal iteration.
Surface Finish and Solderability
Surface finish selection on a metal core board follows the same logic as on a rigid board, with an extra constraint: the finish must withstand the thermal cycling that the application imposes. Hot air solder leveling is economical and robust for through-hole and mixed assemblies. Immersion finishes offer a flatter surface for fine pitch parts and better shelf life, but require tighter process control at the fabricator.
Avoid finishes that need a thick nickel layer if the thermal path matters, because the added material raises the thermal resistance between the pad and the base. Confirm the finish compatibility with the solder paste and with any conformal coating used on the assembly, since some combinations produce poor adhesion after reflow.
Where Metal Core Boards Fit Best
Metal core boards earn their cost in applications with a concentrated heat source and a limited space for cooling. LED lighting arrays are the classic case, followed by motor drive power stages, solid state relays and power supplies with surface mount devices on the primary side. In each of these, the aluminum base acts as both a heat spreader and a structural element.
They are a poor fit when the design needs many layers, dense fine-pitch routing or a large number of plated through holes. The dielectric is a single thin layer, so high layer counts are not available, and the drill process is limited. Recognizing that boundary early avoids specifying a metal core board for a design that really needs a conventional multilayer stackup with a separate heatsink.
FAQ
Can a metal core board be drilled and plated like a normal PCB? The aluminum base is drilled for mechanical features, but plated through holes require isolation and are usually avoided. Connections between the circuit layer and the metal base are made through the dielectric, so signals must be designed to stay on one layer or cross with jumpers.
Does the aluminum base need to be grounded? It can be used as a mounting and shielding reference, but any connection to the circuit must be intentional and defined in the schematic. Leaving the base floating is acceptable in many products, and it avoids ground loops when the chassis provides the reference.
How thin can the dielectric layer be? Standard products start around 60 micrometers, and thinner layers exist at higher cost and lower breakdown voltage. Choose the thickness from the isolation requirement first, then confirm the thermal resistance, because the two constraints pull in opposite directions.