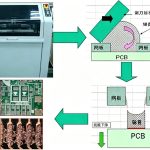
BGA Rework: Preheat, Nozzle Size and Thermal Profile
BGA rework concentrates a reflow process into a few square centimetres, and everything that is gentle in an oven becomes aggressive at that scale. The board is heated from below, the package from above, and the nozzle decides where the heat lands, so success depends on controlling gradients rather than on reaching a temperature.
Why BGA Rework Differs from Oven Reflow
In an oven the whole assembly rises in temperature together, so the package and the board expand at similar rates and the solder joints see little differential movement. In rework the site is heated locally while the surrounding board stays cool, which produces a temperature gradient across the package footprint. That gradient is what warps the board and the package and what cracks joints at the perimeter of the array.
The other difference is time. Oven reflow gives minutes of soak to bring a thermally heavy assembly to near-liquidus, while a rework station may have only tens of seconds of usable soak before the top side overheats. Extending soak by raising the nozzle temperature does not work, because it heats the package faster than the board underneath it.
Preheat: Bottom-Side Heat and Warp Control
Bottom-side preheat raises the whole local area to roughly 100 to 120 degrees Celsius over 10 to 20 minutes before the top heater is applied. This reduces the gradient that the top heat has to create and gives the flux time to activate. It also drives off moisture from the laminate, which otherwise turns to steam and pushes through the joint as a void.
Preheat temperature is limited by the board’s own tolerance: above roughly 150 degrees Celsius, many laminates begin to soften and the risk of delamination and measling rises. The correct setting is the highest preheat the board can take without damage, held long enough for the site to be uniformly warm rather than merely hot at the surface.
Nozzle Selection and Airflow Distribution
The nozzle should be larger than the package so that the heated air flows around the body and over the joint perimeter, typically 2 to 5 mm beyond the package outline. A nozzle that is smaller than the package heats the body and starves the joints at the corners, which is where rework defects concentrate. A nozzle that is far too large heats the neighbouring parts and the board around the site.
Airflow needs to be high enough to transfer heat and low enough not to displace the part or blow neighbouring components off their pads. Where the profile allows it, a longer soak at lower flow is gentler than a short burst at high flow, and it produces a more even joint temperature. Check the flow pattern with a smoke test before committing to a profile.
Profile for a Rework Station
A workable rework thermal profile follows the same shape as an oven profile: ramp at 1 to 2 degrees per second to a soak near 150 to 180 degrees, then a rise to a peak of 235 to 245 degrees with 45 to 75 seconds above liquidus. The peak is measured on the solder joint, not on the nozzle or the package surface, and the liquidus margin should not be less than about 20 degrees.
The number of passes matters as much as the shape. A profile that just reaches the liquidus produces a grainy joint, while one that overshoots damages the package substrate and the nearby parts. Where the first attempt does not reflow cleanly, investigate the heat balance rather than repeating the same profile at a higher temperature.
Thermocouple Placement on the Rework Site
Place a thermocouple on the solder joint at the package perimeter, where the temperature is lowest, and a second on the package surface or beside the die shadow, where it is highest. The difference between them is the gradient the profile has to accommodate, and it is not unusual for it to reach 15 to 25 degrees Celsius on a large package.
Attach the joint thermocouple with high-temperature solder or a thin adhesive and make sure it does not sit on top of the package. It is common to see a rework profile that looks perfect while the bead is actually measuring the nozzle outlet air, which reads far hotter and flatter than the joint ever gets.
Site Preparation and Pad Cleaning
Removing the old package leaves solder on the pads, and the site must be cleaned with a vacuum desoldering tool or wick and then levelled before the new part is placed. Residual solder that is not levelled leaves the new balls sitting on uneven pillars, and the resulting joints vary in height across the array. After cleaning, inspect the pad for lifted metallization and for damaged mask dams.
Flux choice matters at this stage. A gel flux suited to rework holds the site wet through the profile, while a flux that burns off early leaves partially oxidized surfaces that do not wet. Clean the residue after reflow, because rework flux left under a package is a corrosion path that no later process step will remove.
Placement, Self-Alignment and Collapse
The part is placed with the ball array aligned to the pads and allowed to self-align as the solder melts, which surface tension does reliably if the placement is within about a quarter of a pad pitch. Vision alignment on the rework station gives the best starting position, and manual placement relies on the operator seeing the ball pattern through the split prism or a side-view camera.
Collapse is the confirmation that reflow completed. A properly reflowed ball flattens by roughly 20 to 25 percent of its height, which is visible in a side view and in the X-ray standoff measurement. A ball that has not collapsed means the joint did not reach liquidus, and it will not be visible on a top-down image.
Inspection After Rework
Inspect with X-ray in at least two views, top-down for bridging and missing balls and oblique for voids and joint shape. Compare the reworked site against an unreworked one on the same board, because the reference makes a subtle difference in ball shape visible without relying on an absolute criterion.
For high-reliability work, dye-and-pry or a cross-section through the array adds the information X-ray cannot provide about the actual joint interface. Sectioning through a reworked microsection is the definitive check, and it is the only way to confirm that the IMC layer formed uniformly across the array.
Process Records and Repeat Rework Limits
Record the profile, the nozzle used, the preheat settings and the thermocouple data for every rework, so a later failure can be compared against the conditions that produced it. Boards that have been reworked more than once should be tracked individually, since each thermal excursion adds stress to the laminate and to the surrounding joints.
Set a limit on how many rework cycles a board may receive, and treat it as an engineering decision rather than an operator decision. Where a board has already been reworked twice, the correct action is usually to scrap it rather than to attempt a third pass, because the accumulated damage is not visible but is very real.
Related reading: our fabrication notes, board quality and design release notes cover the same ground.
FAQ
Why does a BGA rework profile need bottom-side preheat? Preheat reduces the gradient between the package and the board, drives out moisture and lets the flux activate, which lowers warpage and voiding at the joint perimeter.
How large should a rework nozzle be? Two to five millimetres larger than the package outline, so hot air reaches the joint perimeter rather than heating the body and starving the corner joints.
How do I know the balls actually reflowed? Check collapse: a reflowed ball flattens by roughly 20 to 25 percent of its height, which is visible in a side view or as a reduced standoff in the X-ray image.