ESP32-C3 vs ESP32-S3 PCB: Key Differences and Design Guide
Choosing Between Two Wireless Giants
ESP32-C3 and ESP32-S3 are the two most popular members of the ESP32 wireless microcontroller family, and both appear across IoT devices, smart home products, industrial controls, smart sensors, consumer electronics, wireless gateways and edge computing hardware. They share Wi-Fi and Bluetooth Low Energy radios, but the esp32-c3 vs esp32-s3 pcb decision is far from trivial, because processor architecture, performance, memory, interfaces and application focus all differ. For hardware engineers the choice is never just about chip price. This guide compares the two platforms from a PCB design perspective, covering layout, RF, antenna, power and manufacturing considerations, so you pick the right board strategy the first time.
ESP32-C3 vs ESP32-S3 at a Glance
The core differences shape everything downstream. The ESP32-C3 runs a single-core 32-bit RISC-V processor at up to 160 MHz with up to 400 KB SRAM, while the ESP32-S3 uses a dual-core Xtensa LX7 design at up to 240 MHz with 512 KB SRAM. Both support 2.4 GHz Wi-Fi 4 and Bluetooth LE, but the S3 adds USB 1.1 OTG and vector instructions for AI and DSP work. As a result, the C3 suits cost-sensitive, compact, low-power IoT products, while the S3 suits applications that need more compute, memory, USB functionality or AI and DSP capability. Board complexity follows: an ESP32-C3 design is usually simpler, and an ESP32-S3 pcb is typically denser and more demanding.
Performance Differences That Change the Board
Processing choice affects more than the chip on the bill of materials. If the product only collects sensor data, communicates wirelessly and runs simple control, a single-core C3 at 160 MHz is usually enough, which keeps the PCB small and the power section simple. The S3 earns its place in AIoT devices, voice interaction products, audio gear, imaging applications, smart displays, HMI terminals, USB devices and high-performance edge computing, where dual cores, 240 MHz operation and vector instructions matter. If future firmware may add AI algorithms, speech recognition, image processing or heavier local computation, starting with an ESP32-S3 PCB is cheaper than redesigning the board later.
Memory and Peripherals Change the Architecture
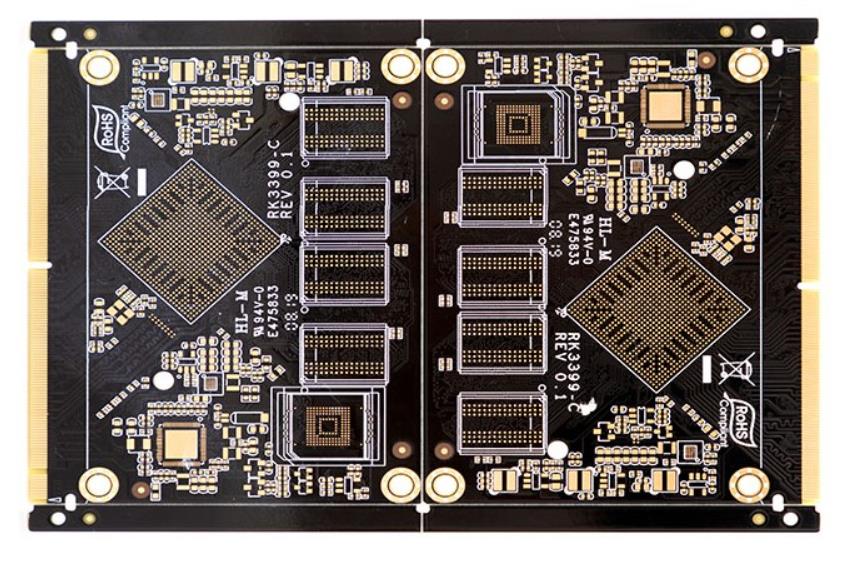
Memory and peripheral resources directly influence PCB structure. The C3 offers up to 400 KB SRAM, which is fine for ordinary sensor and IoT control products. The S3 provides 512 KB SRAM plus room for external PSRAM and larger data caches, which matters for graphical interfaces, audio, AI algorithms, image processing, larger protocol stacks and more complex firmware. A typical ESP32-C3 board is built around power management, flash, sensor or peripheral interfaces and the RF section with antenna. An ESP32-S3 board adds flash and PSRAM, USB, display or audio interfaces and other high-speed peripherals around the same RF core, which raises routing density and layer requirements.
Layout Rules That Apply to Both
The most common mistake is treating an ESP32 as an ordinary digital MCU during layout. Because both chips integrate Wi-Fi and Bluetooth radios, the pcb layout directly controls RF performance, and both the C3 and the S3 demand the same discipline: 50 ohm RF trace impedance, clean PCB grounding, antenna keep-out areas, correct crystal placement, power integrity, decoupling capacitors, isolation of high-speed signals from the RF region, and clear separation between digital and RF zones. Espressif publishes dedicated layout guidance for each chip, and following it from the first revision avoids the painful antenna-tuning cycle that slows many IoT programs.
RF and Antenna Design Essentials
RF is where most ESP32 developments stumble. The transmission line from the module or chip to the antenna should be designed for 50 ohm characteristic impedance, but 50 ohm is not a fixed trace width. The correct width depends on board thickness, dielectric thickness, dielectric constant, copper thickness, reference plane distance and the trace structure. The right sequence is to define the PCB stack-up first, then calculate impedance from the real material values, and have the manufacturer confirm stack-up and dielectric data before production. Controlled impedance, a clean ground reference under the RF trace, generous antenna clearance and a matched antenna feed separate boards that pass certification from boards that radiate poorly.
Power, Ground and Crystal Placement
Wi-Fi transmissions draw short current bursts, so the power network needs low-impedance decoupling close to the chip and a solid ground plane under the RF and digital sections. The crystal and its load capacitors must sit near the SoC with short traces and a clean ground island, away from switching regulators and high-speed lines. On ESP32-S3 boards, the USB and high-speed flash and PSRAM interfaces add another set of rules: differential routing where needed, controlled impedance for high-speed memory buses, and careful return paths. A review of power integrity and ground stitching early in the layout prevents the intermittent resets and sensitivity problems that plague wireless designs.
Cost and Manufacturing Considerations
Board cost follows complexity. Simple ESP32-C3 designs often fit two or four layers with standard FR-4, which keeps prototype and volume pricing low. ESP32-S3 boards with external PSRAM, USB and higher routing density commonly need four to six layers, tighter tolerances and controlled impedance, pushing up fabrication cost. Where antenna performance matters, module-based designs with pre-certified antennas simplify layout and certification; chip-based designs are cheaper in volume but require disciplined RF work. Whether you build a C3 node or an S3 AI device, working with a manufacturer that understands RF stack-ups and offers PCB manufacturing with controlled impedance testing reduces the risk of silent field failures.
How to Choose for Your Product
Choose the ESP32-C3 when the product is battery-powered, small and cost-sensitive, with simple data collection and control. Choose the ESP32-S3 when the roadmap includes AI, voice, graphics, imaging, USB or heavy local processing. Before layout, confirm stack-up and impedance requirements with the factory, because the esp32-c3 vs esp32-s3 pcb decision changes layer count, materials and test scope. Early PCB design and layout review plus PCBA testing on the first samples catches antenna and power issues while they are still cheap to fix.
Two-Layer or Four-Layer?
Layer count is the biggest cost and performance lever in ESP32 board design. A two-layer board with components and signals on top and ground with some signals on the bottom is possible for simple, low-density IoT products, but it makes RF impedance control, complete grounding, power distribution and high-speed routing harder. For complex ESP32-C3 and most ESP32-S3 products, a four-layer board is the recommended starting point: layer one carries components and RF or high-speed signals, layer two is a complete ground plane, layer three handles power and some signals, and layer four carries remaining signals. The dedicated ground plane gives clean return paths, easier 50 ohm control, better power integrity, lower ground impedance and stronger EMI performance. Bare ESP32 boards typically cost about USD 2-15 each, while fully assembled boards run USD 4-30 and up depending on density, materials and testing.
Common ESP32 Layout Mistakes
Six mistakes cause most wireless performance problems. Routing the RF trace too long or with unnecessary bends, vias and branches adds loss. Cutting up the ground plane with signal traces destroys return paths and raises EMI. Placing high-speed digital lines such as USB near the antenna lets noise desensitize the receiver. Choosing regulators only on average current ignores the Wi-Fi transmit transient, which needs good decoupling and low-impedance supply paths. Testing only the bare PCB misses enclosure effects, because plastic and metal housings, batteries, displays and cables all change antenna behavior, so final RF tests must run on the complete product. Finally, confirming the stack-up only at the fabrication stage forces redesigns; the dielectric thickness, copper weight and impedance target should be agreed with the manufacturer before layout starts.
ESP32 PCB FAQ
Q1: Can ESP32-C3 and ESP32-S3 use the same PCB? Not usually; the S3 adds memory, USB and high-speed interfaces that change routing density and layer count.
Q2: What impedance does the RF trace need? The antenna feed is normally designed for 50 ohm characteristic impedance.
Q3: Which ESP32 is cheaper to build? The C3, because its simpler design often fits a two or four layer board with fewer high-speed constraints.
Q4: Why does antenna clearance matter? The antenna needs a keep-out zone and clean ground so radiation patterns stay consistent and certification passes.
Conclusion
The esp32-c3 vs esp32-s3 pcb choice is really a product strategy decision. The C3 wins where cost, size and battery life dominate, and the S3 wins where compute, memory, USB and AI capability matter more. Both demand the same RF discipline: controlled 50 ohm routing, clean ground, correct crystal layout and solid power integrity. Choose the platform that matches the roadmap, then build it with a manufacturer that treats RF design as a science rather than an afterthought.