Mini Projector PCB: Design, Cost and Manufacturing Guide
What the Board Has to Do
A mini projector squeezes a light engine, a display driver, a video pipeline and a power supply into a handheld enclosure. The board has to decode a video stream, drive the display element with precise timing, regulate a high power LED, control focus and cooling, and manage wireless connectivity, all while keeping the optical path aligned and the device cool enough to hold. Of these, the two that dominate the layout are the display interface, which demands tight timing and clean signals, and the LED driver, which delivers several watts of switched current inches away from sensitive video electronics.
Display Interface
Two architectures dominate. In a DLP design, a controller drives a digital micromirror device through a dedicated flexible interconnect, and the timing has to be precise because the mirrors are modulated at high frequency to create colour and grey scale. In an LCD design, the panel is driven through a MIPI or LVDS interface with strict impedance and length matching, often over a flexible cable that folds into the light path. In both cases the display clock and data lines are the fastest signals on the board, so they need controlled impedance, continuous reference planes and physical separation from the LED driver. The panel or the DMD usually connects through a thin flexible circuit, so the board has to provide a mechanically stable landing area with the right stiffener so the connector does not peel under handling.
LED Driver and Thermal Design
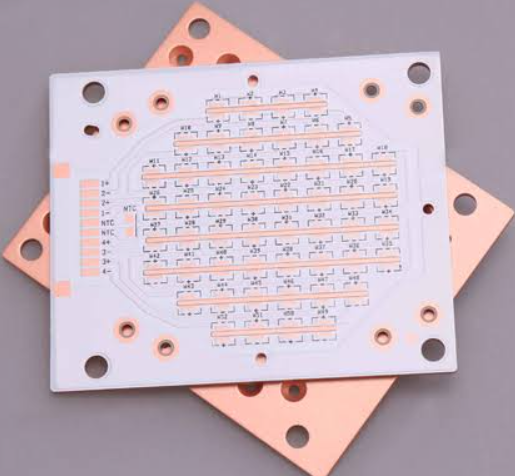
The LED is the light source and the main heat source. It is driven by a constant current switching regulator, which means fast edges and a high current loop that must be kept as small as possible. The driver should sit close to the LED, with a solid ground return directly under the switching loop, and the sense resistor and the inductor placed to minimise loop area. Thermally, the LED has to be connected to a metal core section, a copper inlay or a heatsink through a low thermal resistance path, because the light output and the lifetime both fall as the junction temperature rises. Many mini projectors use a small fan, which adds an electrical noise source: the fan supply should be decoupled and its return should not share the analogue or display ground.
Video Input and Wireless
External video arrives over HDMI, USB-C or a wireless link, and each has its own requirements. HDMI and USB-C are high speed differential interfaces that need controlled impedance and protection against electrostatic discharge and hot plug transients at the connector. Wireless designs add a Wi-Fi and Bluetooth module, which needs a clean supply, a keep-out around the antenna and physical distance from the LED driver, because the driver’s switching harmonics can desensitise the receiver. Since the projector is usually a compact metal or metalised enclosure, the antenna placement and the enclosure openings have to be planned together with the board.
Power Architecture
The board runs from a DC adapter or a battery, and it has to generate several rails: a core rail for the video processor, a memory rail, an analogue rail for the display, and the high current rail for the LED. Sequencing matters, because the display and the processor have defined power-up orders. The LED rail is the largest load and should be designed so that its switching does not modulate the other rails; separate regulation and adequate decoupling at the point of load are the usual answers. If the device runs from a battery, the peak LED current and the processor load together set the battery and the input conversion rating, and the efficiency of the LED driver directly determines battery life.
Cost Structure
In a mini projector, the light engine dominates the bill of materials. The display chipset, whether a DMD or an LCD panel, the LED and its optics are the expensive parts, and the mainboard is typically four to six layers with a small area. The layer count is driven by the display interface and the need for a clean ground rather than by component density. Assembly cost comes from the fine pitch video processor, the flexible interconnect and the connector count. The step that distinguishes projector manufacturing from other consumer products is the optical test and alignment, which requires a purpose built station with a camera and a light measurement, and that station is a significant fixed investment.
A mini projector board combines a fast display interface, a high current LED driver and a radio in a small, hot enclosure, so the layout has to be planned with the optics and the mechanics from the start. Review how PCB manufacturing handles controlled impedance and metal core sections, apply the high speed and thermal rules in your PCB design and layout, and check the design and manufacturing considerations before release. A prototype PCB assembly run with optical and thermal measurement proves the design before tooling.
FAQ
How many layers does a projector board need? Four to six layers is usual, with extra layers providing a clean reference for the display interface.
Why is LED thermal design so critical? Because the light output and the LED lifetime both fall as the junction temperature rises, and the board is the main heat path.
Can the LED driver share a rail with the processor? It should be separately regulated, because the switching noise would otherwise couple into the video and display rails.
What is the biggest cost in a mini projector? The light engine, not the mainboard. The optical test station is a large fixed cost as well.
Conclusion
A mini projector PCB has to serve a fast display interface, a high current LED and a wireless link inside a small hot box. Keep the LED switching loop tight and away from the video section, give the display interface a controlled impedance path and a continuous ground, sequence the rails properly, and design the LED thermal path before the enclosure is fixed. Done that way in 2026, the projector stays bright, cool and wirelessly connected at the same time.