PCBA Heat Dissipation: Thermal Management Strategies for PCB Manufacturing
Why PCBA Heat Dissipation Deserves a Place in PCB Manufacturing
Every electronic component consumes power while a board is in operation, and almost all of that power eventually turns into heat. On a densely populated assembly the heat accumulates quickly, the temperature inside the product rises, and when the heat is not removed in time the printed circuit board becomes a source of failure rather than a support for it. Solder joints weaken under repeated thermal stress, semiconductor junctions drift outside their specifications, and the reliability of the whole device declines. PCBA heat dissipation is therefore not a refinement that can be added later; in PCB manufacturing it is a basic requirement, because the thermal behavior of a product is largely decided on the layout and the stack-up long before the first unit is switched on.
Thermal management on an assembled board is shared work. Design engineers fix the main cooling paths when they choose copper coverage, via patterns, and component positions, while the manufacturer influences the result through substrate selection, soldering quality, and process control. A design that ignores heat will struggle in production and in the field, no matter how carefully the components are placed.
This article explains what makes an assembled PCB heat up, how engineers analyze power consumption and board structure before acting, and which cooling measures are practical in PCB manufacturing, from heat sinks and thermal covers to thermal vias, copper layout, and substrate materials. The goal is a board that keeps every component within its temperature limit over the full lifetime of the product.
What Causes Temperature Rise on an Assembled PCB
The direct cause of board temperature rise is circuit power consumption. Components such as processors, power transistors, drivers, and switching regulators dissipate heat whenever they work, and the heating intensity follows the power they draw: a device carrying more current or switching more often gives off more heat. Passive parts add their share as well, because resistors, inductors, and connector contacts all convert part of their losses into temperature increase.
Temperature rise on a PCBA appears in two basic patterns. It can be local, concentrated around one hot component, or it can spread over a large area of the board, and it can build up in short bursts or creep upward over long operating periods. The distinction matters because the remedy is different in each case: local heat calls for a direct thermal path away from the component, while a wide-area rise usually needs better spreading through the board or better airflow around it.
Surrounding conditions shape both patterns. Ambient temperature, enclosure ventilation, the position of neighboring boards, and the amount of air moving across the assembly decide how quickly heat leaves the system, so the same component layout can run cool in one product and dangerously hot in another. For this reason temperature problems are evaluated together with the mechanical design of the final equipment, not on the bare board alone.
Analyzing Power Consumption and Board Structure
Before any cooling measure is chosen, engineers find out where the heat is generated and how it is distributed. Power consumption is usually analyzed at two levels: first the consumption of each functional area or circuit block, and then the distribution of that power across the board surface. The result is a heat map that shows the dominant sources, and it is surprisingly common to discover that one small regulator, not the largest chip, sets the thermal limit of the assembly.
Board structure determines how easily the heat can travel. The relevant facts are the board size, the number of layers, the copper thickness and coverage, the substrate material, and the position and height of the heating components. These factors are interdependent, so they cannot be treated one by one: a heavy copper plane is only useful if the vias reach it, and a large board still runs hot when all the power sits in one corner. Temperature rise and power figures can therefore be calculated or estimated correctly only from the actual conditions of the specific design, which is why the analysis is repeated whenever the layout changes.
Heat Sinks and Heat Conduction Plates for High-Power Components
When a board has one high-heat component or only a few of them, fewer than about three sources, a radiator or a heat conduction plate is usually the first choice. The sink is attached to the component case with a thermal interface material, and the heat flows from the case into the fins or the plate and then into the surrounding air. Where natural cooling cannot keep the temperature down, the radiator is combined with a fan to force air across the fins, which raises the heat transfer sharply and is a standard solution for power supplies and motor drives.
When more than three heating devices are spread over the board, a large heat dissipation cover is often more practical than several individual sinks. This cover is a customized plate machined according to the positions and heights of the hot components on the specific board, and it is buckled over the component side as a single unit so that it touches every hot device at the same time. One cover can serve the whole power section, which simplifies assembly and keeps the top side of the board tidy.
The weak point of a large cover is contact. Component height consistency after placement and soldering is never perfect, so a flat plate pressed over the assembly may touch some devices firmly and leave air gaps over others, and air is a poor conductor of heat. Manufacturers therefore add a soft thermal phase change pad or a gap filling pad on the surface of the elements before the cover is fitted. The pad deforms under the pressure of the cover, fills the height differences, and provides a continuous conductive path, which makes the heat dissipation effect of the whole structure predictable.
Using the Board Itself as a Heat Dissipation Path
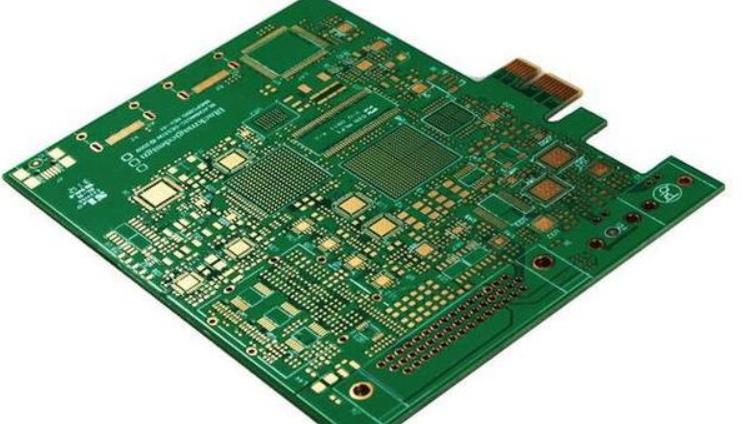
Modern assemblies rely increasingly on the board as a heat path. Surface mounted packages such as QFP and BGA transfer a large part of their heat into the printed circuit board through their leads and solder balls, and in fine pitch boards the component itself can no longer shed enough heat from its small exposed surface. The heat must be moved into the board and spread underneath the part, which means the board has to be designed as a thermal conductor instead of a simple carrier.
This is harder than it sounds, because the resin that forms most laminates is nearly a thermal insulator. The most widely used substrates in PCB manufacturing, epoxy glass cloth copper clad laminate of the FR-4 family and phenolic resin paper laminates, offer good electrical performance and easy processing, but their thermal conductivity is poor, and the resin itself is almost unable to conduct heat away from a hot element. Nearly all useful conduction happens through the copper foil, the plated holes, and the internal planes.
The practical answer is to give the heat more copper to travel through. Increasing the copper foil residual rate, meaning the percentage of the board surface that remains covered by copper after etching, adds lateral spreading area on every layer, and thermal vias drilled and plated under hot pads carry the heat vertically into inner planes and toward the bottom side of the board. Together these features turn the whole board into a radiator, which is why power boards often combine heavy copper with dense via arrays. The right combination is agreed when the stack-up is defined during PCB manufacturing planning, because copper weight and via filling affect cost and yield as well as temperature.
Thermal Vias and Copper Layout for Spreading Heat
Because the resin conducts so poorly, the main means of heat dispersion in a board are copper traces, copper pours, and plated holes. Rational wiring design uses that fact deliberately: power devices are surrounded by solid copper rather than thin traces, ground and power planes are kept intact instead of being cut into long slots, and thermal vias are stitched around hot pads so that heat leaves the component from every side. In the same spirit, power traces are made wide and short, and copper is removed only where the circuit function truly requires it.
Engineers need numbers as well as rules of thumb, so the heat dispersion capacity of a board is evaluated by calculating an equivalent thermal conductivity for the whole structure, because a printed circuit board is a composite of materials with very different conductivities. Simple estimates work well for straightforward boards, while complex power maps justify a more careful simulation followed by thermal imaging on the first prototypes. The cheapest time to make these checks is during the PCB design layout, when a via can still be added for the price of a file change.
Assembly Quality and Testing Keep the Thermal Path Intact
A thermal design only works if the assembly process preserves it. Solder voids under power pads and ball grid arrays act like hidden air gaps, because they block the flow of heat exactly where it is needed most, so paste printing, stencil aperture design, and the reflow profile are all controlled with the thermal pads in mind. During SMT PCB assembly, thermal pads on packages such as QFN are printed with the correct paste coverage and inspected after reflow, since a joint that looks acceptable electrically can still be a thermal bottleneck.
Verification closes the loop. A loaded board should be operated at its expected current and its case temperatures measured, or monitored with a thermal camera, to confirm the analysis made during design. Automated optical inspection catches pad wetting problems, and PCBA testing under load gives the first real evidence that the board will survive its intended environment, long before the product reaches the customer.
How gopcb Applies Thermal Discipline to Every Board
gopcb treats heat as part of the normal engineering review rather than as a problem that appears after the first field failure. When a project is quoted, the engineering team looks at the power consumption map, the package types, and the expected operating environment, and then recommends the copper weight, via patterns, thermal pads, and substrate choices that fit the product. During fabrication the stack-up is built to the agreed specification, and during assembly the thermal interfaces and the soldering quality are controlled on the line, so the board that ships behaves like the board that was designed.
For customers who want the entire chain handled by one supplier, board fabrication and assembly can be combined with turnkey PCB assembly, which keeps the design files, materials, and production records under one roof and makes thermal changes easy to trace. Send gopcb your Gerber files, bill of materials, power estimates, and expected volumes for a free DFM and thermal review, and the team will recommend the right cooling measures for your product with a quote that reflects the real cost of building it.