Stencil Cleaning and Foil Life
A stencil is a consumable that is treated as a tool. It arrives as a precision foil with apertures cut to tolerances measured in microns, and it is expected to deliver the same deposit volume on its ten-thousandth print as on its first. In practice the foil stretches, the apertures wear, the surface accumulates contamination and the tension in the frame falls, all of which change the print without any obvious visual symptom. Managing that decline is what keeps print quality stable across a product’s life.
What Changes with Age
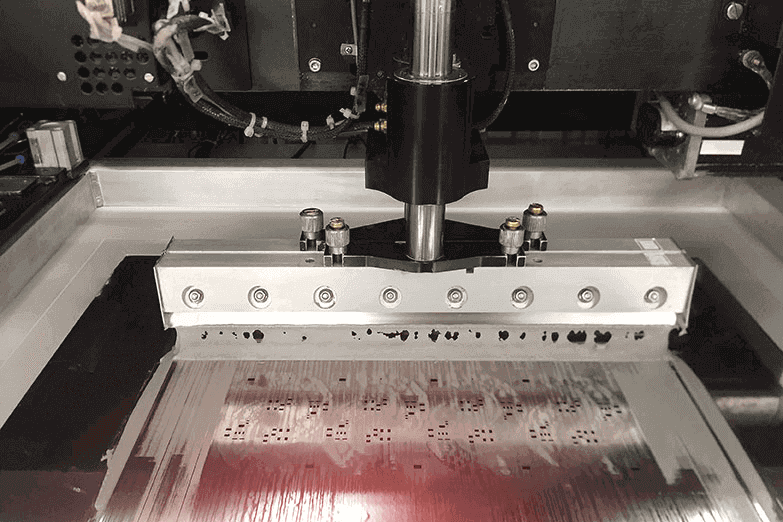
Tension in the mesh or the frame is the first thing to change. A stencil that has lost tension no longer sits flat against the board, and the gap allows paste to be smeared under the foil edge instead of releasing cleanly. Aperture walls are the second: repeated squeegee strokes polish them, and the polishing changes both the surface energy and the aperture dimensions. The third is contamination, which accumulates in the smallest apertures even with a cleaning routine, because paste dries in the corners where the brush cannot reach.
The consequences appear in the deposit rather than in the stencil. Smearing at the board edge, a slow decline in volume on fine-pitch apertures and a rising incidence of bridging on parts that used to print cleanly are the usual signatures. Because each of them develops slowly, the decline is usually attributed to the paste or the printer until the paste volume data is examined against the print count.
Cleaning Methods
Under stencil cleaning, with a wipe in the printer, removes the paste that remains on the underside and in the apertures between prints. The frequency should be set by a print count rather than by the appearance of the board, and it should be tightened for fine-pitch products where the apertures are small and paste dries quickly. A wipe that runs too dry leaves residue behind, and one that runs too wet can push solvent into the apertures and change the paste consistency.
Offline cleaning, in a washing machine with a suitable solvent, removes what the wipe cannot. The interval depends on the paste chemistry and the product, but a weekly deep clean is a common baseline for a stencil in daily use. The cleaning agent must be compatible with the foil and the frame, and the drying step matters as much as the wash, because moisture left in an aperture changes the first deposits of the next run. Stencil cleaning practice covers the solvent and drying choices.
Handling and Storage
Most stencil damage happens outside the printer. A foil that is carried flat without support bows under its own weight; one that is leaned against a bench creases at the frame; one that is placed on a surface with debris scratches on the contact side. A rack or a trolley that holds the stencil vertically, with the foil supported, costs very little and prevents the most common form of damage, which is also the least repairable.
Storage should protect the aperture area and record the identity of the tool. A stencil that is stored without a label becomes anonymous within a few weeks, and the cost of that anonymity is a print problem that cannot be attributed to a tool. The same discipline that governs foil selection should govern where the foil lives when it is not in use.
Tension and Flatness Checks
Tension can be measured on a mesh-mounted stencil with a tension gauge, and the reading should be compared with the value when the stencil was new. A framed stencil can be checked for flatness by placing it on a surface plate or a granite table and looking for gaps, or by measuring the height at several points. Neither check takes long, and both answer the question of whether the tool is still doing its job.
The interval should reflect the print volume. A stencil that runs a few hundred prints a week can be checked quarterly, while one that runs continuously may need a monthly check. Where a measured value moves outside the acceptable range, the stencil should be retired rather than nursed, because a print problem traced to a stretched foil usually costs more in scrap than a replacement tool. Printing control plans should state where that limit lies.
Aperture Wear and Inspection
Aperture wear is best seen under magnification or with a measurement system that can compare the current dimensions with the drawing. Rounded corners, polished walls that have become barrel-shaped and apertures that have grown slightly larger are all signs of wear, and each changes the deposit. The change is not always detrimental: polishing can improve release, which is why electropolished foils are specified in the first place. The problem is uncontrolled change rather than change itself.
Inspection should be done at defined intervals and after any incident that could have damaged the tool, such as a squeegee crash or a misaligned board. A simple record of the aperture dimensions and their trend gives an objective basis for retiring the stencil, and it identifies which apertures wear fastest, which is useful information for the next design. Where the same product runs for years, that record is the only way to plan replacements rather than react to them.
Print Counts and Replacement Planning
Every stencil should carry a print count, whether it is tracked on the machine or recorded manually. The count converts an unpredictable failure into a planned replacement, and it allows the procurement of a spare to be scheduled rather than triggered by a defect. The practical limit depends on the foil, the paste, the squeegee and the product, so the count that prompts replacement should be set from the observed condition of tools in similar service rather than from a generic figure.
Keeping a spare stencil for the highest-volume product is the simplest form of insurance. When the production tool fails a check, the spare can be run immediately and the replacement ordered without stopping the line, and the failed tool can be examined at leisure to decide whether the cause was wear, handling or a defect in the foil itself. The cost of the spare is a fraction of a shift’s lost output.
Additional Considerations for This Build
Practical attention to foil life pays for itself here, because it decides whether the finished board behaves as the drawing intended. Where the requirement is not stated on the fabrication drawing or in the assembly notes, the shop has to assume a default, and that default is rarely the value the design was simulated with. Stating foil life explicitly, together with the tolerance that applies, removes the assumption and keeps the result predictable from batch to batch.
Process Control and Verification
On a design of this kind, foil life is the item that decides how the rest of the board is arranged. The process window is set by the narrowest step in the flow, so an improvement anywhere else shows up as margin rather than as yield until that step is addressed. A short note on the drawing about handling, storage or packaging is often worth more than an extra decimal place on a tolerance.
FAQ
How often should a stencil be deep cleaned? Weekly is a common baseline for daily use, adjusted for the paste chemistry and the smallest aperture on the tool. Under stencil wipes should be set by print count.
Can a stretched stencil be repaired? Frame tension can sometimes be restored by re-mounting the mesh, but a creased or torn foil cannot. Retire the tool and replace it.
Does polishing shorten stencil life? It removes material and changes the aperture, so it should be done deliberately, with measurement before and after, and not as a routine remedy.
How do I know when to replace a stencil? From the print count combined with an aperture measurement and a tension or flatness check. Plan the replacement rather than waiting for a defect.