UV Cure Verification for PCB Adhesives and Coatings: 7 Rules
A UV cure is a chemical reaction started by light rather than by heat. An adhesive or coating contains a photoinitiator that absorbs ultraviolet energy and begins the polymerisation, and the reaction then runs on its own. That is why a UV cured material can be handled seconds after exposure, and why the same material can remain soft and uncured if the light never reached it properly.
The difficulty is that the cure is invisible. A joint that has been exposed looks exactly like one that has not, and the difference only appears later as a failed adhesive or a coating that lifts. Verification is therefore not an optional quality step, it is the only evidence that the process did what the specification intended.
How a UV Cure Actually Works
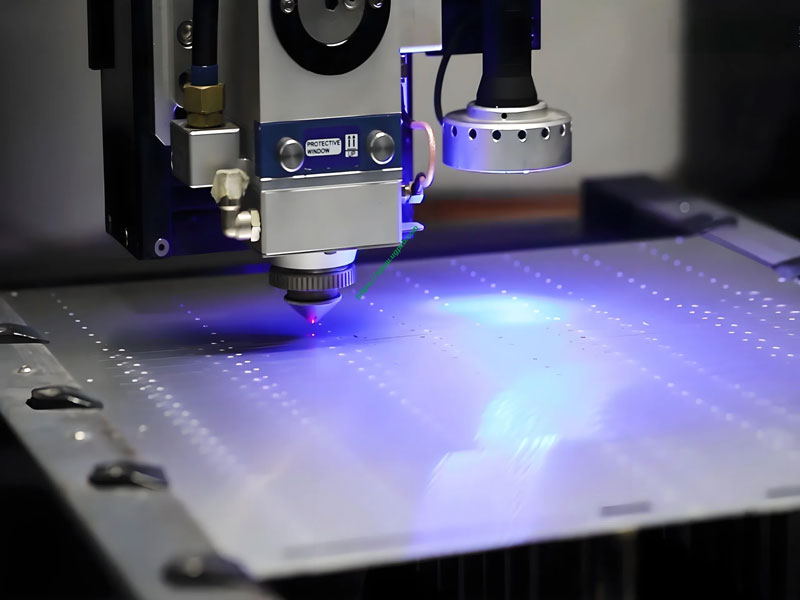
The photoinitiator responds to a particular range of wavelengths, and the formulator chooses it to match the lamp that will be used. A lamp whose output is concentrated outside that range may be bright and hot while producing very little cure. That is why a lamp change, not just a power change, requires the process to be re-qualified.
Once the initiator has absorbed enough energy it breaks down into reactive species that link the monomers together. The reaction continues after the light is removed, so the material keeps gaining strength for a period after exposure. Handling strength and full cure are therefore different points in time, and the specification should say which one is required before the next operation begins.
Dose, Not Time, Is the Specification
The energy that reaches the material is described as dose, calculated as intensity multiplied by time. A lamp that delivers a high intensity for a short exposure and a lamp that delivers a low intensity for a long exposure can produce the same dose, and both can produce a sound cure, provided the intensity is high enough to penetrate the material.
The process window therefore has two limits. Below a minimum intensity the cure does not start properly, and a very long exposure at low intensity cannot compensate for it. Above a maximum dose the material can be over cured, which makes it brittle and can affect adhesion. Both limits belong in the process specification, expressed in the units the radiometer reports.
Measuring With a Radiometer
A radiometer measures the intensity reaching its sensor, and it has to be matched to the wavelength range of the lamp and to the intensity it will see. A meter designed for a different part of the spectrum will report a number that looks plausible and is meaningless for the cure in question.
The measurement should be taken at the plane where the product sits, not at the lamp face, because the fixture, the reflector and the distance between them all change what reaches the work. The sensor also has a temperature limit and a calibration interval, and a meter that is out of calibration is worse than no meter at all because it supports a decision that has no foundation.
The Shadow Problem
Light travels in straight lines, so any part of the assembly that stands between the lamp and the adhesive leaves a shadow. A component body, a connector housing, a tall capacitor and a cable all cast shadows, and the adhesive underneath them receives a fraction of the dose measured on an open surface.
The usual answers are a second exposure from a different angle, a light guide that reaches into the shadow, or a material that also cures by moisture or heat so that the shadowed region eventually sets. Where the joint is critical, the shadow should be designed out at layout stage rather than solved with a flexible lamp, because the flexible lamp is difficult to verify.
Lamp Aging and Reflector Condition
UV lamps lose output as they age, and the loss is gradual enough that it is invisible. A lamp that was qualified at one thousand milliwatts per square centimetre may be delivering half of that after a few hundred hours, and the process will have drifted out of its window without any setting being changed.
Reflectors and shields collect dust and flux, which reduces the energy reaching the work in the same quiet way. Recording lamp hours, cleaning the reflector on a schedule and checking the intensity with the radiometer at defined intervals turn lamp aging into a monitored condition rather than a surprise. Replacement criteria should be stated in hours or in measured output, whichever comes first.
Verification Beyond the Meter
A meter proves that energy arrived, not that the material reacted. The two checks answer different questions and both are needed. For the material side, a simple tack test, a solvent rub or a hardness check on a coupon cured alongside the product gives a direct indication that the reaction has run.
For a critical application, an adhesion test on a sample and a laboratory method such as a spectroscopic or thermal scan provide stronger evidence, and they are worth doing when a material, a lamp or a supplier changes. The equipment photographs and the coupon should be identified so that the sample can be linked to the production unit it represents.
Records and Process Windows
The record should include the lamp hours, the measured intensity, the exposure time, the fixture used and the date. With those four numbers, a cure problem can be investigated from data rather than from memory, and the drift that precedes a failure becomes visible.
That discipline connects to the rest of the assembly controls. The coating that covers the joint is inspected with the techniques described in the UV tracer notes, the handling that follows is covered by the post coating handling rules, and the cure settings for a structural material are qualified in the same way as the underfill cure schedule. Where adhesion is the requirement, the test used in the adhesion check procedure gives the final answer.
Setting Up a New Product
When a new product is introduced, the cure parameters should be established experimentally rather than copied from a similar assembly. The first step is to measure the intensity the lamp delivers at the working plane with the production fixture in place, because the fixture itself often blocks part of the light. The second is to cure a series of coupons across a range of doses and test them for tack, hardness and adhesion.
From that series a working dose is chosen in the middle of the range that produced a sound cure, and the process window is set around it. The window should then be written into the work instruction with the lamp condition, the exposure time and the fixture identification, and the first article of every run should repeat the coupon test so that the production unit can be compared with the sample that was qualified. Where the material supplier provides a dose range, it should be treated as a starting point rather than as a specification, because the supplier does not know the geometry of the joint or the reflectivity of the parts around it.
FAQ
Can a UV cure be checked by looking at it? No. An uncured adhesive can look identical to a cured one. A tack test, a hardness check or an adhesion test on a coupon is needed, together with the dose measurement that shows the energy actually arrived.
Why not simply increase the exposure time? Because intensity has a lower limit. A long exposure at low intensity may deliver the same calculated dose without starting the reaction properly, and it also heats the assembly, which is often the reason UV was chosen in the first place.
How often should the radiometer be used? At the start of each shift or each production run, after any lamp or reflector change, and whenever the product fixture changes. The readings should be recorded, because the trend is what shows a lamp aging before it fails.