Voice Assistant PCB: Microphones, Audio Path and Radio
A voice assistant board has to do something that most embedded systems do not: it has to listen continuously with enough sensitivity to hear a command across a room, and it has to do that without consuming enough power to drain its supply or enough processing power to keep the rest of the system busy. The board that achieves it combines a microphone array, an audio signal chain, a processor and a radio, and the layout of each affects the others.
This article covers the blocks on a voice assistant PCB and the layout decisions that determine how well the device hears.
What Is on a Voice Assistant Board
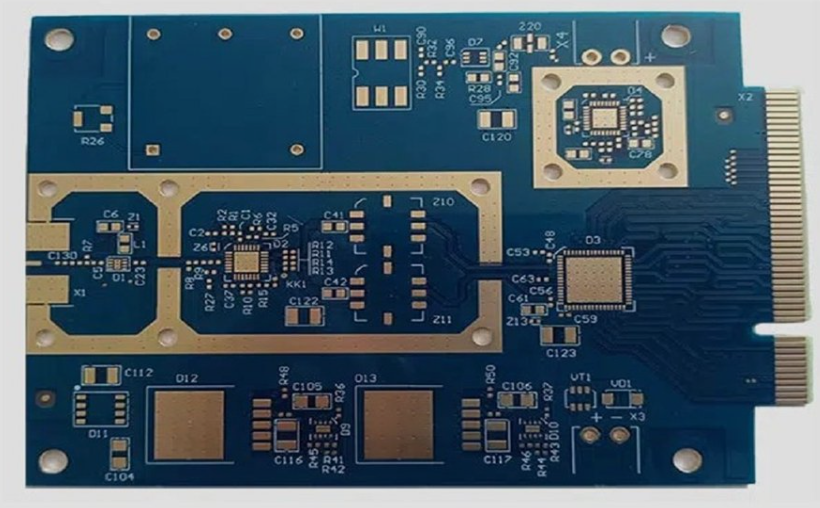
The core is an application processor or a dedicated audio system-on-chip that performs the wake word detection and, in a device without a cloud connection, the speech recognition. Around it sit the microphone array, the audio codec or the digital microphone interface, the radio, the memory and the power architecture.
Most designs also include at least one output path: a speaker amplifier, a headphone jack or a line output. That output is a high-current, switching load, and it is the element most likely to interfere with the microphones, so its placement is a layout decision rather than a detail.

The Microphone Array
Multiple microphones are used not for redundancy but for direction. By comparing the arrival time of a sound at each microphone, the processor can determine the direction of the source and use beamforming to reject noise from elsewhere. That technique only works if the microphones are matched and if the spacing between them is accurate and stable.
Mechanically, the microphones have to be positioned so that their acoustic ports are not blocked and so that the housing does not create a resonance in the voice band. Electrically, each microphone needs a clean supply and a clean clock, and the trace from each to the processor should be short and symmetric so that the delay is equal across the array. Digital microphones carry a high-frequency clock that radiates, so the traces should be kept away from the analogue audio and from the antenna. The mixed-signal layout rules apply across the whole array section.
The Audio Signal Chain
The signal path runs from the microphones, through the codec or the digital interface, into the processor. Where an analogue microphone is used, the path includes a preamplifier and an analogue-to-digital converter, and the noise floor of that chain sets the smallest sound the device can hear.
Keeping the noise floor low is mostly a grounding exercise. The analogue ground and the return path from the preamplifier have to be separate from the digital and switching returns, and the reference for the converter has to be clean. A ground that is shared with the processor or the amplifier will radiate its noise into the microphone input, and the resulting hiss cannot be removed in software without also removing the quiet parts of the speech.
The Radio and Its Antenna
A voice assistant device is usually wireless, and the antenna is often placed on the same board or on a small daughter board. The antenna keep-out area has to be free of copper, and it has to be checked against the battery, the speaker magnet and the display, all of which are significant metal or magnetic objects.
The radio also shares the board with the audio chain, and the two interfere in both directions. The transmit bursts couple into the microphone traces, and the switching supplies for the processor couple into the receiver. Physical separation, a continuous ground plane and a well-planned return path are the measures, and the microstrip and stripline routing rules give the geometry that keeps the radio feed controlled.
Power Architecture
A device that listens continuously has a power problem. The processor has to be in a state where it can detect a wake word while drawing very little current, and the supplies have to be organised so that the parts of the system that are not needed can be turned off completely rather than idled.
That requirement shapes the layout. Multiple regulators mean multiple supplies with their own decoupling, and each has to be switched cleanly so that turning on the amplifier does not disturb the microphone supply. The current-carrying paths follow the trace width and current calculation, and the amplifier supply, which carries the largest current, should be routed so that its return does not pass beneath the microphones.
The Speaker Amplifier
The speaker amplifier is a switching load in a board full of sensitive analogue circuitry, and it is the most common cause of audio artefacts in a voice device. Its output trace carries a high-current square wave, and both the trace and the speaker cable radiate.
The layout measures are standard but have to be applied deliberately. Keep the amplifier close to its output connector, route the output as a tight pair to minimise loop area, keep the class-D switching loop small, and place the amplifier and its inductor away from the microphones with the ground plane continuous between them. Where the amplifier is fed from a separate regulator, that regulator should also be away from the audio input section.
Mechanical and Acoustic Integration
The board layout and the acoustic design are coupled. The microphone port in the housing has to line up with the microphone on the board, and the seal around the port determines whether the device picks up the sound it intends to or the vibration of the enclosure. The board outline is therefore fixed partly by the acoustic requirements rather than by the electronics alone.
The same applies to the speaker. The enclosure volume behind the speaker and the sealing of the front chamber determine the sound output, and the board cannot obstruct either. Where the mechanical and electrical teams work from separate models, the first prototypes usually reveal a mismatch, which is why the acoustic and board models should be integrated early. A small change to the position of a microphone port, made late in the mechanical design, can force a change to the board outline and to the whole audio section layout.
FAQ
How many microphones does the array need? Two are enough for basic direction finding, and three or four give better rejection of off-axis noise and more freedom in placing the beam. The practical limit is set by the enclosure dimensions, because the spacing has to be a reasonable fraction of the wavelength of the sounds being located.
Why does the device hear better in some directions? The array has a directional response, and the housing modifies it further by shadowing the microphones. Both effects are normal, and the voice processing normally compensates by calibrating the array response at manufacture.
Can the microphone be placed on a separate board? Yes, and it is common where the acoustic ports are on a different face of the enclosure. The connection should be short, matched between channels and referenced to a clean ground, because a long or asymmetric path between the microphones degrades the direction estimate. Where a daughter board is used, the flex that connects it is part of the array and should be specified with the same attention to matching as the traces on the main board.