PCBA Soldering Defects: Common Types, Root Causes and Prevention
Why Solder Joint Quality Decides PCBA Reliability
In a printed circuit board assembly, the solder joint is the smallest part of the product and usually the most decisive one. Every joint carries current between the component and the board, and it also absorbs mechanical stress from vibration, thermal cycling, and handling. PCBA soldering defects therefore rarely stay local: a single weak joint can make an entire board fail in the field even when the rest of the circuit is perfect. Experienced electronics manufacturers therefore treat soldering quality as the foundation of long-term reliability.
PCBA soldering defects appear in recognizable families: pads that peel away from the laminate, uneven or dull solder distribution, white burned joints, sharp spikes, grainy cold joints, starved and excess filler, voids and blowholes, and leads that remain loose inside the joint. Behind every symptom there is a limited set of causes related to solder materials, flux quality, heating temperature and time, pad surface condition, and the way the operator or the machine moves while the solder solidifies. Because one defect can have several root causes, analysis should start from the joint appearance and work back through the process.
A structured approach pays for itself quickly. When a defect is identified early, it costs little to correct; when it is discovered only after assembly, rework, retesting, and scrap multiply the loss. The sections below describe the most common PCBA soldering defects, explain why they form, and show how they are prevented on a disciplined SMT PCB assembly line and during hand rework alike.
Pad Peeling and Solder Lifting
Pad peeling, also called pad lifting, occurs when the copper pad separates from the surface of the printed circuit board during soldering. The defect is usually caused by excessive temperature, heating that lasts too long, or mechanical force applied while the joint is still hot, sometimes combined with weak copper to laminate adhesion or moisture absorbed by the board. A lifted pad may still look like a joint, but the connection to the internal copper trace has already broken, so the component develops an open circuit fault that is difficult to repair because the pad itself is gone.
Pad peeling is prevented before the soldering iron is ever switched on. The board must come from a PCB manufacturing process with clean, well bonded copper, and it must be stored dry and handled without scratches. During soldering, the tip temperature should be matched to the solder alloy and applied for the shortest time that produces a good fillet, and repeated rework on the same pad should be avoided, because every additional heating cycle weakens the copper to laminate bond.
Nonuniform Solder, White Joints, and Solder Spikes
Nonuniform solder distribution leaves a joint that is thicker in some areas and almost empty in others, with a dull, lumpy surface. It is most often traced to flux or solder of poor quality, insufficient heating, or pads contaminated with oxidation, oil, or solder mask residue. Because the fillet is not continuous, the joint has low strength and tends to develop an open circuit when the board is stressed. The correction is systematic: clean and verify the pad finish, use flux and solder of consistent quality, and make sure the heat reaches both the pad and the component lead evenly.
A white solder joint is uneven and dull instead of bright and smooth. It usually means the soldering iron was too hot or the heating time too long, so the flux burned away before it could finish cleaning the surface; oxidized solder and contaminated tips look the same, and the joint stays mechanically weak even when it conducts. Solder spikes, the sharp peaks that form when the iron is pulled away, follow a similar logic: the iron is withdrawn in the wrong direction, or high temperature makes the flux sublimate rapidly, leaving pointed solder that can touch an adjacent pad or wire and create a short circuit. Using a clean, correctly sized tip, a moderate temperature, and a smooth withdrawal along the axis of the lead removes most of these defects.
Cold Joints, Starved Joints, and Excess Solder
Cold welding, commonly called a cold joint, leaves a surface that looks grainy, like fine crumbs, rather than smooth and shiny. The usual causes are an iron temperature that is too low, a contact time that is too short, or movement of the component or the board before the solder has solidified. A cold joint has low strength and weak conductivity, so it can pass an initial test and then fail as an intermittent open circuit under vibration or thermal cycling. The remedy is to heat the pad and the lead together until the solder flows freely, then hold the assembly still until the joint freezes completely.
A starved joint receives too little solder because the wire is removed too early, while an excess joint receives too much because the wire is not withdrawn in time. Both extremes hide the true quality of the joint: a starved fillet is mechanically weak, and a mound of excess solder can bridge to the neighboring pad while hiding voids underneath. Leads that remain loose and movable in the joint are usually the result of the lead being shifted before solidification or of flux that never penetrated the barrel of a through hole joint. The fix is discipline: feed a controlled amount of solder, keep the component still, and inspect every fillet.
Automated assembly shows the same families in different clothes. On a reflow or wave line, movement before solidification appears as conveyor vibration or uneven cooling, and early wire removal becomes an incorrect solder paste deposit or a poorly designed stencil opening. The visual symptoms are identical, so the vocabulary of soldering defects learned at the bench remains useful everywhere in the factory.
Voids, Blowholes, and Surface Holes
Holes in or under the solder joint, sometimes called voids or blowholes, are most common in through hole soldering. They form when the lead is not wetted properly, when the gap between the lead and the hole wall is too large, or when flux and trapped gases escape through the molten solder as the joint cools. A joint with a hole can work temporarily, but its strength is low and the cavity can collect corrosive residues, so components on such joints tend to fail after months of service. The same mechanism creates hidden voids on reflow assembled boards, weakening the connection and its electrical and thermal performance.
Preventing holes starts with fit and cleanliness. The hole diameter should be matched to the lead so that capillary action can fill the barrel, the lead and the pad must be free of oxidation, and the flux should be allowed to activate and outgas during preheat rather than at the moment of solidification. Boards and components that have absorbed moisture should be dried according to the manufacturers instructions, and wave soldering parameters should be kept inside the window defined by the solder supplier.
Root Causes: Solder Materials, Temperature, and Time
Almost every PCBA soldering defect can be traced to one of three variables: the materials, the temperature, and the time. Solder alloys of poor composition, weak or expired flux, contaminated pad finishes, and oxidized component leads all produce dull, weakly wetted joints. Temperature that is too low leaves grainy cold joints and poor penetration, while temperature that is too high burns the flux, dulls the surface, and damages pads and components. Time interacts with both: an iron held too long overheats the joint, while too short a contact leaves the filler unable to flow into a proper fillet.
On automated lines these variables are controlled through the soldering profile. The preheat stage drives out moisture and activates the flux, the peak temperature must stay inside the solder paste manufacturers recommended window, and the time above liquidus must be long enough for wetting but short enough to protect the components. On a reflow line the cooling rate matters as well, because slow cooling allows large grains and weak joints to form. Hand soldering follows the same logic: match the tip temperature to the alloy, keep the dwell just long enough, and never move the work while the solder is molten.
Quality materials remove most of the remaining variability. Solder paste should be stored according to its datasheet, flux should be fresh and matched to the application, and the pad finish on incoming boards should be checked before the first board of a batch is assembled. When a new defect appears, the fastest path to the root cause is usually a controlled experiment that changes one of these three variables at a time while the others stay fixed.
Preventing Soldering Defects With DFM, Inspection, and Testing
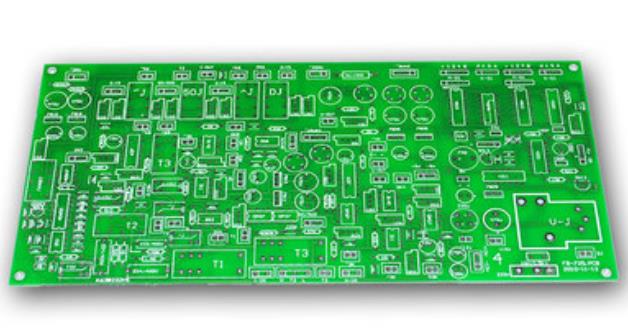
The most effective prevention happens before soldering starts. A PCB design layout that uses correct land patterns, sensible hole to lead ratios, thermal relief on pads connected to large copper planes, and enough spacing between dense pads removes many classic causes of voids, spikes, and bridging. The design review should also confirm that test points and component orientation make later inspection and rework practical, so that a defect discovered in production can still be corrected at low cost.
During production, every board should pass through visual inspection and automated checks. Automated optical inspection catches missing, shifted, and poorly wetted components, X-ray inspection reveals voids hidden under ball grid array packages, and electrical tests performed through PCBA testing catch the opens and shorts that visual methods cannot see. Comparing defect rates against IPC-A-610 criteria keeps the process honest, because a rising count of one defect family is usually the first warning that a material batch or profile has drifted.
How gopcb Controls Soldering Quality
gopcb treats soldering as a controlled process rather than a routine operation. Incoming boards and components are verified before assembly, solder paste and flux are stored and tracked by lot, reflow and wave profiles are validated for each product, and soldering irons are calibrated and checked on a regular schedule. Trained operators, first article inspection, in line optical inspection, and final testing are combined so that a defect is caught at the station where it was created, and every order keeps records that link the materials, the machine settings, and the inspection results together.
If your product shows open circuits, shorts, or intermittent failures that point to solder joint quality, the gopcb engineering team can review the boards and the soldering profiles together and recommend the correction. For new projects, the cleanest way to avoid soldering defects is to keep design and assembly under one roof: gopcb combines board fabrication with turnkey PCB assembly, so pad finishes, component sourcing, soldering processes, and test records are planned as one system. Send gopcb your Gerber files, bill of materials, and expected volumes for a free DFM and manufacturability review, and receive a quote that reflects the real cost of reliable soldering.