Designing for the Soldering Process: What the Layout Should Provide
Most solder defects are designed in rather than produced. The stencil, the placement machine and the reflow oven all operate on what the layout gives them, and when the layout gives them something awkward, the process has to compensate. Understanding what the soldering process needs from a board turns a list of assembly complaints into a set of layout rules.
What Determines Whether a Joint Forms
The chain that produces a good board runs from the artwork, through the quality of the bare board and the components, the condition of the component leads, the solder paste and the printing quality, the placement program and its accuracy, and finally the thermal profile of the reflow oven. Only one link in that chain is under the direct control of the layout designer, and it is the one that constrains all the others.
That is why the design side deserves more attention than it usually receives. A layout with inadequate fiducials forces the placement machine to work harder for the same accuracy, a layout without tooling holes forces the printer to find a reference that may not exist, and a layout that places components too close to the panel edge invites damage on the second pass through the oven.
Fiducials and Machine Vision
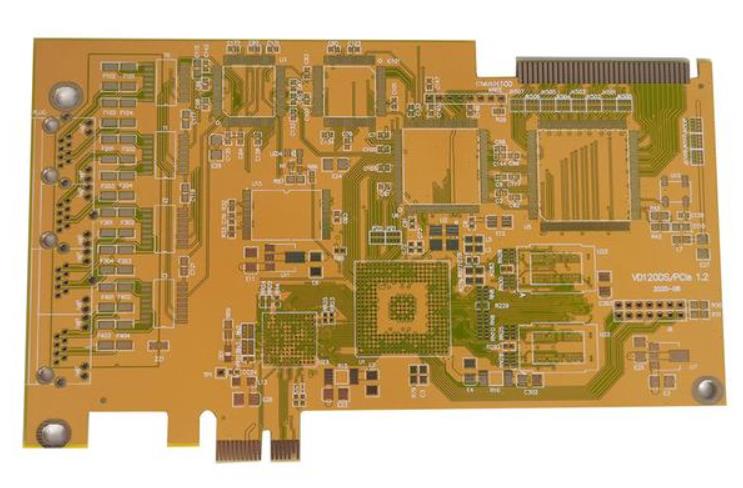
A fiducial is a reference mark that a placement or inspection machine can recognise reliably. It is usually a circular or square pad with a clear contrast against its surroundings, with nothing within a couple of millimetres that the vision system might mistake for the mark itself. Fiducials belong on the diagonal corners of the board or the panel, they should not share the appearance of a component pad, and where components are fitted on both sides, both sides need their own marks.
The surface of the fiducial matters as well. A plated or tinned surface gives a defined optical behaviour, whereas a mark that is only an outline may not be detected at all. Where the board is assembled twice, once per side, the second pass needs the same quality of reference on the second side, and the components fitted during the first pass must not obstruct the view. Our tooling hole and registration notes cover the geometry rules that apply to both fiducials and tooling holes.

Tooling Holes and the Stencil
The stencil printer holds the board by tooling holes, so the board needs them and they need to be accurately positioned. Four holes are normal, one near each corner, with a minimum diameter large enough for the printer’s pins. The requirement is that the pattern of holes locates the board reproducibly in both axes, which means the holes should be on the same centre lines rather than placed independently.
The stencil itself is cut from the paste layer of the design data, so the apertures it produces are a direct consequence of the pad geometry. A pad that is too large for the component will print too much paste, and one that is too small will print too little, and no amount of process adjustment will correct a systematic error of that kind. Keeping the paste aperture to the proportion recommended by the component manufacturer is the design contribution to printing quality.
The Panel Edge and the Second Pass
The conveyor that carries a board through the placement machine and the oven grips it along one edge, and the area it occupies cannot be used for components. A few millimetres along the long edge should be left clear, and where the board has components on both sides, a larger margin is needed on the side that faces down during the second pass, because components fitted in the first pass can be knocked off by the conveyor.
Where the panel has to be tight, a rail added to the panel rather than the board solves the problem. The rail is removed after assembly, and the board keeps its full area for components. A panel designed for assembly should include that rail as part of the panel layout rather than being left to the assembler to improvise.
Vias, Pads and Solder Flow
A via placed directly on a pad is a defect waiting to happen. When the paste melts, the solder flows into the via, leaving the joint short of solder, and the result is a weak or open connection that is difficult to see. Where a via must be placed on a pad, it should be filled and plated over so that the surface is closed.
The same reasoning applies to pad geometry in general. A pad that is larger than the component terminations spreads the paste beyond where the solder is needed. A pad with insufficient space between adjacent pads will bridge at the slightest excess of paste. Both conditions are visible in the artwork and invisible in the completed assembly until the joints are inspected.
Thermal Relief and Rework
A pad connected directly to a large copper area conducts heat away from the joint during soldering, which is a problem for hand soldering and for rework. Thermal relief spokes restrict the connection so that the joint reaches temperature, at a small cost in electrical impedance. Where a plane connection is not needed for current or thermal reasons, the relief makes the board far easier to assemble and repair.
That final consideration is worth stating plainly: a board that is difficult to rework becomes a board that is scrapped. Our solder wetting notes cover the surface conditions that cause joints to fail, the solder defect material describes the failures that follow, and the design release checklist covers the assembly provisions that should be present before release.
Checking the Assembly Provisions
The provisions that the soldering process needs are all visible in the artwork, which means they can be checked before the data is released rather than discovered on the line. The check is short: are there fiducials on both sides in positions the vision system can see, are there tooling holes that locate the board in both axes, is the panel edge clear of components, are the paste apertures proportional to the pads, and are vias either absent from pads or filled and plated over. Five questions, and each one corresponds to a class of defect that is otherwise attributed to the process.
FAQ
How many fiducials does a board need? Two are the minimum for a machine to establish position and rotation, and three or more allow for scaling to be corrected. In practice the answer depends on the equipment: a placement machine typically wants a pair on the panel and a pair on each board, and it wants them on the side being assembled. Providing them on both sides costs a small amount of board area and removes an entire class of alignment problem.
Why does a component near the board edge get damaged? Because the edge is where the conveyor grips the board, and the second pass through the oven runs with the first side facing a surface that is not designed to clear components. Moving the parts away from the edge, or adding an assembly rail to the panel, solves the problem at the layout stage. Correcting it after the panel is built means rebuilding the panel.
What does gopcb check for assembly compatibility? We check the presence and placement of fiducials, the tooling holes and their alignment, the clearance from the panel edge, the paste aperture proportions and the treatment of vias on pads. These are the provisions that the assembly process cannot supply for itself, and they are all decided long before the board is fabricated.