Flexible Heater PCB Design And Power Density
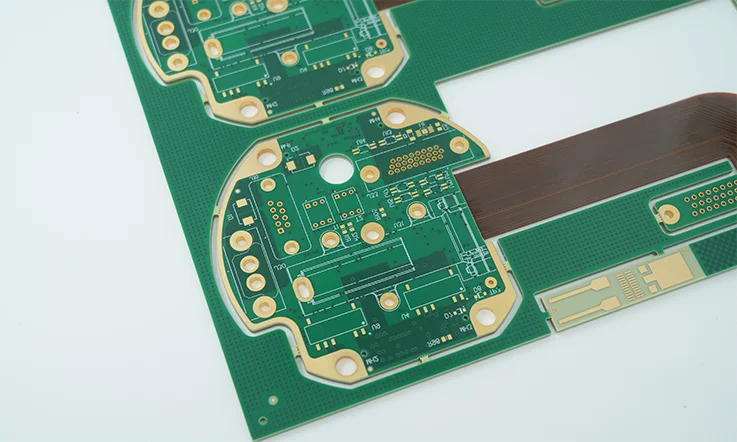
A flexible heater is a resistive circuit formed on a thin polymer substrate, usually polyimide, that can be bonded to a curved or irregular surface. It replaces a wound wire element with an etched foil pattern, which makes the heat distribution repeatable and lets the heater follow the shape of the part it warms.
Designing one is a thermal problem as much as an electrical one. The resistance alloy, the trace geometry, the substrate and the adhesive together determine how much power can be delivered and how evenly the heat spreads across the surface being warmed.
How A Flexible Heater Works
Current passes through an etched resistor pattern and dissipates power as heat. The pattern is designed so that the total resistance matches the supply voltage and the required wattage, and so that the tracks are spread across the heated area rather than concentrated in one place. The heat then conducts through the substrate into the part being warmed.
The circuit is normally a single resistive layer with two terminations, and the heater is often supplied with a temperature sensor and a thermal fuse on the same substrate. Integrating those elements on the heater removes the need for separate wiring and makes the control loop respond more quickly.
Resistance Alloy And Trace Geometry
The resistance alloy is chosen for a stable resistivity, a low temperature coefficient and enough ductility to survive bending. Copper nickel alloys are common, and the alloy foil thickness is selected so that the required resistance can be reached with a practical track width and a sensible total area.
Trace geometry sets the local power density. A narrow track has a higher resistance per unit length and generates more heat per unit area, while a wide track spreads the same power over more surface. The pattern is therefore a map of where the heat is wanted, and a uniform grid gives the most even result.
Power Density And Its Limits
Power density is usually quoted in watts per square centimetre or per square inch, and it is the number that decides whether the heater will survive. A typical polyimide heater is limited to a few watts per square centimetre in still air, and the limit falls as the ambient temperature rises. The substrate properties behind this limit are described under PCB dimensional stability and expansion.
Exceeding the limit does not simply make the heater hotter. The adhesive or the substrate reaches its temperature rating, the bond degrades, and the heater delaminates from the surface it was meant to warm. The practical rule is to design for the worst case, which is usually a cold start in still air with no heat sinking.
Polyimide Substrate And Adhesive Choice
Polyimide is the usual substrate because it keeps its mechanical properties from below freezing to well above 200 C and survives repeated bending. Thinner substrates transfer heat faster but are damaged more easily, while thicker ones are more robust but respond more slowly to a change in set point.
The adhesive that bonds the heater to the part is often the weakest link. A pressure sensitive adhesive is convenient for prototypes but creeps at temperature, while a thermosetting epoxy or a silicone gives a stronger and more heat resistant bond. The adhesive thickness also adds thermal resistance, so a thick glue line reduces the heat that reaches the part.
Thermal Uniformity And Sensor Placement
Thermal uniformity is a function of the trace layout and of how the heat escapes into the surrounding structure. A heater bonded to a metal plate evens out quickly, while one bonded to plastic develops hot spots wherever the thermal path is poor. Modelling the assembly or measuring an early prototype is the only reliable way to know.
The temperature sensor should sit where the control loop needs to be accurate rather than beside the hottest track. Placing it on the surface being warmed gives the true controlled variable, while placing it on the heater gives a faster but offset reading. The choice should be stated in the specification. The way these choices are documented is described under PCB design quality characteristics.
Testing, Safety And Standards
Every heater is tested for resistance, dielectric strength and insulation resistance before it leaves the factory, and the dielectric test is the one that catches a damaged substrate. A hipot test at the specified voltage confirms that the resistive layer is properly insulated from any external surface.
Safety requirements depend on the application. A heater running from mains voltage needs creepage, clearance and insulation that satisfy the relevant product standard, while a low voltage heater is judged mainly on temperature limits and on the flammability of its materials. The dielectric requirement belongs on the drawing rather than in a conversation. How these requirements are captured in the fabrication data is described under PCB design and fabrication.
Process Control and Verification
On a design of this kind, resistance alloy is the item that decides how the rest of the board is arranged. The measurements that matter are the repeatable ones: conductor width and spacing, annular ring, finished hole size, plating thickness and surface finish are all verifiable on a coupon that travels with the panel. Running a first article through the same checks as the production panel confirms that the two agree, and that comparison is the cheapest form of process control available at prototype stage.
Keeping a sample from the panel turns a dispute into a measurement, because the same coupon can be re-examined by both parties without rebuilding the batch. Reviewing the design before the data is released is cheaper than correcting it after the panel is in the tank, because every step downstream inherits the decision made at the front end.
Process Control and Verification
On a design of this kind, resistance alloy is the item that decides how the rest of the board is arranged. The measurements that matter are the repeatable ones: conductor width and spacing, annular ring, finished hole size, plating thickness and surface finish are all verifiable on a coupon that travels with the panel. Running a first article through the same checks as the production panel confirms that the two agree, and that comparison is the cheapest form of process control available at prototype stage.
Keeping a sample from the panel turns a dispute into a measurement, because the same coupon can be re-examined by both parties without rebuilding the batch.
Process Control and Verification
On a design of this kind, resistance alloy is the item that decides how the rest of the board is arranged. The measurements that matter are the repeatable ones: conductor width and spacing, annular ring, finished hole size, plating thickness and surface finish are all verifiable on a coupon that travels with the panel. Running a first article through the same checks as the production panel confirms that the two agree, and that comparison is the cheapest form of process control available at prototype stage.
A first article check confirms that the process and the drawing agree on the points listed above, and that the coupon data supports the values used in the design.

Where a measurement falls outside the expected window, the sample is retained so that the cause can be established before the balance of the batch is released.
FAQ
Can a standard PCB be used as a heater? It can for low power and low temperature applications, but FR-4 is rigid and its adhesive and solder mask limit the surface temperature. Polyimide is preferred wherever the heater must bend or run hot.
How is the heater resistance set? From the supply voltage and the required wattage, then converted into a track length and width using the foil resistivity. The pattern is then checked against the power density limit at the worst case ambient.
Does a flexible heater need a thermostat? Almost always. A resistive element has no natural self limiting behaviour, so an external sensor or a thermal fuse is used to keep the surface inside its rated temperature.