The Assembly Sequence: From Files to Finished Board
Between the files a customer sends and the boards that arrive, a series of operations is performed, and each of them has requirements and produces something that can be checked. Understanding that assembly sequence is useful for two reasons: it shows where a delay is most likely to occur, and it identifies the points at which a decision has to be made rather than assumed.
The sequence is long but not complicated. What makes it difficult in practice is that each stage depends on the previous one, and an unresolved question at one of them stops the work rather than slowing it.
Stage One: The Fabrication of the Board
The bare board comes first, since nothing else can begin without it. The data is reviewed and prepared, the panel is arranged, the layers are imaged and pressed, the holes are drilled and plated, the surface is finished and the board is tested and packed.
The requirement at this stage is a data set that is complete and unambiguous: the fabrication data, the stack-up, the material specification, the finish and the tolerances. The output is a board that meets a dimensional and electrical specification, and the evidence is the test result and, where it applies, the measurements taken from coupons.
Two decisions belong here that are often deferred. The panel arrangement, which determines how the boards are handled in assembly and how they separate afterwards. And the surface finish, which affects not only the board but the assembly, because a finish with a short shelf life imposes a limit on how long the boards may wait before placement.
Stage Two: Material
Material gathering runs in parallel with fabrication when the arrangement allows it, and it is the stage that most often determines the schedule. Each part has to be acquired, checked against the bill of materials and set aside for the order.
The incoming material check is the point at which a difference is found while it is still cheap to correct: a package that does not match the drawing, a part number that differs in one character, a quantity that is short of the allowance. The record of that check is also what allows a material-related fault to be attributed later.
Three items belong to this stage and are frequently left open: which parts may be substituted and within what range, what allowance is added for attrition, and who is responsible when a part cannot be obtained at all.
Stage Three: Printing and Placement
Assembly begins with the stencil and the paste. The stencil is designed from the pad geometry, the printer is set and measured, and the deposit is inspected before the components are placed.
Placement follows, using a programme built from the coordinate file and verified against the first article. The stage handoff between printing and placement is the most sensitive in the whole sequence, because the volume of solder available at each position has already been fixed. A problem discovered after placement is a rework operation; the same problem discovered at printing is a wipe and a second attempt.
Reflow completes the connection, and the profile is the parameter that decides whether the joints are formed as intended. Where the assembly carries devices whose joints cannot be seen, this is also the stage whose result has to be verified by a method that can see them.
Stage Four: Insertion and the Mixed Board
Where the board carries inserted components, they follow the surface mount work. Terminals, connectors, capacitors, relays and transformers are placed and soldered by hand, by selective soldering or by a wave, and the joints are then rechecked at the positions that carry load or current.
The structural requirements belong here: the height of a component, whether it sits against the board or stands off it, the trimming of the leads and the space reserved around it for the enclosure. None of those can be inferred from the board, and all of them are cheaper to state in the drawing.
<img src="https://www.gopcba.com/wp-content/uploads/2026/08/shutterstock_62810317-small.jpg" alt="final inspection of a completed assembly batch” />
Stage Five: Test, and the Test Definition
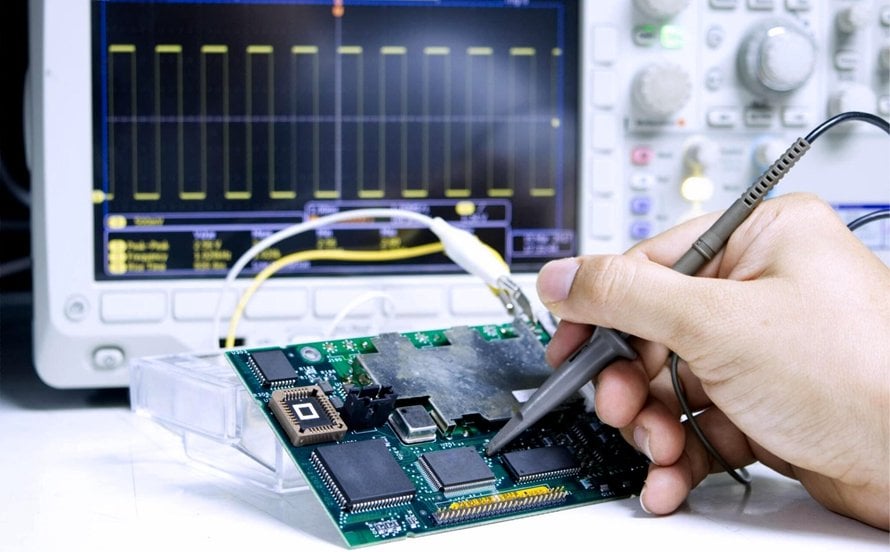
Testing is where the assembly is confirmed to be what it was intended to be. The scope varies: an unpowered inspection of the assembly, a powered check of the supply, a functional verification of the interfaces and the programme version, or a longer run at load for a product that has to be reliable.
What makes the difference between a test and an assumption is the test definition: what is measured, how it is applied and what range is acceptable. A test without limits cannot be repeated consistently, and a result that cannot be repeated cannot be compared between batches.
The definition should be written before the first batch, and it should state the treatment of a failure: how the unit is marked, whether it is repaired and whether it is retested before it returns to the batch.
Stage Six: Final Inspection and Packing
The last stage confirms the delivery. The units are counted, inspected for the faults that survive the earlier checks, and packed so that the protection survives transport.
The information produced here is what makes the delivery describable: the quantity, the product revision, the batch reference, the test status and the way the units are divided between packages. Where the product is stored rather than used immediately, the moisture protection and the labelling matter as much as the electrical result.
An order that reaches this stage with all of the earlier questions answered takes a short time to complete. Where one of them was left open, this is the point at which it re-emerges, and the operations involved remain the familiar ones: SMT assembly, mixed technology assembly for boards that combine both, PCBA testing and the controls described under quality management.
What Runs in Parallel
The sequence is fixed, but not everything in it has to wait its turn. Recognising what can overlap is the simplest way to shorten the total without paying for priority.
The material can be gathered while the boards are being fabricated, the stencil can be ordered as soon as the pad geometry is settled, the placement programme can be built before the boards exist, and the test method can be defined while the assembly is being planned. Each of those is work that would otherwise happen after the boards arrive, and each of them is a day or more gained.
The limit is that some steps genuinely depend on others. The first article cannot be verified before boards exist, the profile cannot be measured without an assembly, and a test limit cannot be confirmed until a board behaves correctly at it. Making the distinction between work that depends on a result and work that depends only on information is what allows the schedule to be arranged rather than merely accepted.
FAQ
Which stage causes the most delay? Material gathering, particularly when a single device has a long lead time or a laminate has to be ordered.
What is the most sensitive handoff? The transition from printing to placement, because the solder volume is fixed at that point and can no longer be adjusted.
What makes the last stage quick? Having answered the earlier questions. Counting, packing and labelling are straightforward when the revision, the test status and the batch reference are already known.