Drone PCB Cost: What Drives the Price of Flight Controller Boards
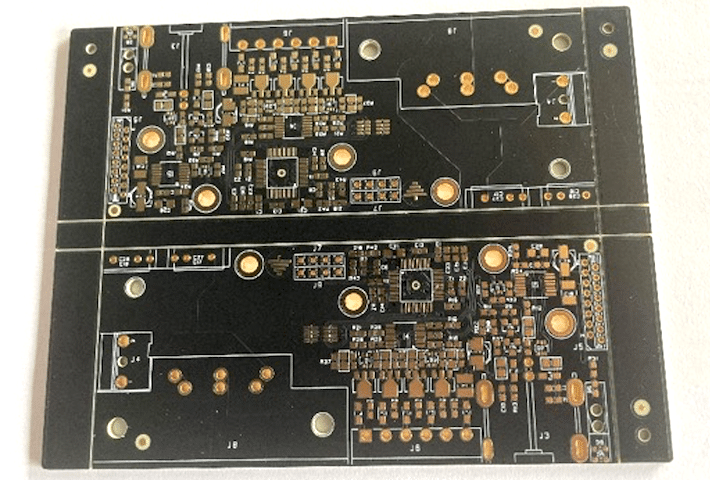
Drone PCB cost is shaped by constraints that have nothing to do with the circuit: weight, vibration, thermal extremes and a very small available volume. A flight controller board is usually 30 to 50 millimetres square and carries a processor, an inertial sensor, a power stage and several connectors.
Those constraints push the design toward thin laminates, high layer counts and dense placement, and each of those raises the fabrication price. Understanding which requirement drives which cost item makes it possible to reduce the price without compromising the aircraft.
Layer Count and Density
A flight controller escapes from a high pin count processor in a very small area, which usually requires more layers than the net count alone would suggest. Four and six layer stacks are common, and higher-end designs with integrated HDI structures use build-up layers.
Each additional layer pair adds lamination, registration control and drilling cost. Beyond six layers, the increase becomes steeper because the process needs tighter control and often sequential lamination.
Weight and Thickness Constraints
Weight is a direct cost multiplier on a drone, because every gram reduces flight time. Boards are therefore made thinner than a typical industrial design, often 0.8 mm or less, and the layer thicknesses are minimised.
Thin boards are harder to fabricate and harder to assemble. They need carriers and support fixtures during printing and placement, and the panel design must provide enough stiffness to survive the conveyor. That tooling is part of the cost.
Thickness also constrains the aspect ratio of every via. A thin board allows small vias, which is an advantage for density, but the panel handling and warpage risk increase as the board gets thinner.
Power Distribution
The power stage carries the motor and avionics currents through a small board area, so copper weight and plane design matter. Where the current is high, designers use thicker copper or multiple plane pairs, and both raise the price.
Connector placement determines the current path. Battery connectors and motor output pads need enough copper and enough vias to distribute the current without local heating, and their position defines the thermal map of the board.
Voltage drop and heat are the constraints. A copper path that is too narrow does not fail immediately; it produces a temperature rise that shows up as a reduction in margin, and the margin is what keeps the board reliable at maximum current.
Sensor and Signal Layout
An inertial measurement unit is sensitive to vibration, thermal gradients and magnetic fields. Its placement relative to the motors, the power wiring and the mounting points determines how much filtering the software must do.
Mechanically, the sensor should be placed close to the board centre and away from mounting holes that transmit frame vibration. Electrically, it should be routed as a short, well-referenced interface with its own supply decoupling, and kept away from the switching power stage.
This is where layout quality becomes a cost item. A design that requires extensive filtering or calibration to work is more expensive to develop and to support than one whose layout avoids the problem.
Connectors and Mechanical Integration
Drone boards use small, high-density connectors for motors, radio links, cameras and power. Each connector imposes a keep-out area, a mechanical load path and often a height constraint, and the number of them drives board area and assembly steps.
Where the board mounts directly to the frame, the mounting pattern is defined by the frame standard, and the board must absorb vibration without cracking at the mounting holes. That usually means larger pads, additional copper around the holes and sometimes a compliant mounting design.
Material Selection
Standard FR-4 covers most flight controller designs. Higher glass transition laminates may be used where the board sits near a hot power stage, and low-loss material appears in designs with high-speed interfaces such as camera links.
Material cost is rarely the dominant item on a small board, because the board area is small. The process cost per unit dominates instead, so simplifying the stack is more effective than shopping for a cheaper laminate.
Panel Utilization and Small Boards
Small boards may tile many times per panel, which is good for unit cost but means the panel is shared with the tooling and rails that are needed regardless of board count. The rails, fiducials and tooling holes are a fixed overhead per panel.
Very small boards also need handling care during assembly. They are prone to being drawn into the machine or lost, so carriers and sometimes a panel-per-board arrangement are used, which reduces the utilization advantage.
Assembly Cost
The assembly cost of a flight controller is driven by the number of unique components and by the fine-pitch devices on the board. A small board with a high pin count processor, a small inertial sensor and several fine-pitch parts requires vision placement and careful paste control.
Double-sided assembly is common, which doubles the number of placement and reflow passes and adds a second set of tooling. Where one side can be kept to a few parts, the second pass is faster and the risk is lower.
Test and Qualification
Testing covers functional behavior, current consumption and sensor performance. The sensor is usually verified with a calibration routine rather than a single measurement, because its accuracy depends on the board’s thermal and mechanical environment.
Where the product is subject to emissions requirements, the radio interfaces and the switching power stage must be measured. Design changes after a failed measurement are expensive, so the layout is usually reviewed against those requirements before the first prototype is built.
Where Cost Can Be Reduced
Review the layer count against the actual escape requirement, and check whether via-in-pad is genuinely needed or merely convenient. Reducing layers and avoiding build-up structures are the largest available savings.
Consolidate part numbers where possible. On a small board, the number of unique components drives both the assembly setup and the risk of a misload, and consolidating two similar values into one is often possible without changing performance.
Finally, review the panel and the tooling. A board outline that tiles better and a panel that needs fewer fixtures reduce cost without touching the circuit.
Design Checklist
Confirm the current path cross section and the connector pad sizes, verify the sensor placement against the mounting pattern and the power stage, check the stackup against the weight and thickness target, and confirm that the assembly process can handle the panel.
Then verify the interfaces: motor outputs, radio link, camera link and the battery connector. On a flight controller, the mechanical and electrical interfaces are the parts of the design that cost the most to change after the first prototype.
Related reading: AIoT processor core board design, trace width and current calculation, and via in pad versus plated through.
FAQ
Why is a drone board so expensive for its size? Because the cost is dominated by process steps rather than area. Fine-pitch assembly, high layer count for the escape routing and thin laminate tooling all add cost on a small board.
Does a thinner board cost more? Usually yes, because it requires carriers and handling fixtures and has a higher warpage risk. The weight saving may still justify the cost on a flying platform.
Can the layer count be reduced? Often, by changing the escape strategy or moving to via-in-pad. Reviewing the stack against the actual routing requirement usually finds at least one layer that is not needed.