PCB Panelization for Assembly: Requirements and Design Rules
What PCB Panelization Means
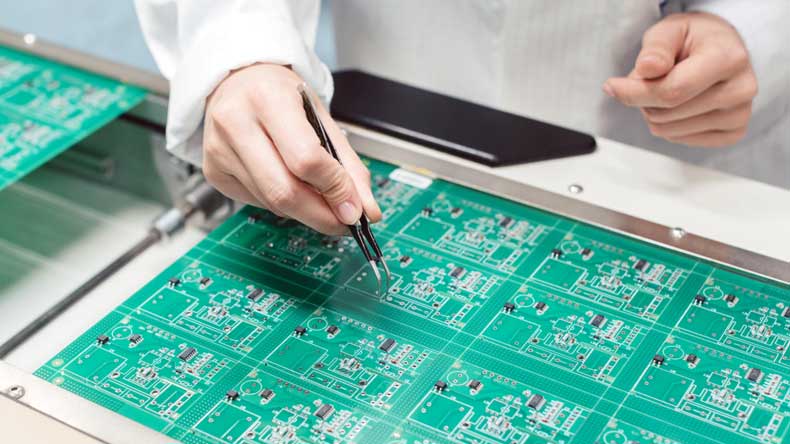
Panelization is the process of arranging several identical or mixed circuit boards into one larger panel so that they can be fabricated, printed and assembled as a single unit. Instead of handling tiny boards one at a time, the assembly line moves one rigid panel through solder paste printing, pick and place, reflow and inspection, then separates the individual boards at the end. Done well, panelization raises throughput and lowers cost per board. Done badly, it causes warping, poor stencil printing, misplaced components and damaged edges. This guide covers the requirements that make a panel work on a modern assembly line in 2026.
Why Panelization Matters for Assembly
Automated equipment needs a minimum handling size. Very small boards, thin boards and boards with fine pitch components are difficult to feed, support and clamp on their own. Grouping them into a panel gives the machine a stable, standard format and provides room for the rails, fiducials and tooling holes that the line needs. A panel also lets the manufacturer share stencil apertures and conveyor handling across many units, which is where the real cost saving appears.
Panel Size and Format
The panel must fit the equipment. Common line standards accept panels roughly between 50 mm and 250 mm on each side, with 100 x 150 mm and 150 x 200 mm being very common working sizes. The panel should be thick enough to resist sagging in the reflow oven and to stay flat during stencil printing, and the individual board thickness must match what the design and the assembly process expect. If a board is thinner than about 0.8 mm, a carrier or a thicker rail is usually added so the panel stays flat.
Edge Rails and Spacing
Every panel needs edge rails, also called breakaway rails, on at least two opposite sides for conveyor handling. A typical rail is 5 mm to 10 mm wide, and it must be free of components. Between the rails and the array there should be an edge clearance, usually at least 1 mm to 2 mm, so the router or V-cut does not touch copper, traces or solder mask on the finished board. Spacing between adjacent boards inside the array is normally 1.6 mm to 3 mm, which leaves room for the depanel tool and prevents damage during separation.
Breakaway Tabs and V-Cut
Boards are held in the panel by breakaway tabs, perforated bridges that connect each board to its neighbours and to the rails. Tabs are usually 3 mm to 5 mm wide and are placed where they will not damage sensitive areas when snapped or routed. V-cut scoring is a faster alternative for straight edges: a V-shaped groove is cut part way through the panel on both sides, and the board is separated by bending. V-cut needs a straight line the full length of the edge and roughly 0.4 mm to 0.6 mm of remaining material, and it cannot be used on curved edges, so complex outlines rely on tabs and routing instead.
Fiducials and Tooling Holes
Fiducials are small copper or gold dots that the pick and place machine uses to align itself to the panel. A panel should carry at least three global fiducials placed asymmetrically, and each individual board should have its own local fiducials if the board is dense or uses fine pitch parts. Tooling holes are non-plated holes near the rails that locate the panel in the printer and conveyor. Their position and diameter must be consistent across the batch, because the machine references them mechanically.
Component, Keep-Out and Marking Rules
Keep components and tall parts away from the rails, the tabs and the separation lines. The general rule is a 1 mm to 2 mm component keep-out around every break line, widened to 3 mm or more when the parts are tall or fragile. Place the panel barcode and the board identification marks on the rails or in dedicated areas so that they are not lost when the panel is separated. Orientation matters too: align all boards in the same direction so the stencil apertures and the feeder setup stay consistent.
Requirements Checklist
Panel fits the line. Size and thickness within equipment limits. Rails present. At least two handled edges, component free. Edge clearance. 1 mm to 2 mm to copper and mask. Board spacing. 1.6 mm to 3 mm between boards. Tabs or V-cut. Sized so the board survives separation. Fiducials. Three global plus local where needed. Tooling holes. Consistent, non-plated, on the rails. Keep-out. Clearance around all break lines. Marking. Barcode and ID on the rails.
Panelization is a joint decision between design and production, so review how your fabricator and assembler handle it before release. Confirm how PCB manufacturing prepares the array, keep the panel rules aligned with your PCB design and layout, and check the wider design and manufacturing considerations. For new products, a prototype PCB assembly run is the cheapest way to prove the panel before volume.
Common Panelization Mistakes
The most frequent error is placing components too close to the break line, which leads to cracked solder joints when the board is separated. The second is a rail that is too narrow or too thin for the conveyor, so the panel sags and prints unevenly. The third is missing fiducials on a dense board, which forces the machine to align to a pad and loses accuracy. The fourth is mixing board thicknesses or orientations in one panel, which complicates stencil printing and reflow. All four are avoidable with a short review at the design stage.
FAQ
How many boards should be in a panel? As many as fit the equipment limits while keeping the panel stiff and the rails intact. Fewer large boards often work better than many small ones.
Is V-cut better than breakaway tabs? V-cut is faster and cleaner for straight edges, while tabs and routing suit curved outlines and mixed arrays.
Do I need fiducials on every board? Global fiducials on the panel are mandatory; local fiducials are recommended for dense or fine pitch designs.
Can components be placed on the rails? No. Rails are for handling and must stay free of parts and tall components.
Conclusion
Panelization turns many small boards into one efficient assembly unit, and the requirements behind it are straightforward: fit the line, provide rails, respect edge clearance and spacing, choose tabs or V-cut wisely, add fiducials and tooling holes, and keep components away from every break line. Follow those rules and the panel will print, place and reflow cleanly in 2026, then separate without damage.