PCBA Short Circuit Inspection: How to Find and Fix Faults
Why Short Circuits Happen on a PCBA Board
Short circuits are among the most common defects found on assembled printed circuit boards, and they can stop a product from working at the moment of first power-up. On a PCBA board, most shorts form between a power net and ground or between two signal nets that run close together. Typical causes include solder bridges across fine-pitch pads, stray solder balls hidden under components, damaged filter capacitors, and layout clearances that are simply too small for the process used. A power-to-ground short is the most serious case, because every part connected to that rail is affected and the board may be damaged by the time the fault is found. This is why a reliable PCB manufacturing process combines careful design rules with disciplined assembly and a clear inspection routine.
The difficulty of a PCBA short circuit inspection depends on the board itself. On a simple two-layer assembly the fault can often be found in a few minutes with a multimeter, while a dense board with hundreds of small capacitors, fine-pitch ICs, or BGA packages can hide the same fault for hours, because many components share the same power and ground networks. Instead of probing at random, experienced engineers follow a systematic sequence: review the shorted net in the design files, check the most likely positions visually, measure with a multimeter, isolate suspect blocks, and use a milliohmmeter when the fault remains. The sections below explain each step in the order that works on the shop floor.
Start from the Design: Highlight the Shorted Network
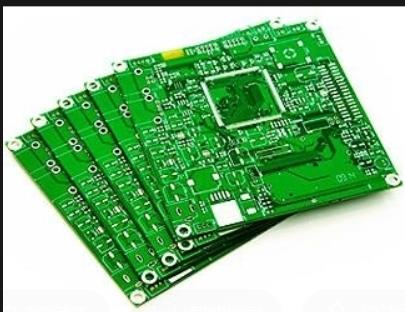
The first step of any PCBA short circuit inspection is to open the PCB design on a computer and highlight the network that is shorted. The layout software then lights up every pad, via, and track that belongs to that net, so the engineer can compare the picture with the physical board. Attention should focus on the positions that are closest together and easiest to connect accidentally: the pins of fine-pitch ICs, vias that sit beside a ground pour, the pads of decoupling capacitors, and connector pins near an edge. A short that appears inside an integrated circuit, between two adjacent pins of the same package, is especially difficult to see by eye and needs electrical testing to confirm.
It is also worth checking the design itself before blaming the assembly process. Occasionally the short is designed in, for example when a polygon pour touches a pad of another net or when a clearance rule was set below the capability of the fabricator. Reviewing the highlighted net against the schematic reveals such cases quickly. When the design is clean, the layout also tells the inspector where to look first on the physical board, and a well-prepared PCB design layout with sensible clearances prevents a large share of shorts before a single component is placed.
Good Soldering Habits Prevent Hidden Shorts
In hand assembly and rework, short circuits often begin at the workbench, so good habits are the cheapest inspection method. First, visually inspect the bare board before soldering and use a multimeter to check the key circuits, especially power and ground, for existing shorts. Second, after each chip is soldered, measure power to ground again before moving to the next component. If the reading changes after a particular part, the cause is almost certainly at that component, and it can be corrected while the work area is still clear. Waiting until the whole board is finished turns a five-minute fix into an hour of fault hunting.
Third, never shake or flick the soldering iron to remove excess solder. Drops of solder thrown from the tip can land under a chip, particularly under surface mount components, where they create tiny bridges that are almost impossible to see and very hard to find later. Keep the tip clean, use the correct temperature, and apply a sensible amount of flux. When a board has many fine-pitch parts, machine soldering is more repeatable than hand work: an automated SMT PCB assembly line with a well-set stencil and reflow profile produces far fewer solder bridges than manual soldering of the same design.
Cut-and-Test Isolation for Simple Boards
When a short persists after visual checks and the board does not have design isolation, the cut-and-test method is a practical next step, especially for single-layer and double-layer boards. Take the board with the fault and carefully cut a track that separates one functional block from the rest of the circuit. Then power each part of the board in turn and observe where the short remains. Each cut eliminates a group of components, so the fault area becomes smaller with every step until the defective block is found.
A few rules make this method safe. Cut the track with a sharp blade at a clear point, away from component pads, and confirm with a multimeter that the cut is complete before applying power. Keep a note of every cut so the board can be repaired afterwards. When the defective component is found and replaced, restore the cut track with a short length of wire or a solder bridge. The method is less practical on multilayer boards, because the shorted plane may lie on an inner layer where no track is visible, which is why design-level isolation matters on such boards.
BGA and Multilayer Boards: Split the Power in the Design
BGA packages are a special case, because the solder joints are hidden under the body and cannot be inspected visually, and multilayer boards of more than four layers hide their inner planes in the same way. For these boards the most reliable strategy is prepared during design: give each chip its own power connection through a magnetic bead or a 0 ohm resistor. When a power-to-ground short appears, the engineer disconnects each bead or lifts each 0 ohm resistor in turn and measures the chip supply. The chip whose connection still shows a short is the source of the fault, and the rest of the board is cleared in a few minutes.
Soldering itself is another source of BGA shorts. If a BGA is assembled without automated equipment, adjacent power and ground balls can bridge during placement without anyone noticing, because the defect is hidden as soon as the chip is set. BGA devices should therefore be soldered in a controlled reflow process and verified with X-ray or automated optical inspection, and the isolating beads should be rated for the current of the chip they feed. This combination of design foresight and process control keeps BGA-related faults rare instead of mysterious.
Checking Suspect Components: Capacitors and ICs
Small surface mount capacitors deserve special attention, particularly power filter capacitors of the 103 and 104 types that sit between power and ground. During hand soldering they can be bridged easily because their pads are close together, and a cracked or overheated capacitor can itself become a short. A common power supply short is serious because many components on the board share the same rail, so every component that uses that supply is a suspect. If the board has only a few components, each one can be checked in turn and the short point is usually found quickly. If the board is dense, tracing every component is slow and success depends on luck, which is exactly when systematic isolation or a milliohmmeter is the better tool.
For boards with few parts, a practical trick is to free suspect components one at a time. A through-hole capacitor can be cut free with diagonal pliers by cutting one lead at the middle of the lead, never at the root or flush against the circuit board, so the remaining stub can be soldered again later. A through-hole IC can be treated the same way by cutting its VCC pin. When the short disappears after one lead is cut, the component is confirmed as the cause. For a chip integrated circuit, melt the solder on the power pin and tilt the pin away from the pad to leave the VCC connection, then test again. After the faulty part is replaced, the cut or lifted connection is soldered back and the board is measured once more.
Milliohmmeter Measurement: Let the Resistance Talk
Copper foil on a circuit board has a small but real resistance. A track 35 micrometers thick and 1 millimeter wide has a resistance of roughly 5 milliohms per 10 millimeters of length. An ordinary multimeter cannot resolve such small values: on a shorted board it simply reads zero, whether the fault is at one pad or across the whole panel. A milliohmmeter changes the picture, because it can measure tens or hundreds of milliohms and turn that difference into useful information.
The technique is to compare readings on the shorted network rather than searching for an absolute value. Place one probe at a reference point on the rail and touch the other probe to the legs of the components connected to that network, or measure between the two ends of a suspected section. Every reading includes the resistance of the track and the component lead between the probes, so the component that gives the lowest value is the one closest to the actual short, and that component becomes the prime suspect. Remove it, measure again, and the reading on the rest of the network rises as expected. With a four-wire milliohmmeter and clean probe contact, this method locates faults on dense PCBA boards quickly and with far less cutting than trial and error.
How gopcb Keeps Shorts Out of Its Assemblies
gopcb treats short circuit prevention as a chain that starts before production. Every order passes a design for manufacturability review that checks clearances, copper pour spacing, and pad geometry, so layout errors are corrected while changes are still free. On the line, solder paste is inspected after printing, reflow profiles are controlled for each board type, and assembled boards are checked optically and electrically, including dedicated PCBA testing that measures power and ground integrity before boards leave the workshop. Catching a short at testing costs minutes; finding it in the field costs a customer relationship.
For customers who prefer to handle fabrication and assembly with one supplier, gopcb combines board manufacturing, component sourcing, and assembly under a single turnkey PCB assembly service, so design files, process records, and test results stay in one place. Send gopcb your Gerber files, bill of materials, and expected volumes for a free DFM and manufacturability review, and the team will recommend the inspection and testing plan for your product with a quote that reflects the real cost of assembly.