Vacuum Printing: Filling Small Apertures From Below
Vacuum printing applies a pressure difference across the stencil so that paste is pushed into the aperture from above and pulled into it from below at the same time. The vacuum is applied through the support under the board, and it acts during the print stroke and through the moment of separation. It exists because the smallest apertures on a modern stencil do not fill reliably with squeegee pressure alone.
The technique is not a replacement for good stencil design, and it does not repair a bad paste or a worn foil. It is a way of adding a filling force that does not depend on the squeegee, which is exactly what a low area ratio aperture needs. Where the aperture is already easy to fill, the vacuum adds a maintenance burden for very little gain.
What Changes When the Vacuum Is On
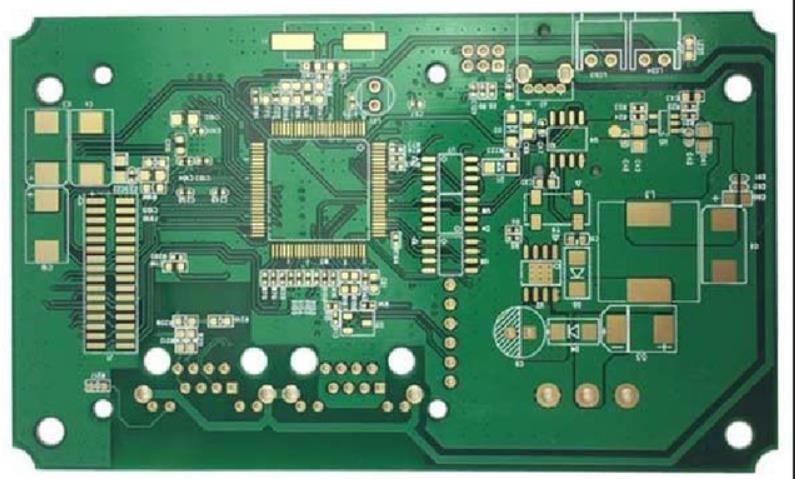
A standard stencil printing stroke fills the aperture by forcing paste across it with a squeegee, and the paste that enters does so because the pressure in front of the blade exceeds the resistance of the aperture. On a small aperture, viscous resistance is high and the deposit comes out short and rounded.
Vacuum printing lowers the pressure on the far side of the aperture, so the same squeegee action produces a higher filling force. The vacuum also holds the paste in place while the stencil separates, which is why it improves paste release as well as aperture filling. The deposit tends to be fuller, flatter and more repeatable from board to board, because paste release is more complete.
Hardware: Support, Plate and Gasketing
The vacuum has to reach the underside of the board across the whole print area. That means a support plate that is porous, or drilled with a pattern of channels, and a gasket around its perimeter so the vacuum acts where it is wanted. The board has to sit flat on the plate, because a gap at the edge leaks the vacuum and starves the middle.
The stencil and the print gap also matter, since the vacuum acts through the space between the stencil and the board. A gap that is too large lets air bypass the apertures and the vacuum is wasted; too little gap and the paste has nowhere to go at separation. Our notes on print gap cover the geometry that the vacuum depends on.
Settings That Decide the Result
Vacuum level is the first setting and it is quoted in kilopascals or inches of mercury, measured at the plate rather than at the pump. The second is timing: the vacuum should be applied before or during the print stroke and released after separation, and the exact sequence is configured in the printer. Applying it too late gives filling without release, and too early lets paste bleed under the stencil.
Squeegee speed and separation speed are the third and fourth settings. Slower separation gives the deposit more time to settle before the stencil lifts, which works with the vacuum rather than against it. A fast separation on a fine-pitch stencil pulls paste out of the aperture instead of giving clean paste release, whatever the vacuum level, and the remedy is time rather than pressure.
Aperture Filling and Area Ratio
Area ratio is the relationship between the aperture opening and the wall area, and it predicts how easily a stencil releases paste. Below the practical limit, deposits become short and inconsistent. Vacuum printing extends that limit downward, because the pressure difference does work that the squeegee cannot do on a very small aperture.
The aperture filling gain is largest for the apertures that were already marginal. A design at the edge of the standard window moves comfortably inside it, while a design far outside the limit is still outside. The area ratio calculation should be done first, and the vacuum treated as a way of buying margin rather than as a way of ignoring geometry.
Vacuum Printing for Through-Hole and Cavity Fill
Where paste has to fill a plated hole, as in pin-in-paste assembly, the vacuum can be applied from below the board so that paste is drawn down the barrel as well as printed on the pad. The result is a fuller hole and a more consistent volume for the connector joint.
The same principle applies to a cavity or a step in the stencil, where a deep region fills slowly. Pulling from below shortens the fill time and reduces the void at the bottom of the cavity. The technique is described alongside the connector work in our pin-in-paste notes.
Print Quality: What to Measure
Print quality under vacuum should be judged with the same tools as any other print, and the comparison should be made on the same stencil, paste and board. Deposit volume, area and height from the paste inspection system are the primary measures, with the standard deviation across the board as the number that shows whether the process has become more stable.
Two failure modes are unique to the technique. Paste can be drawn through the apertures onto the support plate when the vacuum is too high, and paste can bleed under the stencil when the gap is wrong. Both show up as sudden increases in print defects, and both are visible on the underside of the stencil during a routine wipe.
Cleaning and Maintenance
The support plate collects paste that has been pulled through, and a plate with blocked channels delivers an uneven vacuum across the board. Cleaning should be scheduled like any other stencil task, with the plate checked for blockage rather than simply wiped. The gasket is a consumable and should be replaced on a measured interval.
The vacuum circuit also needs attention. Filters clog, pumps lose efficiency and hoses leak, all of which reduce the level at the plate while the gauge at the pump still reads correctly. A measurement point at the plate, checked at the start of a shift, catches the drift before it changes the deposits. Our printing defect notes cover the wider fault list.
Where Vacuum Printing Is Not Worth It
For a board with comfortable apertures, the technique adds cycle time, hardware and a maintenance task for no measurable improvement. It also gives away one of the safeguards of ordinary stencil printing: with the vacuum removed, a starving aperture announces itself through low volume, while a vacuum can mask a marginal paste or a wearing stencil and keep the volume nominal-looking.
A sensible rule is to enable it where the area ratio demands it, where paste in hole is required, or where a specific defect has resisted every other change. Elsewhere, a slower separation speed and a better stencil will usually deliver most of the print quality benefit at none of the cost, as described in our separation speed guide.
Commissioning a Vacuum Print Process
Commissioning should follow a fixed sequence: establish the baseline print without vacuum, measure the deposit statistics, then enable the vacuum at a low level and increase it in steps. For each step, record the level at the plate, the deposit volume and the defect rate, and stop where the improvement flattens.
Write the chosen settings into the product file rather than into the machine, so that a different product cannot inherit a vacuum level that was tuned for fine pitch. Record the stencil reference with the setting, because a new stencil changes the release and may move the optimum. The IPC documentation on stencil printing provides the vocabulary for describing deposits consistently.
FAQ
Does vacuum printing allow a thinner stencil? It allows a thicker one, which is the more useful direction. Because filling and release both improve, a stencil that would starve at a given area ratio can be made thicker to deliver more volume, and that volume is what the joint needs.
Can vacuum printing fix bridging? Not directly, and it can worsen it if the level is too high, because paste is drawn into the gap between the stencil and the board. Bridging is a volume and gap problem, and the vacuum should be set after those two are correct rather than before.
Is vacuum printing suitable for all pastes? Most pastes respond well, but a very low-viscosity paste can be pulled through the apertures more easily and may bleed under the stencil. Test the combination on a production board before writing the setting into the product file.