Immersion Silver and the Galvanic Effect on Copper
Immersion silver is a popular final finish: flat, solderable, free of the nickel layer that immersion gold requires, and inexpensive compared with gold. It is also the finish with the most interesting failure mode, because the deposition chemistry can attack the copper it is supposed to protect.
This article describes the process, explains the mechanism behind the attack, and sets out the design and process measures that keep it from turning into an open circuit.
The Immersion Silver Process
The line runs through a fixed sequence: degrease, rinse, microetch, rinse, pre-dip, immersion silver, an anti-tarnish step, rinse and a horizontal dry. Each rinse exists to prevent the chemistry of the previous bath from contaminating the next, and the microetch is what prepares the copper surface by removing a controlled amount of it and leaving a clean, active layer.
The deposition itself is a displacement reaction rather than an electroplated one, which is why the thickness is self-limiting. Silver ions in solution are reduced to metallic silver on the copper surface, and the copper beneath is oxidised and dissolves into the solution to supply the electrons for that reduction. The reaction stops when the surface is covered, so the deposit is thin — of the order of a tenth of a micron — and uniform, which is exactly what a solderable finish needs.
The Chemistry of the Galvanic Effect
The displacement reaction has a consequence. Because copper must dissolve for silver to deposit, the process consumes copper wherever the solution can reach it. Under normal conditions that consumption is uniform and controlled, and it is accounted for in the design of the microetch and the silver bath.
The problem arises when the supply of silver ions to part of the surface is restricted while the copper beneath is still electrically connected to an area where deposition is proceeding. The connected copper then continues to dissolve to supply electrons for silver depositing somewhere else, and it does so without being replaced. The rate depends on the exposed copper area taking part in the reaction and on the thickness of silver being deposited, so the effect grows with the size of the pad and with the duration of the process.
Why Solder Mask Gaps Make It Worse
The restriction usually comes from a gap between the solder mask and the copper underneath. Where the mask has lifted slightly, or where its adhesion is poor after development, a narrow channel exists between the two. Solution enters that channel by capillary action, so copper inside it can dissolve, but the silver ions that would normally deposit there are in short supply relative to the exposed copper at the pad.
The result is preferential dissolution of copper in a place that is invisible from the surface. This is why the failure mode is associated with mask adhesion rather than with the silver bath itself: a process that produces a perfectly acceptable deposit on an open pad can still consume a trace under the mask edge if the mask is not bonded properly.
Defect One: Opens at the Pad Neck and Trace
The classic failure appears as an open circuit where a narrow trace meets a large pad. The neck of the connection has the smallest cross-section, so it is the first place where copper loss becomes a break, and the large pad next to it provides the current path that drives the attack. The break belongs to the same family as the copper plating defects that hide under a mask edge, and it is often hidden under the mask edge, so it is not visible on visual inspection and may not appear until an electrical test.
Two responses apply. The first is to avoid combining a large area of copper with a narrow trace that connects to it, because that geometry concentrates the reaction at the neck. The second is to add a teardrop where the trace meets the pad, which widens the transition and removes the point where the copper is thinnest. Neither changes the chemistry, but both reduce the consequences of it.
Defect Two: Voids in Blind Vias
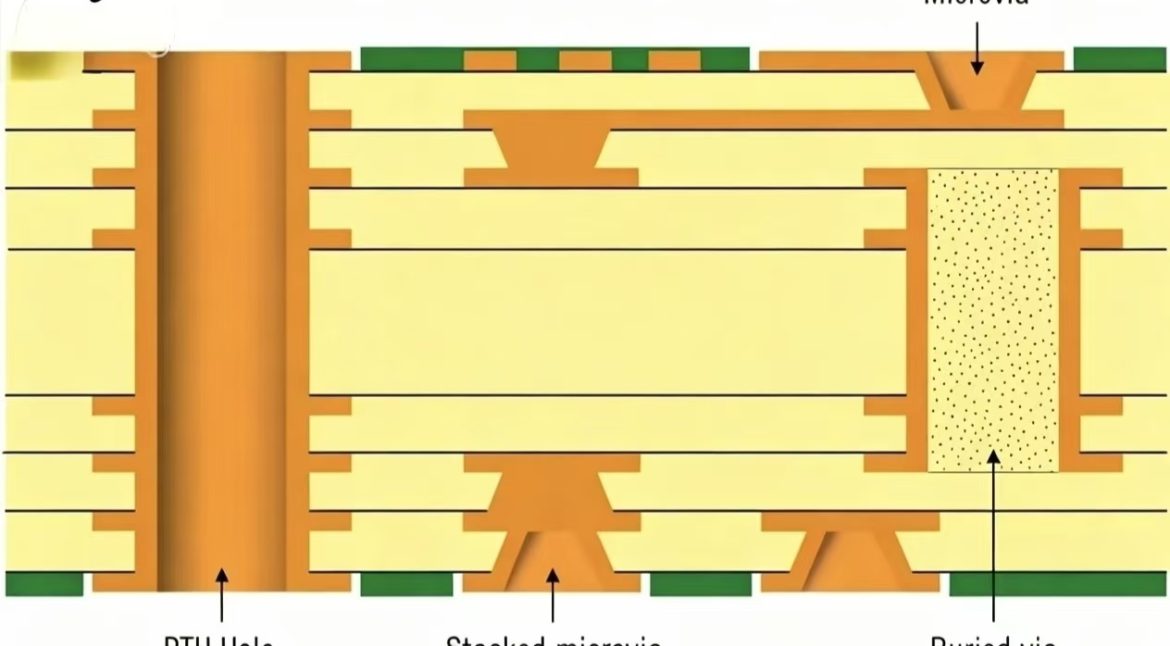
A second failure mode occurs in blind vias, where the finish is applied over a plated barrel that may not be perfectly uniform. Voids or thin areas in the plated copper expose the laminate, and the solution that enters the via during the finish process attacks the copper that remains. The result is a connection that measures acceptably when the board is tested and fails later, because the copper that was left is too thin to survive thermal cycling.
The countermeasures are on the plating side. Improving the uniformity and the thickness of the copper in the barrel gives the finish process less to attack, and shorting the microetch and the immersion time to the minimum that still produces a good deposit reduces the exposure. Agitation in the process baths helps as well, because it keeps fresh solution moving through the vias instead of allowing a depleted layer to stagnate there.
Design Measures: Copper Balance and Teardrops
The first design measure is to avoid abrupt transitions between large and small copper features. A ground plane connected to a thin sensor trace by a single neck is the geometry that fails most reliably, and reshaping the connection so that the copper tapers rather than steps removes the risk.
The second is the teardrop, applied at every pad-to-trace junction on nets that matter. The third is to keep the solder mask design conservative: a mask opening that is only slightly larger than the pad, with a clearly defined dam, gives the mask the best chance of bonding well to the laminate and the copper beneath it. The design rules that keep a board manufacturable cover the same geometry from the fabrication side.
Process Measures: Microetch, Time and Agitation
On the fabrication side the controls are the ones that limit how much copper is available to dissolve. The microetch has to remove a defined amount, no more, and it should be monitored rather than assumed, because the copper thickness removed is a process variable that drifts with bath age and temperature. The immersion silver time is the other control: a longer immersion produces a thicker deposit and consumes more copper, so the shortest time that still meets the solderability requirement is the right one.
Mask quality is the third. Solder mask adhesion depends on the surface preparation before coating, on the exposure and development settings, and on the cure. Where adhesion is poor, the finish process finds the gap, and no adjustment to the silver bath will compensate for it. The rheology of the solder mask ink also feeds into this, because an ink whose flow behaviour is wrong will not fill the space between fine features evenly. Checking adhesion by a tape test on a coupon from the same batch is a quick way to confirm that the mask is bonded before the panels are finished.
Choosing Between Finishes
Immersion silver is a good answer for a fine-pitch board that has to be flat and solderable, provided the design avoids the geometry that concentrates the reaction and the process keeps mask adhesion under control. Where the board will sit in storage for a long time, or where the environment contains sulphur, the anti-tarnish step matters more, because silver tarnishes and a tarnished surface is harder to solder.
Where the risk is judged to be unacceptable, immersion tin and immersion gold over nickel are the alternatives. Gold over nickel is the most robust, at the highest cost, because the nickel layer acts as a barrier between the finish and the copper underneath. That barrier is precisely what immersion silver does not have, and it is the reason the copper thickness remaining under the pads is the parameter that has to be controlled on a silver finish.
FAQ
Is the galvanic effect a defect of the silver bath? Not exactly. The reaction is the same one that deposits the silver. It becomes a defect when the supply of silver ions to part of the surface is restricted while the copper remains electrically connected to a place where deposition continues.
How is the effect detected? It is difficult to see optically because the attack occurs under the mask edge. Electrical test finds the opens, and a cross-section at a pad neck shows the reduced copper. Where the failure rate is high, a cross-section on a production coupon is the fastest way to confirm the mechanism.
Does a teardrop really help? It helps by removing the point where the copper is thinnest. The reaction is unchanged, but the cross-section that remains after the finish process is larger, so the connection survives.