Copper Surface Preparation: Plating Adhesion Guide
Surface preparation is the least glamorous step in the plating line and the one that decides whether the deposit will stay on the board. Every subsequent process, from the electroless copper to the final finish, depends on the copper underneath being clean, uniformly roughened and chemically active. A preparation step that is rushed will not show up as a defect on the day it happens, but it will show up as a blister, a void or a delamination weeks later.
Why Preparation Decides Adhesion
Plating adhesion is a mechanical and chemical bond between the deposit and the base metal. For the bond to form, the base metal has to be free of oxide, oil, fingerprints and residues from earlier steps, and its surface has to be rough enough on a microscopic scale for the deposit to key into it.
Two boards with identical copper thickness can behave completely differently after plating if one was prepared properly and the other was not. This is why a plating line is judged by its preparation stages and its rinse quality far more than by the plating tank itself, and why most adhesion failures trace back to the front of the line. A shop that tracks its blister and delamination complaints will usually find that the same two or three preparation stages appear again and again in the investigation notes.
Contamination That Has to Be Removed
The contaminants fall into a few groups: organic oils from handling and from drilling, oxide films that form during storage, residues from resist stripping and etching, and particulate matter from the shop environment. Each group needs a different chemistry, and a single cleaning stage cannot remove all of them.
Fingerprints are the most common and the most underrated. Natural oils leave a hydrophobic film that resists the wetting action of the plating bath, and the result is a circular area where the deposit is thin, porous or missing altogether. Handling protocols are therefore part of the process, not an administrative detail. Cotton gloves, clean interleaves and a rule that panels are held by the edges are cheap controls that remove a large share of the variation seen at final inspection.

Mechanical Preparation
Mechanical steps remove gross contamination and establish surface topography. Scrubbing with pumice or alumina produces a fine matte finish, while a mechanical brush on the hole walls helps to open the resin after drilling. The risk is that an aggressive brush leaves scratches that later trap chemistry.
Abrasive preparation also work hardens the copper surface, and a layer of deformed metal will plate differently from the bulk material underneath. The amount of material removed should therefore be specified and measured rather than judged by eye, since two operators using the same machine can remove very different amounts. The brush pressure, the roller speed and the number of passes should all be written into the work instruction so that the result does not depend on who is running the line.
Chemical Cleaning and Conditioning
Alkaline cleaners remove oils and organic films by saponification and emulsification, and they work best when the temperature and the concentration are held within a narrow band. A cleaner that is too dilute leaves the oil behind, while one that is too concentrated can attack the organic materials on the panel.
A conditioning step follows in many flows to adjust the surface charge so that the next chemistry can wet the surface uniformly. This matters most inside drilled holes, where the solution has to reach the middle of a narrow barrel without leaving a dry or partly wetted region behind. A wetting agent that is exhausted will show up as a hole wall that plates thinly in the middle, which is difficult to see until the barrel is sectioned.
Micro-Etch Control
The micro-etch removes a controlled amount of copper, typically between one and two micrometres, to expose fresh metal and a uniform grain structure. It is the step that converts a smeared, oxidised surface into one that a plating bath can build on evenly.
Because the amount removed is small, it is measured indirectly. Weight loss on a coupon, a chemical analysis of the bath, or a simple visual check of the water break behaviour are all used, and the results have to be recorded for the lot. A bath that has been used beyond its copper capacity will still etch, but it will do so unevenly and leave a surface that looks acceptable while plating poorly. Our etching process guide covers the related chemistry in more depth.
Desmear in Drilled Holes
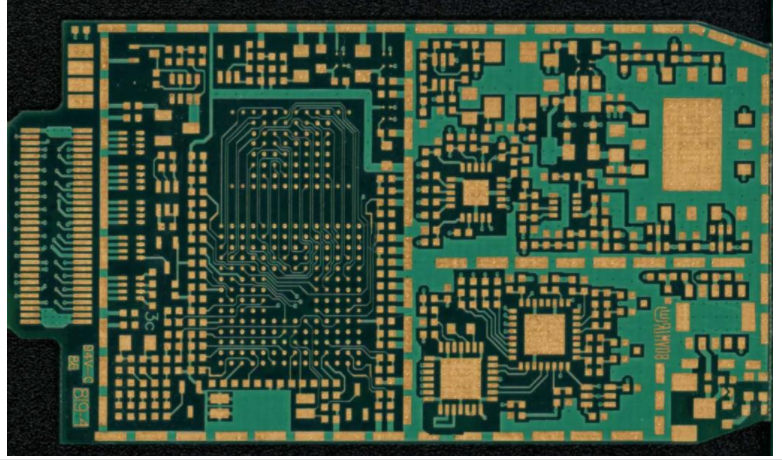
Drilling melts the resin and smears it across the copper of the inner layer connections, and that smear has to be removed before the hole can be plated. The removal is done with a permanganate or a plasma process, and the choice depends on the resin system and on the aspect ratio of the hole.
An incomplete desmear leaves a thin insulating film over the inner layer copper, which produces an intermittent connection rather than a clean open circuit. The defect passes a continuity test at low voltage and fails in the field, which makes it one of the more expensive failures to find. The remedy is a sectioned hole from a coupon on every lot, because the smear is not visible from the surface of the board.
Rinsing and Drying
Between every stage the panel has to be rinsed with water of a controlled purity, because the carryover from one tank becomes contamination in the next. A rinse that is overloaded with the previous chemistry will not just fail to clean the panel, it will actively deposit the residue it holds. Cascade rinses with a measured flow, and a conductivity check on the final rinse, are the standard controls used to keep this stage honest.
Drying has to be complete but not excessive. Water that remains in a hole will dilute the next bath locally, and a dryer that is too hot will re-oxidise a freshly prepared surface before it reaches the plating tank. The interval between the last rinse and the plating tank should be short and specified, because a prepared copper surface begins to oxidise within minutes in a humid shop. Our hole copper guide explains how these effects appear in the finished barrel.
Testing the Prepared Surface
The simplest test is the water break test, in which a freshly rinsed panel is watched to see whether the water film stays continuous. A film that pulls back into droplets indicates an oily or poorly cleaned surface, and the panel should be reworked rather than plated. The test costs almost nothing and it catches the most common preparation failure before any valuable chemistry has been consumed.
More formal checks include the peel strength test on a plated coupon, the microsection of a plated hole, and the thermal stress test. These are slower and destructive, so they are run on coupons attached to production panels. Our plating guide describes how the deposit is verified once it has been applied. Together the water break test and the coupon tests give a picture of both the surface that was prepared and the deposit that was built on it.
Process Control Points
Each stage needs a defined time, temperature and concentration, with a record that can be checked against the lot. Baths should be analysed on a schedule rather than when a defect appears, and the analysis should include the contamination level as well as the active chemistry. Rinse water purity, dryer temperature and the age of the cleaning baths are all part of the same record and belong in the same log.
Handling discipline closes the loop. Clean gloves, defined panel racks and a controlled interval between preparation and plating together ensure that the surface that leaves the preparation line is the same surface that enters the plating tank. When those rules are followed the plating line becomes predictable, and the effort spent on the preparation stages pays back as a lower scrap rate. Our quality documentation describes how these results are recorded at gopcb.
FAQ
How much copper should the micro-etch remove? A controlled amount in the region of one to two micrometres is typical. The figure is specified per flow and verified by weight loss on a coupon rather than by appearance.
Why does a plated hole fail intermittently? Incomplete desmear leaves resin smear over the inner layer copper. The connection appears continuous at low test voltage and opens when the board heats up in service.
Can preparation defects be seen before plating? Some can, using the water break test and a visual check under good light. Others only appear after plating, which is why coupons travel with the production panels.