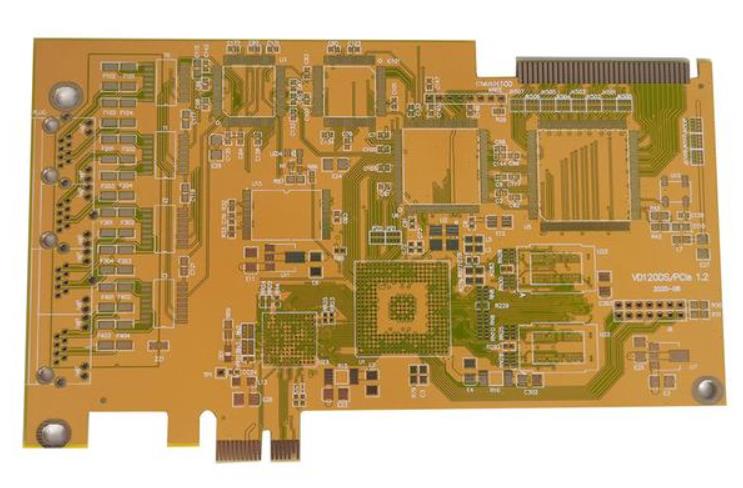
PCB Drill Targets: Registration, Tooling and Hole Accuracy
Drilling looks straightforward until the numbers are measured. A hole is supposed to land in the centre of a pad, but between the artwork used to define the pad and the drill that finally makes the hole there are lamination, bake cycles, moisture, drilling and a dozen smaller influences that move the board a little. A drill target is how the process measures that movement and compensates for it before the hole is cut.
What a Drill Target Is
A drill target is a feature placed on the panel or on the production board that the drill equipment can find optically or mechanically. The machine locates the target, compares its measured position with the position in the design data, and then applies the difference as an offset to every hole coordinate on that board. The target does not make the machine more accurate; it makes the machine work from where the board actually is rather than from where the design assumed it would be.
The need arises because the board changes size during manufacture. Lamination presses the layers together under heat and pressure, the laminate expands and contracts, and the resulting dimensions differ from the artwork by an amount that depends on the material, the copper distribution and the press cycle. Drilling to the design coordinates alone would place every hole slightly off centre, and on a dense board that is enough to break out of a pad.
Layer Registration and Why It Matters Most on Multilayer Boards
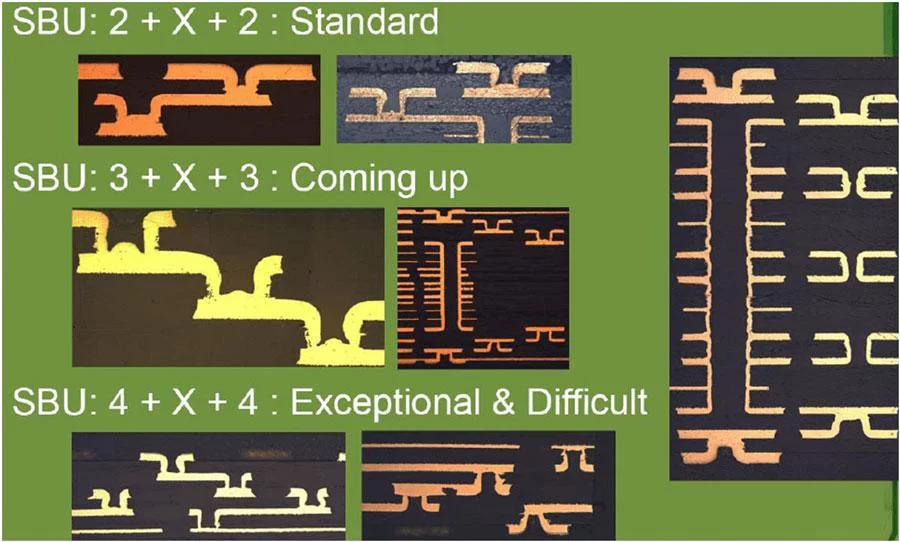
On a single sided board a small positional error is usually harmless. On a multilayer board the hole has to connect features that were defined by separate artworks and pressed together in a stack. Each layer can shift relative to its neighbours, and the drill has to pass through the target of every one of them, so the accuracy that matters is the registration between layers rather than the position on the surface.
That is why layer registration is checked with dedicated structures and why the drill programme is scaled, offset and sometimes rotated to suit the panel. The compensation is derived from the measured targets, and if the panel changed shape in an uneven way, a single rigid transformation is not enough and the process must fall back on a different strategy.

Types of Target and Where They Belong
Tooling targets are the features used by the fabricator for drilling and routing, and tooling holes are the mechanical equivalent, drilled to a known size at a known place so that the panel can be pinned on a machine. Fiducials are the marks used by assembly equipment, and although they are placed by the designer, they serve a later process and should not be confused with what the fabricator uses to drill.
Placement follows the same logic in both cases. Targets should be outside the area that will be populated, far enough from the board edge that the panel is not distorted where they sit, and arranged so that the machine can derive position, rotation and scale rather than only a single offset. Two targets give position and rotation; three or more allow a scale correction as well, which is why panels usually carry several.
What Causes Hole Position Error
The error budget has several contributors. The drill machine has positioning and repeatability limits, the spindle has runout, and the drill bit itself wanders as it enters the stack. Beyond the machine there is the panel: moisture uptake changes dimensions, copper imbalance makes one region expand differently from another, and the bake before drilling removes moisture and shrinks the laminate in a way that must be anticipated.
Nobody dominates. The practical consequence is that hole position tolerance cannot be treated as a property of the drilling step alone. It has to be allocated across the material, the artwork, the press cycle and the drill, and the allocation has to leave enough margin for the smallest pad on the design.
It is also worth separating random from systematic error. A machine that is consistently offset in one direction can be corrected in the programme, while an error that varies from panel to panel cannot, and it has to be absorbed by design margin instead. That distinction decides whether a problem is solved in the process or in the layout.
Copper Balance and Dimensional Stability
Copper distribution is one of the few error sources the designer controls. A panel with heavy copper on one side and almost none on the other expands unevenly during lamination, and the distortion that results cannot be fully corrected by target compensation. Adding thieving pads or a ground plane to balance the copper, and keeping the distribution of large copper areas as uniform as the design allows, reduces the problem before it exists.
Material choice matters too. A laminate with a low coefficient of thermal expansion and predictable shrinkage behaves better through the press cycle than a cheap grade with wide tolerances, and the effect of those material properties on the finished board is described in PCB dimensional stability and expansion.
Relation Between Drill Tolerance and Pad Size
The hole can be off centre by a certain amount, and the pad can be only a certain amount larger than the hole. The annular ring that remains after the worst case combination of drill error, layer shift and artwork tolerance is what determines whether the connection survives. Designing with a generous ring gives the process room, and designing with a minimal ring removes it.
A dense board therefore needs either a smaller total error budget or a larger pad relative to the hole, and in practice both. The trade offs involved in specifying pad and ring dimensions are set out in PCB pad design standards.
Panel Design, Tooling Holes and Verification
The panel around the boards is part of the process, not waste material. Borders wide enough to hold the panel rigidly, tooling holes positioned for the machines that will handle it, and targets that stay clean through plating and etching all contribute to accuracy. A target that is covered by resist, contaminated by plating or placed where it will be routed away is no better than no target at all.
Verification closes the loop. Position is checked after drilling by measuring the pads on a sample, and registration is confirmed on microsections of the plated barrels. Coupon structures placed on the panel edge provide the same information without sacrificing a board, and the principles that govern the outline and mounting features around the board are described in board outline and mounting design.
The same discipline applies to the design files the fabricator receives. Coordinates should be consistent between the drill file and the artwork, the drill table should state the finished hole size and the plating class, and the panel drawing should show where tooling and borders are expected. A mismatch between a drill file and a pad definition is a source of delay that no amount of machine accuracy can repair.
FAQ
Who places the drill targets, the designer or the fabricator? On most production panels the fabricator adds them, because their position depends on the machines used. The designer should leave the border clear and avoid placing features where targets are needed.
How many targets are enough? Two allow position and rotation, three or more allow scale correction as well. High layer count and large panels usually justify the extra marks.
Can target compensation fix a warped panel? No. It corrects a rigid offset, rotation and uniform scale. Local distortion from uneven copper or moisture cannot be removed by moving the drill programme.