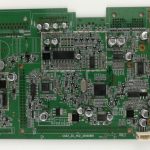
Robot PCB Assembly: Vibration, Thermal and Inspection Requirements
Robot PCB assembly is judged by whether the board still works after a year of movement. A joint that passes electrical test on the bench can crack when a servo reverses a hundred times a minute, and a driver stage that runs warm in still air can exceed its rating when the enclosure is sealed. The assembly has to be designed and inspected around those realities rather than around the first power-up.
What Makes Robot Electronics Different
Robot control boards combine high current motor drive stages, sensitive encoder and communication interfaces, and a processor that runs real time control loops. Those functions share one ground system, one enclosure and one thermal environment, so layout decisions that would be harmless in a consumer product become reliability issues here.
The duty cycle is the other difference. A robot axis may accelerate and reverse thousands of times per shift, which means every solder joint on a heavy component sees accumulated fatigue rather than a single thermal cycle. Assembly quality is therefore a mechanical question as much as an electrical one.
Vibration Resistance Starts at Layout
Large parts are the ones that fall off. Electrolytic capacitors, inductors, connectors and relays carry the most mass, and their joints see the highest stress. Placing them near board edges or mounting holes that flex amplifies the load, while placing them near a stiff mounting point reduces it.
Where vibration resistance is a requirement, use low profile components, anchor heavy parts with adhesive or a mechanical clamp, and keep the solder joint geometry consistent by controlling pad size and stencil aperture. Tombstoning and shift defects have similar root causes, and the review of component shift causes in SMT is a useful checklist when a batch shows placement drift after reflow.
Thermal Management on Motion Control Boards
Motor drivers, braking resistors and DC-DC converters concentrate heat in a small area. Thermal management starts with copper: a wide pad under the device, a dense field of thermal vias into the internal ground plane and enough exposed copper on the underside to couple into the chassis where the enclosure allows it.
Temperature rise should be verified on the assembled board rather than calculated only from the junction-to-ambient figure, because the real board has neighbouring heat sources and restricted airflow. Measuring the case temperature of each power device under worst case load tells you whether the design has margin.
Electromagnetic Compatibility in a Shared Enclosure
A switching motor drive is a broadband noise source, and the cables that connect the board to motors and encoders are effective antennas. Keeping the high current loop small, returning drive current directly under its source trace, and filtering the motor outputs close to the connector all reduce the energy that reaches the control section.
Encoder and communication lines should be routed away from the power stage, with series termination where the interface allows it. A ground plane that is continuous under the control section, split only where isolation demands it, keeps the return path predictable.
Assembly Process Control
Robot boards usually mix surface mount and through hole parts, so the process sequence has to be planned: solder paste printing, placement, reflow, then selective or wave soldering for connectors, followed by cleaning where the chemistry requires it. Connectors that will carry motor current should be inspected for barrel fill, because a partially filled through hole overheats under load.
Stencil design, paste volume and reflow profile all need to be tuned for the mix of fine pitch devices and large thermal mass connectors on the same panel. A single profile that satisfies both ends of that range rarely happens by accident.
X-Ray Inspection, AOI and Functional Test
Automated optical inspection catches placement errors, missing parts and visible solder defects. It cannot see under a ball grid array or inside a through hole, so X-Ray inspection is required wherever area array packages or high current connectors are used. Voids, bridges and insufficient barrel fill all show up in the X-Ray image before the board is ever powered.

Functional test closes the loop. A robot controller should be tested under load, with the motors connected if possible, because a drive stage that passes a static check can still fail when it switches current. Recording the current draw, temperature rise and communication error rate at each stage of the test gives a baseline that can be compared against units returned from the field.
Moisture, Contamination and Coatings
Industrial environments bring dust, humidity and sometimes oil mist. Flux residue left on the board can absorb moisture and create leakage paths between fine pitch pins, especially where the assembly was not cleaned after soldering. Where the application calls for it, a conformal coating applied over a clean, dry board protects the surface from condensation and contamination, and potting and dispensing adhesives can anchor heavy components at the same time.
Coating will not rescue a contaminated surface. Cleaning, baking and inspection come first, and the coating is applied only after the board has passed electrical test.
Working With an Assembly Partner
A robot board project moves smoothly when the assembly house receives the full package: Gerber data, BOM with approved alternates, pick and place file, assembly drawing, test specification and the mechanical constraints of the enclosure. Inspection requirements such as X-Ray coverage, first article approval and traceability should be stated explicitly rather than assumed.
Assembly planning at gopcb starts with the process sequence for each side of the board, because that decision sets the stencil, the reflow profile and the inspection plan for everything that follows.
Design for Assembly and First Article Approval
Assembly cost and yield are decided in layout. Pad geometry should match the component datasheet rather than a legacy library, courtyard clearances should leave room for the placement nozzle, and components that face the same reflow direction should be grouped so the profile can be tuned to the heaviest part on that side.
Panelisation matters too. Robot boards are often large and heavy, so a panel that is too big will sag in the oven and a panel that is too small wastes capacity. Fiducials on each circuit, tooling holes and a controlled breakaway tab design all help the line hold registration.
Before volume, a first article inspection confirms that the assembled board matches the drawing: part orientation, solder fillet shape, polarity, and the dimensions that matter for the enclosure. Production should not start until the first article has been approved and the approval documented, because correcting a systematic error after a thousand boards is far more expensive than a single build review.
FAQ
Does every robot PCB need X-Ray inspection? Any board with a ball grid array, a land grid array or a high current through hole connector should be X-Rayed. Boards with only leaded and small surface mount parts can usually be verified by optical inspection alone.
How is vibration resistance tested? A sample assembly is fixtured and swept through a frequency range, often with the enclosure fitted, while joints are monitored for intermittent continuity. The sweep identifies resonances that a static test never reveals.
Can a coated board still fail from moisture? Yes, if the coating does not cover the whole surface or if contamination was trapped underneath. Coating slows moisture ingress; it does not make a poorly cleaned assembly immune.